WebFOCUS Postinstallation Tasks
This chapter explains verification and common configuration procedures for the WebFOCUS Client.
Configuring WebFOCUS in a Split Web-Tier and Application Server-Only Environment
WebFOCUS Client Verification and Configuration
Setting Tomcat HTTP POST Maximum Size
Verifying and Troubleshooting Server Side Graphics (PCHOLD)
This section explains how to enable, verify and troubleshoot the most common type of graphics. By default, WebFOCUS graphics are generated through the Web or application server using a Java-based graph engine installed with WebFOCUS Client. This is known as Server Side Graphics or PCHOLD. Using this approach, a complete graph file is created on the Web or application server and then sent to a browser.
For the graph engine to create Server Side Graphics, you must either set DISPLAY or use the headless Java VM option:
- DISPLAY
To set DISPLAY, you must configure a VNC Server and the Native Abstract Windowing Toolkit (NAWT) on your IBM i machine. Then you must set the DISPLAY and other variables to connect to and use the VNC server. This configuration supports all WebFOCUS graph options.
or
- Headless Java VM Option
- GIF files are not supported.
Setting DISPLAY
To set DISPLAY, you must configure a VNC Server and the Native Abstract Windowing Toolkit (NAWT) on your IBM i machine.
Configure the VNC Environment
- Procedure
- If they are not installed already, install
and configure the following on your system:
- Portable Application Solution Environment (PASE) (5722SS1 option 33)
- NAWT PTFs
- iSeries Tools for Developers PRPQ
Note: You can optionally install a VNC client on a PC to test the VNC server connection to IBM i.
- Make the directory to store the password for the VNC
server:
MKDIR DIR('/home/userid')(if it does not exist)MKDIR DIR('/home/userid/.vnc')where:
useridIs the user ID that will start the VNC server.
- If the user ID that started the VNC Server differs from
the user ID of the application server, you must provide the application
server user ID authority to the VNC work directories created in
step 2.
CHGAUT OBJ('/home/user/.vnc') USER(wsuser) DTAAUT(*RWX) OBJAUT(*ALL) SUBTREE(*ALL)where:
userIs the user ID that will start the VNC server.
wsuserIs the user ID under which the application server runs.
- Create the password file for the VNC server:
QAPTL/VNCPASSWD USEHOME(*NO) PWDFILE('/home/userid/.vnc/passwd')where:
useridIs the user ID that will start the VNC server.
Start VNC Server
VNC on IBM i acts as a server which renders characters and lines that would be displayed on screen.
- Procedure
- Configure environment variables for your session
by adding the following variables to your IBM i emulation session:
ADDENVVAR ENVVAR(DISPLAY) VALUE('systemname:n')where:
nIs the display number to be used for the VNC server, which must match the display number used when the VNC server is started.
ADDENVVAR ENVVAR(XAUTHORITY) VALUE('/home/userid/.Xauthority')where:
useridIs the name of the user directory where the .Xauthority file was created.
- Start the VNC server with the command:
CALL PGM(QP2SHELL) PARM('/QOpenSys/QIBM/ProdData/DeveloperTools/vnc/vncserver_java' ':n')where:
nIs the display number to be used for the VNC server. Display numbers must be an integer ranging from 1 to 99.
Note: A confirmation message will be displayed.
- If the user ID that started the VNC Server differs from
the user ID of the application server, you must provide the application
server user ID authority to the .XAUTHORITY file. A new .XAUTHORITY
file is created each time the VNC server is started.
CHGAUT OBJ('/home/user/.Xauthority') USER(wsuser) DTAAUT(*RWX) OBJAUT(*ALL)where:
userIs the user ID that started the VNC server.
wsuserIs the user ID under which the application server runs.
Test NAWT
The Native Abstract Windowing Toolkit (NAWT) lets Java applications use the Abstract Windowing Toolkit (AWT) graphic functions on a host that does not have a graphical user interface.
To test the Native Abstract Windowing Toolkit (NAWT):
- Procedure
- Set up the environment variables for your session
by adding the following variables to your session:
ADDENVVAR ENVVAR(DISPLAY) VALUE('systemname:n')ADDENVVAR ENVVAR(XAUTHORITY) VALUE('/home/userid/.Xauthority')where:
nIs the display number to be used for the VNC server.
useridIs the user ID that will start the VNC server.
- Run this Java program to create the test file:
JAVA CLASS(NAWTtest) CLASSPATH('/QIBM/ProdData/Java400')A QSH session will open up and the following will be displayed:
jpgName will be /tmp/NAWTtest.jpg

JPG construction is complete

Java program completed
This process will produce a JPG file named NAWTtest.jpg in the /tmp directory. You can download this file to a PC and view it in a Web browser or JPEG file viewer.
Stop the VNC Server
For now you can keep the VNC Server running. However, when you wish to stop it, run the following:
CALL PGM(QP2SHELL) PARM('/QOpenSys/QIBM/ProdData/DeveloperTools/vnc/vncserver_java' '-kill' ':n')
where:
Is the port number that the VNC server is using.
Set WebSphere Application Server Entries
You need to make the following entries to WebSphere Application Server for the WebFOCUS servlets to use Server Side Graphics.
- Procedure
- Open and logon WebSphere Administration Console.
For example:
http://hostname:port/ibm/console - Click Servers, [Server Types], Application
Servers, server_name, Java
and Process Management, Process Definition, Java Virtual
Machine, and then Environment Entries.
Add two new value pairs:
Name
Example Value
Explanation
DISPLAY
HOSTNAME:0.0
Value to match the system and VNC server port you are using.
XAUTHORITY
/home/user/.Xauthority
Location of the .Xauthority. Usually in the user home directory.
- Save your changes.
- Restart your application server.
Set Tomcat Application Server Entries
You must make the following entries to the Tomcat Application Server for the WebFOCUS servlets to use Server Side Graphics.
- Procedure
- Edit the setenv.sh file, which is located in the /tomcat_home/bin
directory.
You may need to create setenv.sh as a new file.
- Add the following entries:
export DISPLAY=hostname:nexport XAUTHORITY=/home/user/.Xauthority
where:
nIs the display number assigned when the VNC server was started.
userIs the user name that started the VNC server.
- Save the changes.
- Restart the Tomcat Application server.
Verify Server Side Graphics
- Procedure
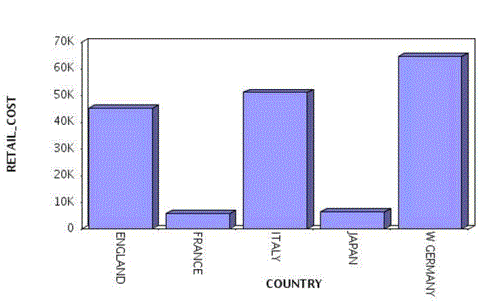
- Sign on to the WebFOCUS Welcome page and create a new graph using the Text Editor.
- Enter the following:
GRAPH FILE CAR

SUM RCOST ACROSS COUNTRY

ON TABLE PCHOLD FORMAT GIF

END
- If the server runs with security, enter your credentials.
Your browser should display a graph similar to the following image.
Troubleshooting: Common Errors and Resolutions
If you receive the following:
E SRVE0026E: [ServletError]-[Could not find class:

sun.awt.X11GraphicsEnvironment]: java.lang.Error:Could not find class:

sun.awt.X11GraphicsEnvironment

java/lang/Throwable.<init>(Ljava/lang/String;)V+4(Throwable.java:85)
The class for the graphics environment was not found. Ensure the WebSphere CLASSPATH includes the path to the /qibm/ProdData/Java400/jdk14/RAWTAHost.jar file. Ensure to use the correct file for the version of Java that WebSphere requires.
These errors may also appear after opening WebFOCUS InfoAssist or running a graph procedure.
E SRVE0026E: [Servlet Error]-[Can’t connect to X11 window server using

'System:1.0' as the value of the DISPLAY variable.]:

java.lang.InternalError: Can't connect to X11 window server using

'System:1.0' as the value of the DISPLAY variable.
This error points to the VNC server not being started, the VNC server not using the specified port, the VNC server not starting properly, the .Xauthority file not being read correctly, or the application server does not have READ access to the .Xauthority. Ensure you set the environment variables and start VNC in batch. There should be no errors in the VNC server log files. If there are, restart the server, and troubleshoot the error. Make sure that the user ID running WebSphere has *RWX authority to the .Xauthority file.
Tip: Be aware of the following:
- Add the DISPLAY and XAUTHORITY environment variables to the session that submits the VNC server as soon as you logon to the IBM i system. The DISPLAY variable needs to match the syntax used with the DISPLAY parameter in the WebSphere Application Server you are using.
- Always start the VNC server in batch.
- Make sure that .Xauthority security file has *RW authority for the WebSphere user. Remember that this needs to be redone every time a new .Xauthoriy file is created, usually when the VNC servers are started or restarted.
Additional Documentation
For additional information, see the IBM document IBM iSeries: IBM Developer Kit for Java and refer to the Run Your Java Application on a Host That Does Not Have a Graphical User Interface section.
Using the Headless Java Option
If an X Server is not available, the headless option must be set. This is a Java VM option and not a WebFOCUS-specific feature, which must be set in the application server.
Set the Headless Option in the WebSphere 8.0 Administrative Console
You must use the WebSphere Administrative Console to set the following JVM property:
java.awt.headless=true
As of WebSphere 6.0, the default value is true.
- Procedure
- Log on to the WebSphere Administrative Console.
- Click Servers, [Server Types], Application Servers, server_name, Java and Process Management, Process Definition, and Java Virtual Machine.
- In the Generic JVM Arguments, enter:
java.awt.headless
- Click OK to save your changes.
- Restart the application server.
Set the Headless Option for Tomcat
- Procedure
- Edit the setenv.sh file, which is located
in the /tomcat_home/bin directory.
You may need to create setenv.sh as a new file.
- Add the following entry:
export JAVA_OPTS="$JAVA_OPTS" -Djava.awt.headless=true
- Save the changes to the setenv.sh file.
- Restart the Tomcat application server.
Verify Server Side Graphics
- Procedure
- Sign on to the WebFOCUS Welcome page and create a new graph using the Text Editor.
- Enter the following:
GRAPH FILE CAR

SUM RCOST ACROSS COUNTRY

ON TABLE PCHOLD FORMAT JPEG

END
- If the server runs with security, enter your credentials.
Your browser should display a graph similar to the following image.

If you get an errors:
- Ensure the headless JVM property is set for the application server.
- Ensure that you are using an JDK of release 1.6 or higher.