Configuring IBM WebSphere
This topic explains how to modify the IBM WebSphere Application Server for use with WebFOCUS.
It is assumed that WebSphere components are installed and configured and that a WebSphere Application Server has been created for use with WebFOCUS.
The WebFOCUS web application (webfocus.war) requires a shared library in order to override certain libraries provided by WebSphere.
Create the WebSphere Application Server Shared Library
- Procedure
- Create a new directory to use for the
shared library. This directory must be accessible by the WebSphere
Application Server user. For example:
mkdir -p /home/ibi/shared
- Copy the following files from the ../ibi/WebFOCUS93/webapps/webfocus/WEB-INF/lib/
directory to the directory created in step 1.
- jackson*.jar
- http*.jar
- org.eclipse.persistence.jpa-*.jar
- org.eclipse.persistence.asm-*.jar
- org.eclipse.persistence.antlr-*.jar
- org.eclipse.persistence.jpa.jpql-*.jar
- org.eclipse.persistence.core-*.jar
- jakarta.persistence-*.jar
- commons-*.jar
For example:
cp /home/ibi/WebFOCUS93/webapps/webfocus/WEB-INF/lib/jackson*.jar /home/ibi/shared
- Sign in to the WebSphere Console.
- Expand Environment and then expand Shared
Libraries, as shown in the following image.
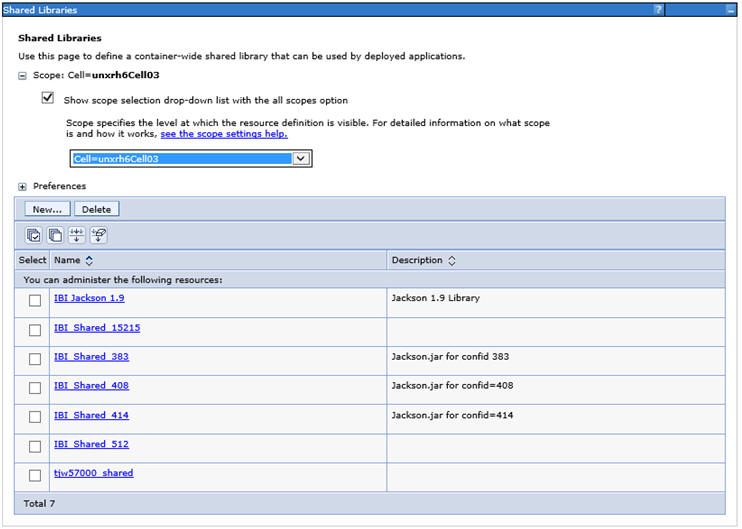
- From the Scope dropdown list, select the scope for your
environment and then click New.
The Shared Libraries dialog box opens, as shown in the following image.
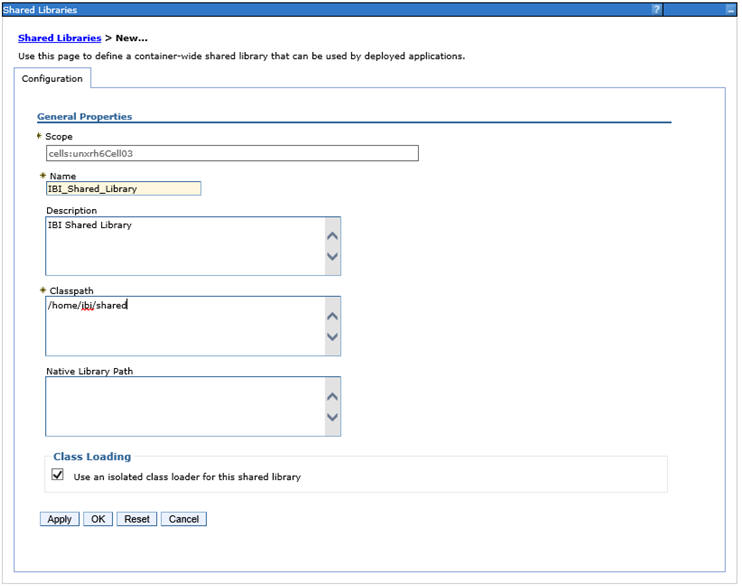
- Provide the following values:
- Name: IBI_Shared_Library
- Classpath: /home/ibi/shared
- Select Use an isolated class loader for this shared library.
- Click OK and then click Save.
Update the WebSphere Application Server Java Settings
The following additional settings are required by WebFOCUS.
- Procedure
- Sign in to the WebSphere Console.
- Expand Servers, Server
Types, WebSphere application servers, your
server, Server Infrastructure, Java
and Process Management, Process definition, Additional
Properties, and Java Virtual Machine.
The Application servers Java Virtual Machine dialog box opens, as shown in the following image.
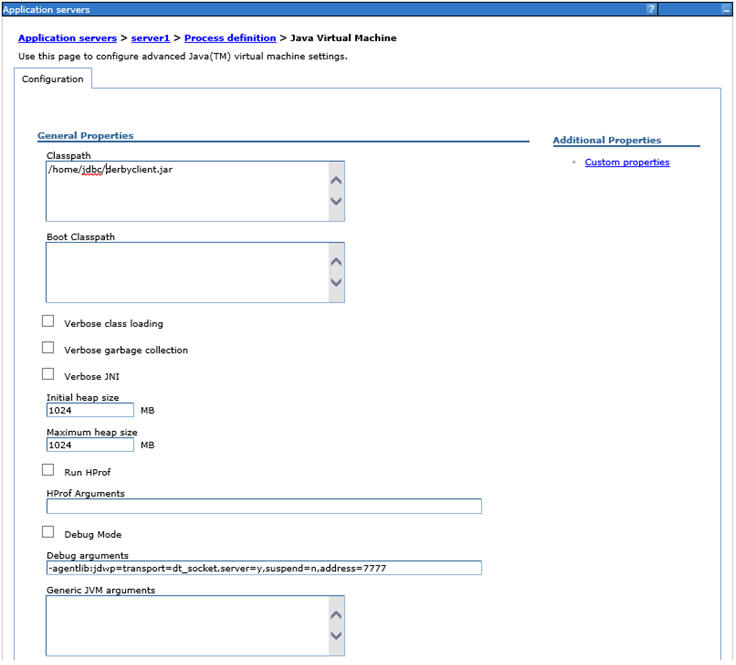
- Update the following settings:
- In the Classpath field, add the full path and name of the JDBC driver jar files required to access the WebFOCUS Repository database. If there is more than one, type one per line.
- Change Initial Heap Size to at least 1024 (minimum, setting is in MB).
- Change Maximum Heap Size to at least 1024 (minimum, setting is in MB).
- Click OK.
- Expand Servers, Server
Types, WebSphere application servers, your
server, Java and Process Management, Process
definition, Java Virtual Machine, Custom
properties, and New.
The Application servers General Properties dialog box opens, as shown in the following image.
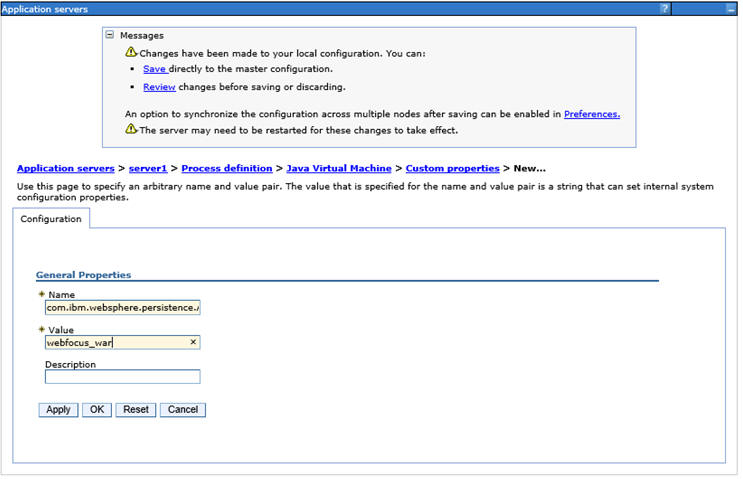
- Update the following settings:
- Name: com.ibm.websphere.persistence.ApplicationsExcludedFromJpaProcessing
- Value: webfocus_war. This needs to match the name of the application when deployed. Modify this value to match the value you plan to use when deploying the webfocus.war web application.
- Click OK.
- Expand Servers, Server
Types, WebSphere application servers, your
server, Container Settings, Web
Container Settings, Web container, Custom
properties, and New.
The Application servers General Properties dialog box opens, as shown in the following image.
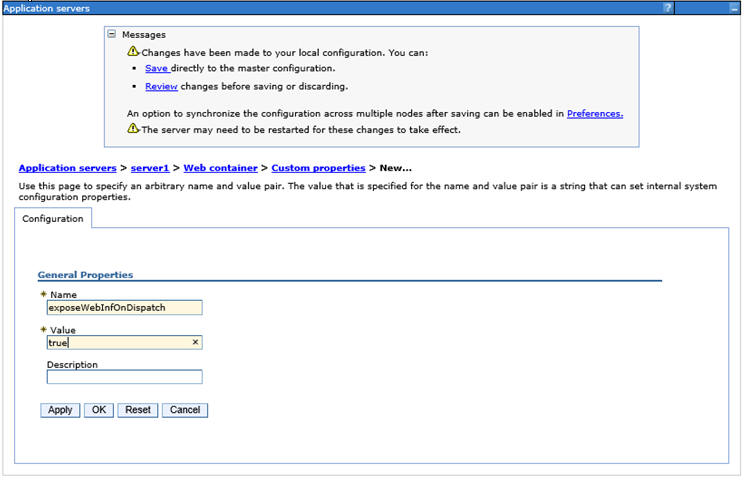
- Update the following settings:
- Name: exposeWebInfOnDispatch
- Value: true
- Click OK.
- Expand Servers, Server
Types, WebSphere application servers, your
server, Container Settings, Web
Container Settings, Web container transport
chains, WCInboundDefault, HTTP
inbound channel, Custom properties,
and New.
The Application servers General Properties dialog box opens, as shown in the following image.
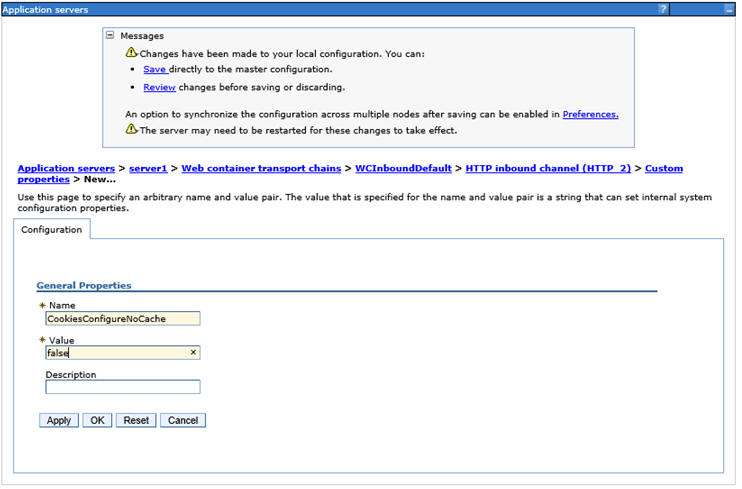
- Update the following settings:
- Name: CookiesConfigureNoCache
- Value: false
- Click OK and then click Save.
Reassign the Default Session Cookie Value from JSESSIONID to WF-JESESSIONID
When WebFOCUS is deployed to a WebSphere environment, the designated cookie value is JSESSIONID. You need to change the cookie values to WF-JSESSIONID.
- Procedure
- Sign in to the WebSphere Console.
- In the Navigation bar, expand Servers and Server Types, and then select WebSphere application servers.
- On the Application servers page, select your server.
- On the Configuration tab, under Container Settings, select the Session management link.
- On the Session management Configuration tab, under General Properties, select the Enable Cookies link.
- Under General Properties, change the value in the Cookie name field from JSESSIONID to WF-JSESSIONID, as shown in the following image.
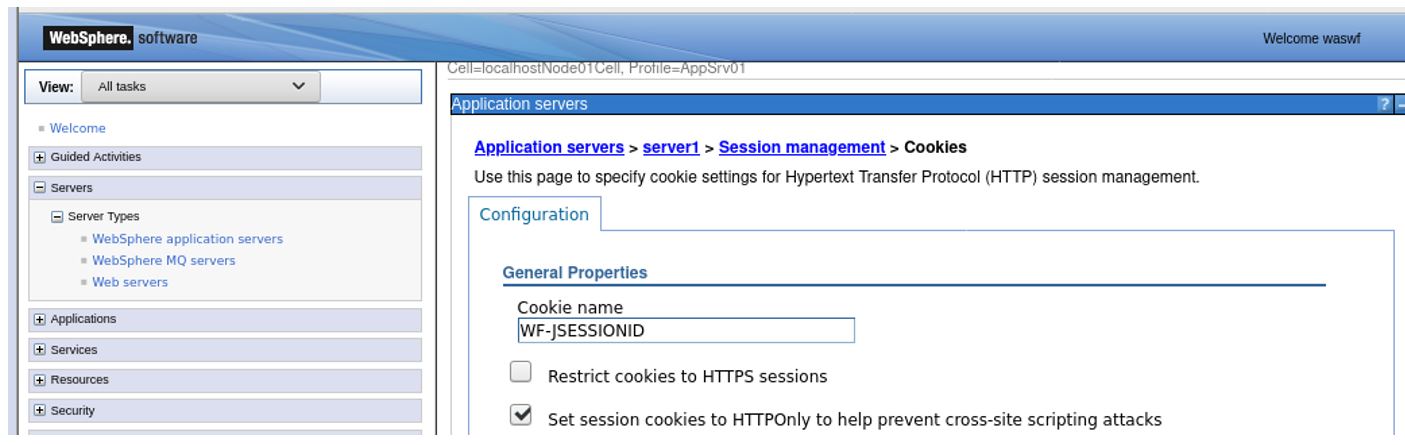
- Click OK when your change is complete.
You will receive a message advising you that a change was made to your local configuration.
- In the Navigation bar, expand Applications and Application Types, and then select WebSphere enterprise applications.
- On the Enterprise Applications page, select webfocus_war (or the name you used during deployment).
- On the Enterprise Applications, webfocus_war page, under Web Module Properties, select the Session Management link.
- On the Enterprise Applications, webfocus_war, Session management page, under General Properties, select the Enable Cookies link.
- Under General Properties, change the value in the Cookie name field from JSESSIONID to WF-JSESSIONID, as shown in the following image.

- Click OK when your change is complete.
- In the Changes have been made to your local configuration message box, select Review to confirm your changes before saving them to the master configuration.
Or
Select Save to save the changes directly to the master configuration.
- In the confirmation message, click Save to complete the changes to the master configuration.
- Restart your application server instance for the changes to take effect.
Verify the WebSphere Application Server is Configured to Run Java 1.8
- Procedure
- Sign in to the WebSphere Console.
- Expand Servers, Server
Types, WebSphere application servers, your
server, Server Infrastructure,
and Java SDKs.
The Application servers Java SDKs dialog box opens, as shown in the following image.
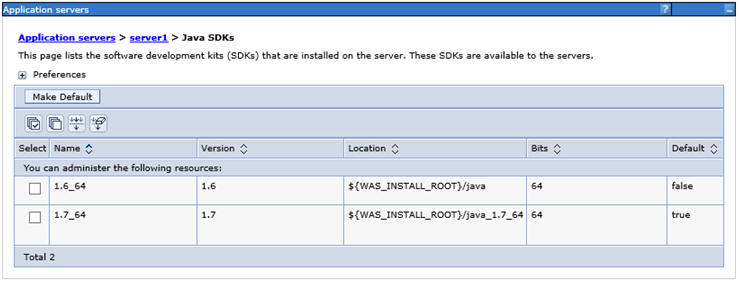
- Verify that the Java 1.8 SDK, if present, is set to true. If not, contact your WebSphere Administrator and request your server be updated to utilize 1.8.
Assign the IBI_Shared_Library to the WebFOCUS Web Application (webfocus.war)
The following procedure assumes that the webfocus.war file has been deployed.
- Procedure
- Sign in to the WebSphere Console.
- Select Applications, Application
Types, WebSphere enterprise applications,
and your WebFOCUS web application, as shown in the following image.
- Select Shared library references.
The Shared library references pane displays, as shown in the following image.
- Select one of the entries in the table and click Reference
shared libraries.
Values populate in the Shared Libraries column, as shown in the following image.
- From the Available list, select IBI_Shared_Library, click the right arrow, and then click OK. Repeat for the second entry.
- Click OK, and then click Save.
- Restart the WebSphere Application Server.
Note:
It is not sufficient to only restart the WebFOCUS web application.