Procedure: How to Create a Scenario Using the Change Management Facility
If your browser blocks pop-up windows, disable this feature before you begin using the change management facility, to ensure that you are able to see the dialog boxes that open during this procedure.
- In the BI Portal Resources tree, expand the Change Management node.
- Right-click Export,
and then click New Scenario, as shown in the
following image.

- In the New
Scenario dialog box, type the scenario name, and then click OK.
The Scenario dialog box opens, as shown in the following image.
The With Rules check box is selected, by default. Clear it only if this change management package should not include all rules associated with the resources you select.
Note: If you receive an alert in your browser stating that the pop-up window is blocked, reset your browser to allow all pop-up windows from this website, and try again.
- To include content that has been migrated from WebFOCUS 7.7 to WebFOCUS 8 or ReportCaster schedules created in WebFOCUS 7.7 that reference procedures through an internal handle in the change management package, select the Retain Handles check box.
- Right-click the , folder, or other resource you
want to include, and:
- Click Select with Sub-Tree to include that folder and all subfolders in your selection.
When selecting a collaborative portal that references external pages, you must also select the folder that contains the pages referenced by that portal, and then transfer them into the scenario by clicking the Select with Sub-Tree command.
- Click Select Folder Only to include the specific folder, with no content. Typically, this is done to move rules on the folder.
- You can also select resources by dragging them from the Resources tree and dropping them in the right pane. When you do so, the With Subtree check box is selected, by default, and you must clear it if you wish to exclude subfolders and content from your selection.
When your selection is complete, an entry for it appears in the right pane, and a strikethrough line appears on the entry under the Resources tree.
- If you select a private resource, the With Private Content check box is automatically selected and cannot be cleared.
- If you select private content, it will only be imported if the owner of that private content already exists in the target environment.
- If you select a published folder, you can include private content within it by selecting the With Private Content check box for that resource. This selection exports all of the private content in that folder and its subfolders, including those My Content folders that are assigned to individual users, even if you do not have the privileges necessary to view that private content.
- If you select a subfolder without a parent folder, the Import process will recreate the parent folder in the target environment. A connection to the same metadata must exist within the target environment as well as the source environment.
- When selecting a collaborative portal and pages that reference external content, be sure to include that content in the change management package.
- If the rules on the source and target environments are different, users may have access to private content in the source environment, but be denied access in the target environment. This occurs if users have access to the published folder that contains the private content in the source environment, but do not have it in the target environment.
- Click Select with Sub-Tree to include that folder and all subfolders in your selection.
- Repeat the previous step for any additional resources you want to include in the change management scenario.
- When you have selected all
resources, click Save.
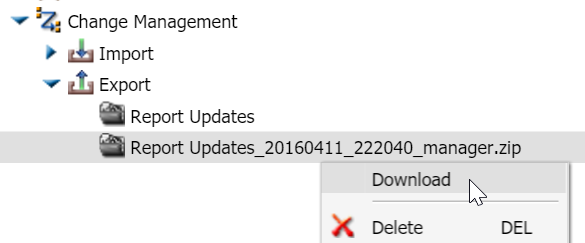
An entry for the new scenario appears beneath the Export node.
If the new scenario does not appear, right-click the Export node, and then click Refresh.
To export the change management scenario using command line scripts, navigate to the following location and double-click one of the following commands:
WebFOCUS82/utilities/cm/cm_export.bat
WebFOCUS82/utilities/cm/cm_export.sh