Procedure: How to Upload Data Files
- You can upload data in the
following ways:
- From the WebFOCUS Home Page, click the Data tab on the Action Bar, and then click the Upload Data button
 .
.
- From the WebFOCUS Home Page, click the Designer tab on the Action Bar, then click the Workbook or Chart button, and then click Upload in the Open dialog box.
- From the WebFOCUS Home Page, click the InfoAssist tab on the Action Bar, then click the Chart, Visualization, Report, or Document button, and then click Upload Data in the Open dialog box.
- From the Legacy Home Page, in the Resources tree, right-click a domain or folder, point to Upload, and then click Data.
Note: The Report button appears in the Designer category if you have enabled the Technical Preview feature.
Note: After you upload your data, a shortcut to that data is added to the same folder location in the repository from where you clicked the Upload Data button.
- From the WebFOCUS Home Page, click the Data tab on the Action Bar, and then click the Upload Data button
- Click the desktop file type in the Upload panel that you want to upload, and navigate to
the location of the file on your machine.
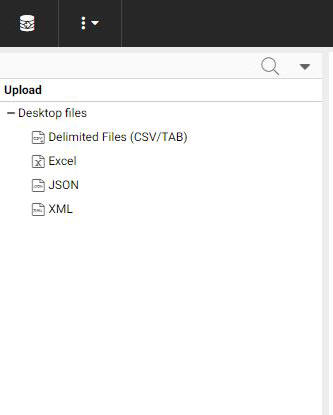
You can select from the following file types to upload: Delimited Files, Excel, JSON, or XML.
Delimited, JSON, and XML files are individual data sources. An Excel file can be a single-worksheet or a multiple-worksheet file.
The default data preparation screen opens, as shown in the following image.
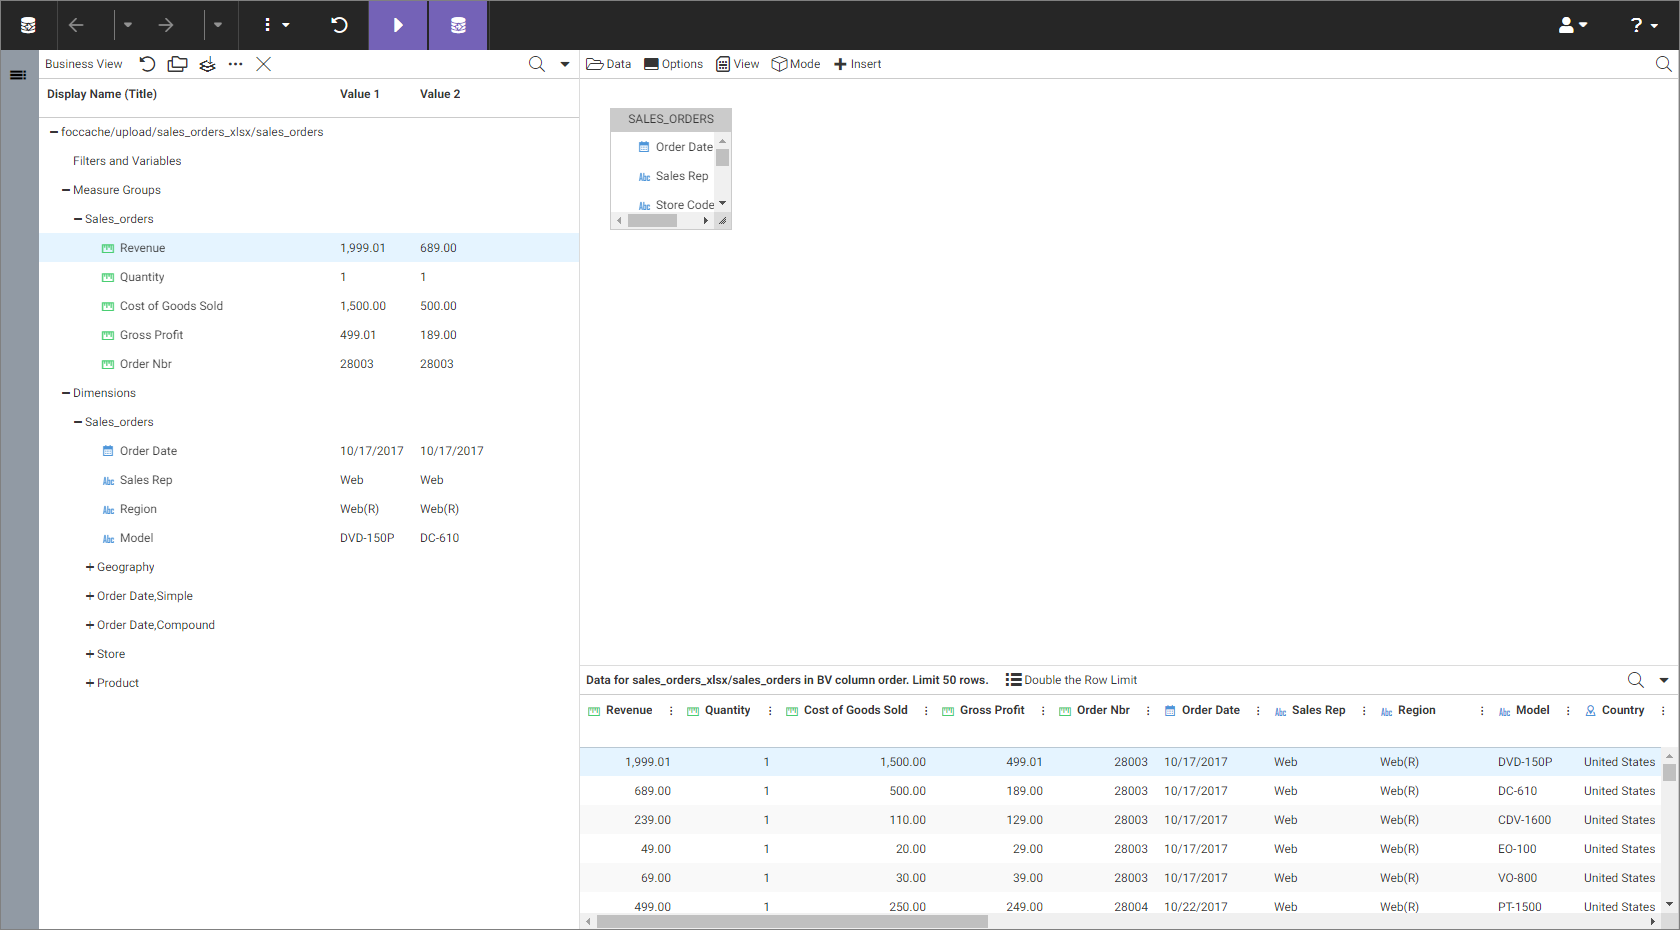
Your data is loaded into temporary storage and default data preparation is shown in a Business View panel, a modeling panel, and an output panel. There are many options for reviewing and modifying your data before you upload it to the target environment.
Note: Clicking the data prep icon
 highlighted on the ribbon takes you to a further data preparation workflow.
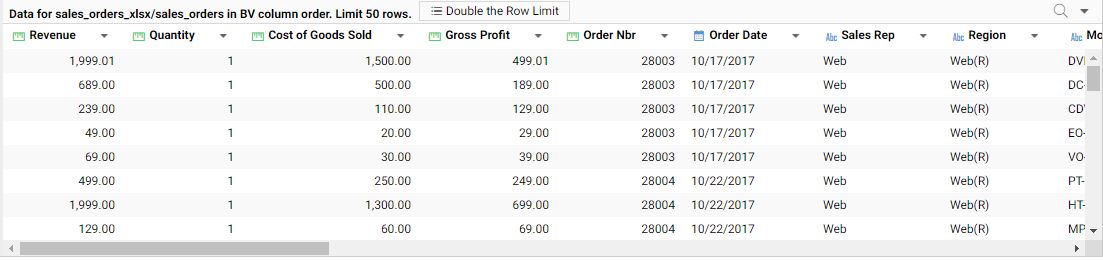
The Business View panel is shown in the following image.
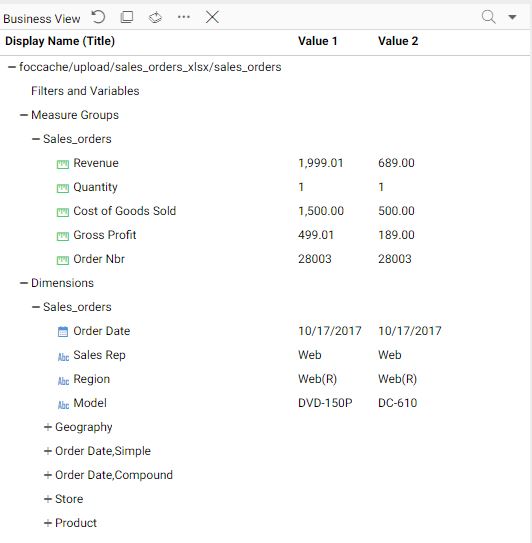
In the Business View panel, data fields are categorized as Measures, based on numeric data types, or as Dimensions, based on non-numeric data types.
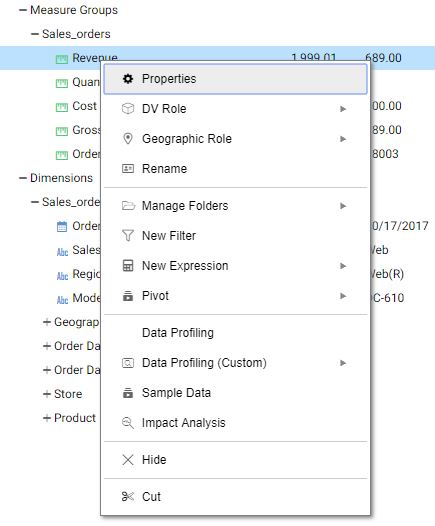
You can right-click fields to change roles, create filters and expressions, pivot, or profile data, among other options, as shown in the following image.
The modeling view panel is shown in the following image.

In the modeling view panel, you can drag and drop synonyms from the Data panel onto the canvas to create a JOIN structure, change Join Editor options, and insert a child or root. An expanded Data panel and a canvas JOIN structure is shown in the following image.

Note: Default data preparation is shown only for single-sheet Excel and other file types. If uploading an Excel file with multiple-worksheets, you can select the worksheet for default preparation by dragging it from the Data panel to the canvas in the modeling view panel.
The output view panel is shown in the following image.
In the output view panel you can work in an Excel-like mode. The options in each column drop-down menu are the same as the right-click options in the Business View panel.
- If you are satisfied with how your data is displayed, click the arrow icon
 highlighted on the ribbon to load.
 The Target Load Options dialog box opens, as shown in the following image.
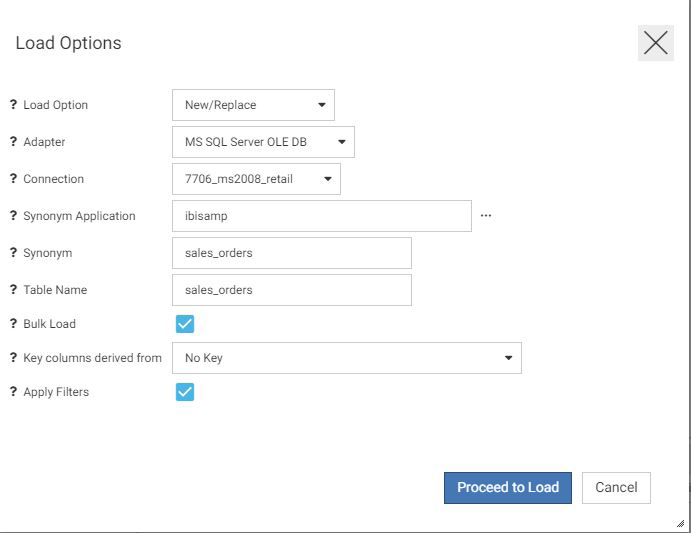
Note: The Apply Filters check box is selected be default. If you have created filters, they will be applied automatically to the load process. If you do not want filters applied automatically, but do want them applied to your created metadata, clear the Apply Filters check box.
- If the information is correct, click Proceed to Load.
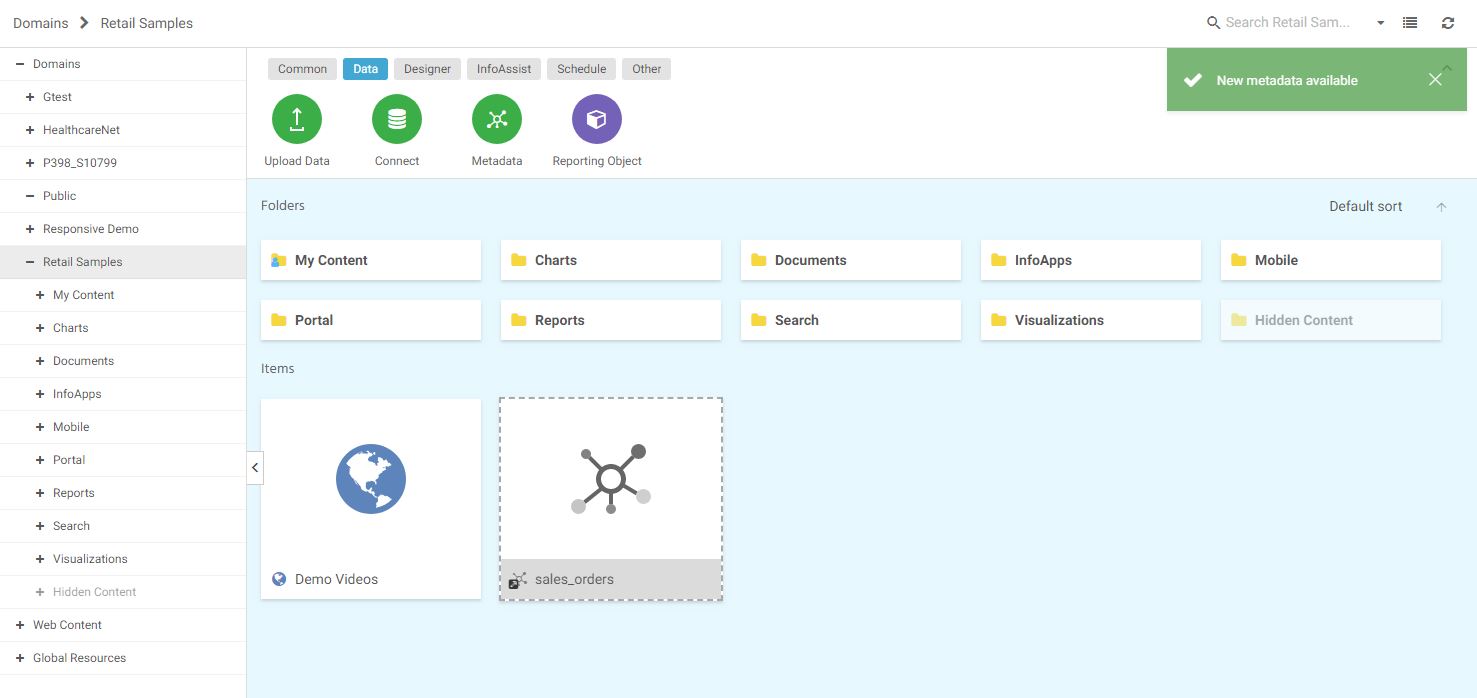
You are returned to the Home Page. A message displays indicating your new data is available. A shortcut to your new data is added to the repository folder from where you uploaded your data, as shown in the following image.
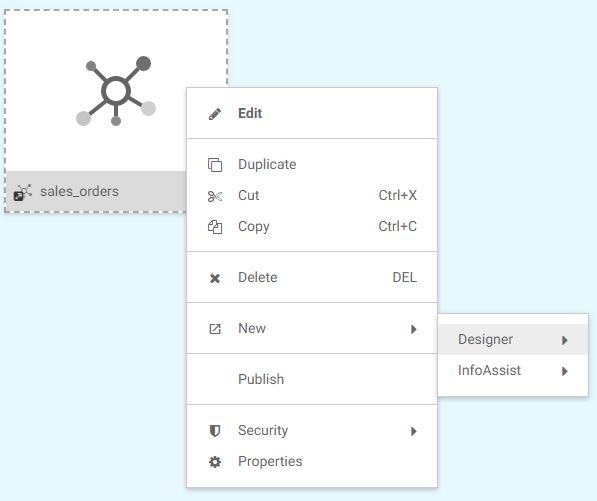
From the shortcut menu options, you can create new content by selecting New, or edit your data by selecting Edit as shown in the following image.
 from the ribbon and then click