Resources
|
In this section: |
A resource is any folder, item, library content, portal, privilege, report procedure, role, user, or group to which access can be controlled or to whom abilities can be granted.
Different resource types have different controlled privileges. For example, all resource types can be deleted, but report request resources cannot be made members of a group and user resources cannot be run or scheduled.
Users gain access to resources from items listed on the Resources tree or displayed in the content area. For customers with legacy licenses, the visibility of licensed components depends upon the license key installed with the product.
Viewing Resource Components
The most complete display of licensed components appears in the Workspaces area.
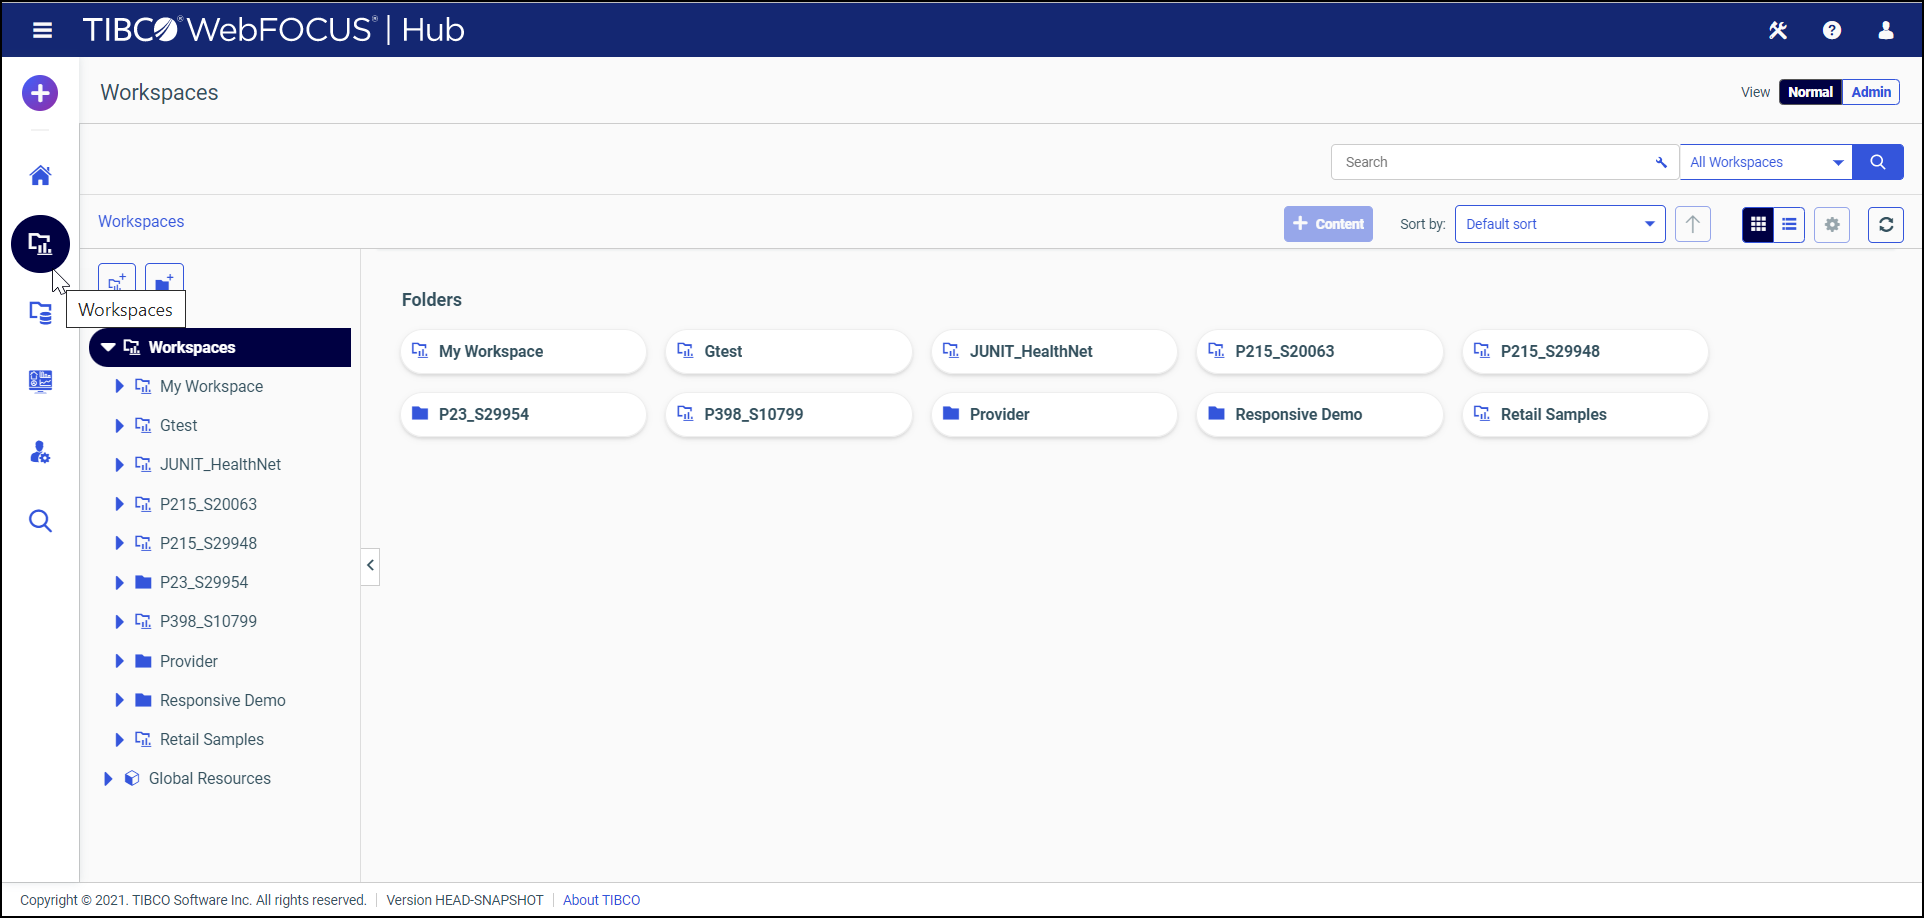
To open the Workspaces area directly from the Hub, select Workspaces from the side navigation pane, as shown in the following image.
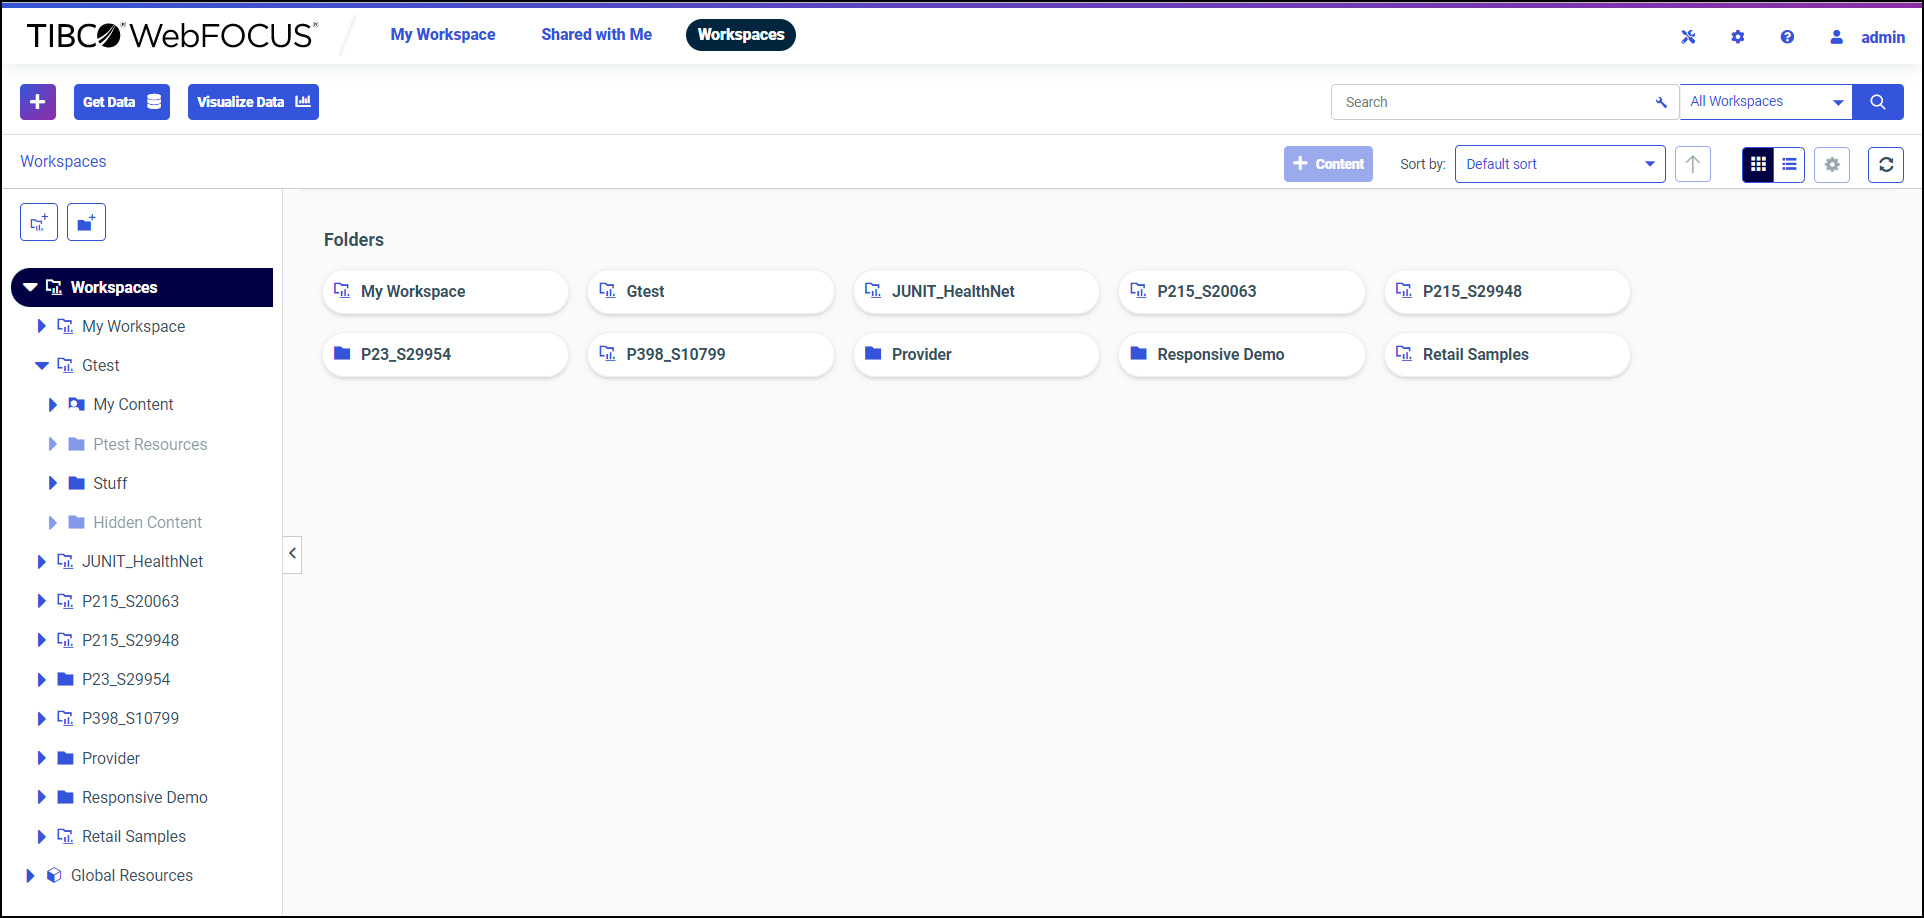
You can also open the Workspaces area from the WebFOCUS Home Page by selecting Workspaces in the banner, as shown in the following image.

The WebFOCUS Explorer opens and displays links to existing workspaces and folders, as shown in the following image.
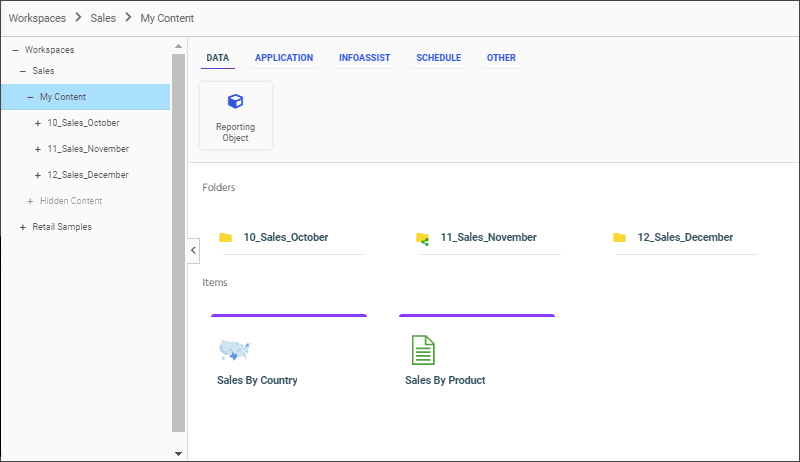
When you open a folder from the WebFOCUS Home Page, the WebFOCUS Explorer displays the items that folder contains, as shown in the following image.
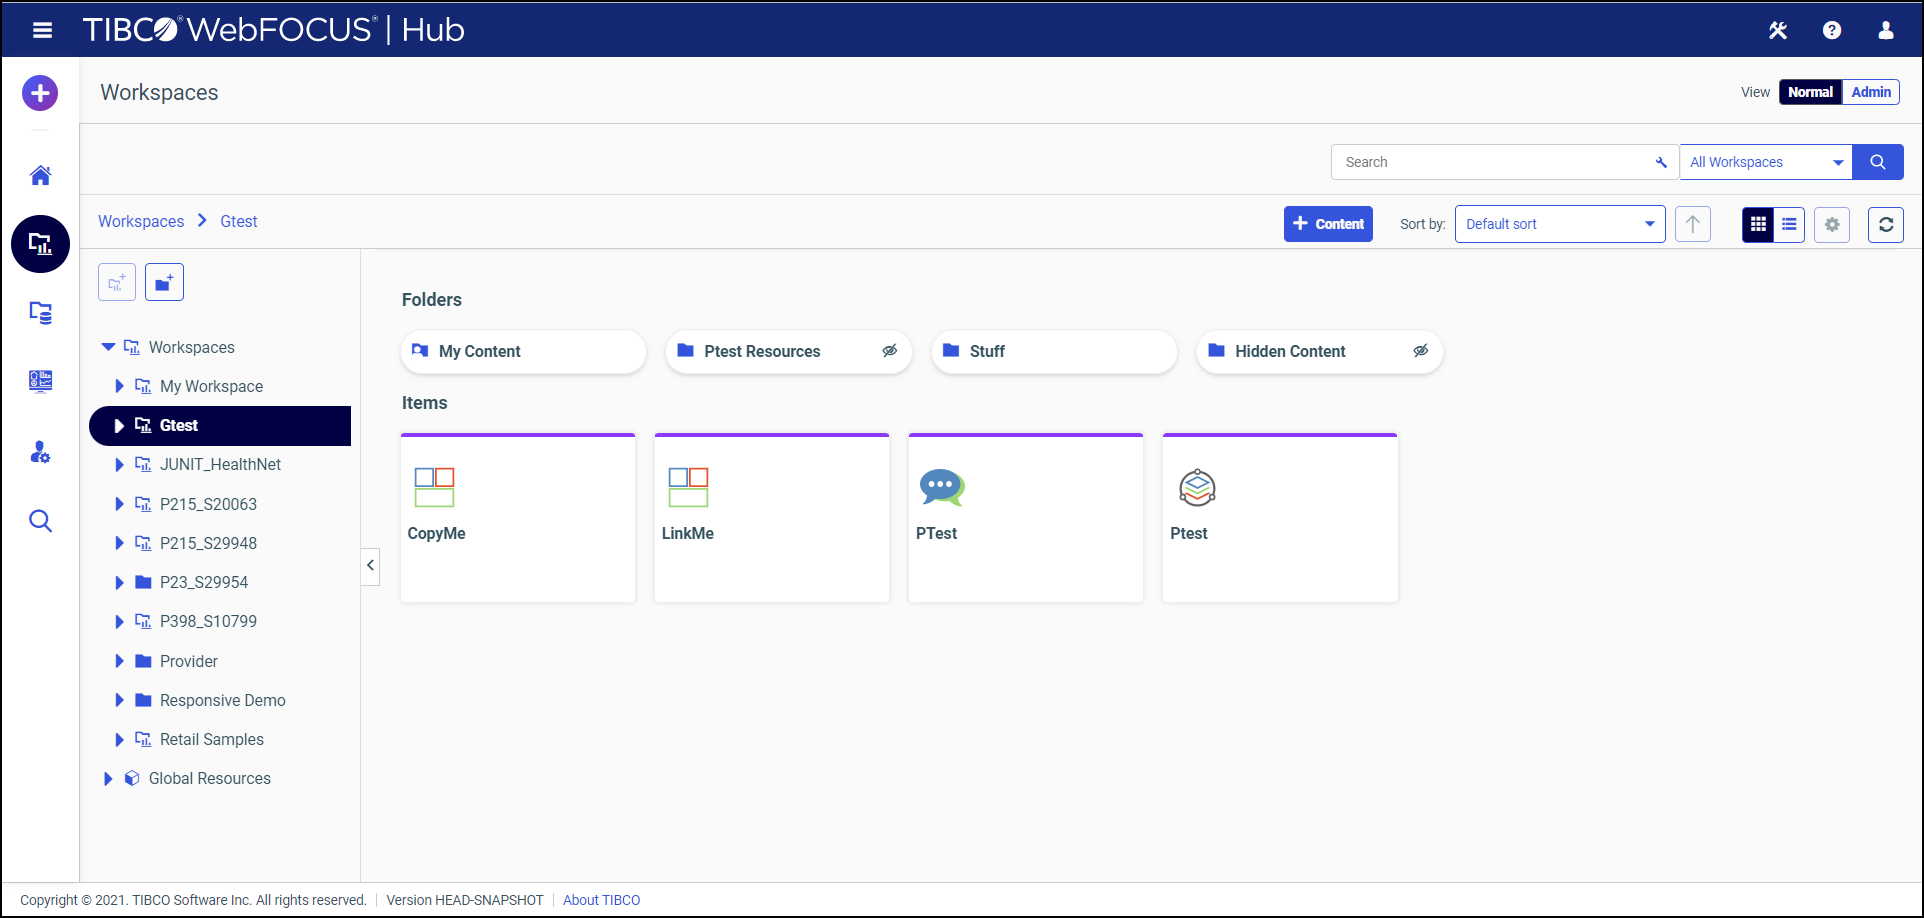
When you open a folder from the Workspaces view in the Hub, the WebFOCUS Explorer displays the items that folder contains, as shown in the following image.
Visual cues indicate whether resource items are private or published, shown or hidden, shared or not shared. In the Workspaces area, resources that are shown are visible to users who are not able to use them to create content. Resources that are hidden are not visible to those users.
In the Resources tree, private workspaces are displayed in italics. Published workspaces are not. Hidden workspaces are dimmed. Workspaces that are to be shown are not dimmed. These variations are shown in the following image.
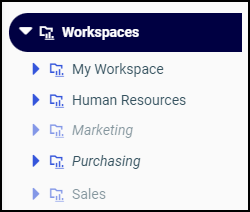
In this example, the Human Resources entry is not dimmed and does not use italics. The folder it represents is published and is shown. The Marketing entry is dimmed and uses italics. The folder it represents is private, and is hidden. The Purchasing entry is not dimmed but uses italics. The folder it represents is private, and is shown. The Sales entry is dimmed and does not use italics. The folder it represents is published, and is hidden.
In the content area, the same conditions affect the display of items in similar ways. Private folders display a Private icon.
The private icon pictures a published document with a strikethrough symbol ![]() . Published folders do not include this icon. Hidden folders include a Hidden icon. The hidden icon pictures an eye with a
strikethrough symbol
. Published folders do not include this icon. Hidden folders include a Hidden icon. The hidden icon pictures an eye with a
strikethrough symbol ![]() . Folders that are to be shown do not include this icon. These variations are shown in the following image.
. Folders that are to be shown do not include this icon. These variations are shown in the following image.
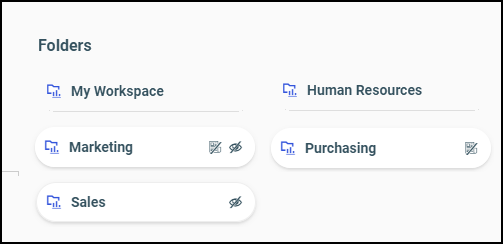
In this example, the Human Resources folder  displays no icons. The folder it represents is shown and published.
The Marketing folder  displays a hidden and private icon. The folder it represents is hidden and private.
The Purchasing folder  displays a private icon. The folder it represents is shown and private.
The Sales folder  displays a hidden icon. The folder it represents is hidden and published.
The same visual cues apply to items within folders, as shown in the following images.
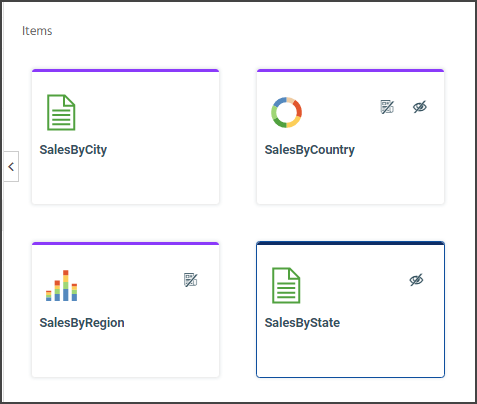
In this example, the SalesByCity report shows no icons in the tile other than the thumbnail for the report itself. The report it represents is published and is shown.
The SalesByCountry chart shows a private icon and a hidden icon in the tile. The private icon pictures a published document with a strikethrough symbol.
![]() The hidden icon pictures an eye with a strikethrough symbol.
The hidden icon pictures an eye with a strikethrough symbol. ![]() The chart it represents is private, and is hidden.
The chart it represents is private, and is hidden.
The SalesByRegion item only shows a private icon in the tile next to the chart thumbnail. The chart it represents is private, and is shown.
The SalesByState report item only shows a hidden icon in the tile next to the report thumbnail. The report it represents is published, and is hidden.
When you right-click a resource, the options presented to you are based on your privileges and the status of that item. When you right-click a published item, you are presented with the option to Unpublish it. If that item is private, you are presented with the option to Publish it.
You can also view the publish or show status of an item from the Properties dialog box. To open it, right-click the item in the Resources tree or content area and select Properties. The Yes option in the Publish setting is selected if the item is published, and the No option is selected if it is private. Similarly, the Yes option in the Show setting is selected if the item is to be shown to users who cannot use it to create content, and the No option is selected if it is to be hidden from those users.
You can share private folders and resources in the My Content folder or in any sub-folder within it. Within the content area of these folders, shared resources are identified with a Shared icon ![]() .
.
Icons for resources that are shared display this additional icon as an overlay  .
.
Icons for resources that are not shared do not display this additional icon  .
.
The overlay applies to folders and to individual items. As shown in the following image, the 11_November_Sales folder, the Pipeline_Prospects report, and the Sales_Expense_Current_Year report are all shared.
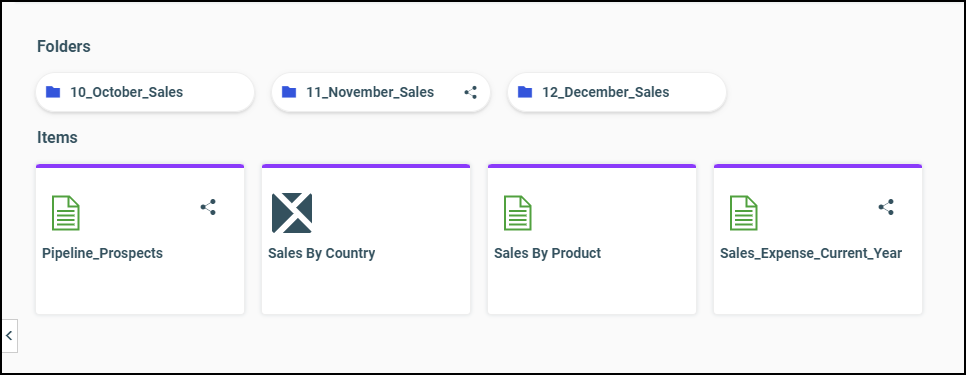
As shown in the following image, the Sales By Region chart is shared, but the Sales By City report is not shared.
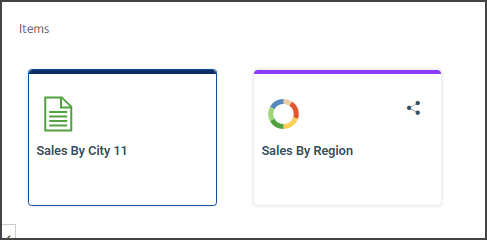
Note: Tiles representing resources configured to Run With Insight will also include the Run With Insight icon, as shown in the following image.
The Run With Insight icon ![]() represents an index finger selecting a button or onscreen option. For more information, see the TIBCO WebFOCUS® User's Guide.
represents an index finger selecting a button or onscreen option. For more information, see the TIBCO WebFOCUS® User's Guide.
User and Group Resources
|
In this section: |
A user is identified by a unique ID and may also have additional properties, such as description, email address, password, group memberships, and active, inactive, or AUTOADD status. Groups are formed of users or subgroups, in which all members require similar capabilities or access to the same resources. All users are members of the EVERYONE group, which is the set of all named users in the system.
Note: In multi-tenancy SaaS deployments, although tenant users belong to the EVERYONE group along with the service provider users, the tenant users are only aware of other users within their own organization.
Explicit and Implicit Groups
The groups to which a user is assigned are called explicit groups. Users always have at least one explicit group because they all belong to the EVERYONE group. Groups can also be nested in a hierarchy to simplify administration. In the hierarchy, if a subgroup is nested in a parent group, the users who are members of the subgroup are considered to be members of the parent group. The subgroup is an explicit group for its members and its parent group is an implicit group.
In the following image, the Sales group is the implicit group, and the BasicUsers group under Sales is the explicit group.
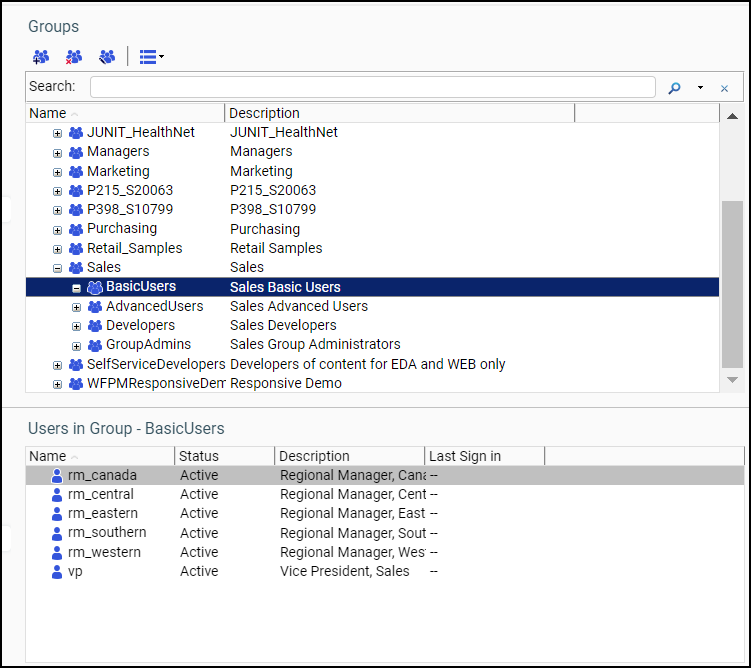
Security rules apply to both implicit and explicit groups. That is, rules which apply to the implicit group also apply to the explicit group nested in it.
Note: In multi-tenancy SaaS deployments, the EVERYONE group and its members are not visible to tenant users.
Private and Published Resources
|
In this section: |
Content resources, such as portals, reports, and procedures, are either private or published. Private content is available only to the owner and authorized users with whom it is shared. Published content may also be shared with authorized users, but user access to published content is controlled by rules, rather than the individual decision to share it. Published content is considered authoritative and has usually undergone quality assurance and testing before being published for the user community.
Private Resources
|
How to: |
All resources are initially created as private resources. The security policy for private resources specifies the following:
- The owner of the resource is the user who created the resource.
- The resource does not inherit security policies from its parent.
- The owner has full control over the resource.
- Administrators with the Manage Private Resources privilege over a group to which the owner belongs can take control of the resource. This allows administrators to manage resources belonging to inactive or deleted users, whether by deleting the resources, publishing them, or transferring their ownership to another user or group.
- A private resource may be owned by a group or a user, but it may not have multiple simultaneous owners. For a group to own a private resource, an authorized user, such as an owner or an administrator with the appropriate privileges, must transfer the ownership from a user to the group.
- ReportCaster schedules can only be owned by a user.
Private content comes in the following forms:
- My Content
-
The reports, output, and schedules created by a user. This content remains private to a user unless the user is authorized to share it with others and chooses to do so, or unless an administrative user with the ability to manage private content for that user publishes the content.
- Other private content
-
Private content that is intended to be accessed by a particular group of developers or that is being prepared for publication. This allows new content to be tested before publication even when it is created in a production environment, a situation most typical of SaaS deployments, where tenant developers may only have access to a single environment.
A My Content folder can be created automatically for published folders to give users a place to save items, such as procedures and reports. The parent folder must have the Automatically Create a My Content Folder property enabled and the user must have the My Content Folder privilege.
The Automatically Create a My Content Folder property is activated, by default, for top-level folders created from the Enterprise Domain Resource Template. It is not activated, by default, for top-level folders that are not based on the Enterprise Domain Resource Template. To add a My Content folder to these folders, follow the steps in the topic, How to Add a My Content Folder.
Note: We recommend that you set this property only on top-level folders.
Procedure: How to Add a My Content Folder
- Right-click the folder, and select Properties.
- In the Properties panel, select the Advanced tab.
- Select the Automatically create My Content folders check box, and then select Save.
- If the folder is published, the screen refreshes, the cursor moves to the parent folder or workspace, and a My Content folder is created. To see it, expand the folder you just updated.
- If the folder is not published, a My Content folder is created when you later publish the folder.
Note: If you clear this check box after creating a My Content folder, the My Content folder is not removed.
Published Resources
Authorized users can publish private resources to make authoritative content available to a larger set of users. The security policy for published resources specifies the following conditions:
- Published resources are owned by the system.
- A published resource is subject to the security policy defined on its parent folder.
Shared Resources
|
In this section: |
Sharing is a feature that is generally used to enable users to share private content residing in their My Content folders with authorized colleagues.
Shared resources are made available to other appropriate users through a special Shared Content folder. The Shared Content folder is a virtual folder that appears automatically in a folder whenever there is shared content inside that folder.
The Content Sharing Scope privilege determines the users and groups with whom the owner is authorized to share resources. The content owner must also be permitted one or more of the following privileges located under the Advanced Reporting folder of the Role dialog box.
- Share Private Resources
-
The user can share resources by selecting Share from the resource shortcut menu. A resource is shared with everyone who can access the folder that contains it. This does not apply to library content.
- Share Private Resources with Specific Users
-
The user can share resources by selecting Share with from the resource shortcut menu and clicking from a list of authorized users, groups, or users and groups. This does not apply to library content.
- Share Private Library Content
-
The user can share library content.
There are two ways to share private resources from your My Content folder or folders within it. You can use the Share menu option to share a resource with everyone automatically, or you can use the Share With menu option and share the resource with a limited set of users or groups selected from the Share With dialog box. When you use the Share option, you share the resource with the EVERYONE group and grant basic user privileges to all users. When you use the Share With option, you share the resource with a limited number of selected users and groups, and grant privileges to them based on their role in the workspace in which the resource appears. You can use the Share option to make a resource generally available while it is still in development, and use the Share With option to share resource development tasks with other users without making the resource generally available.
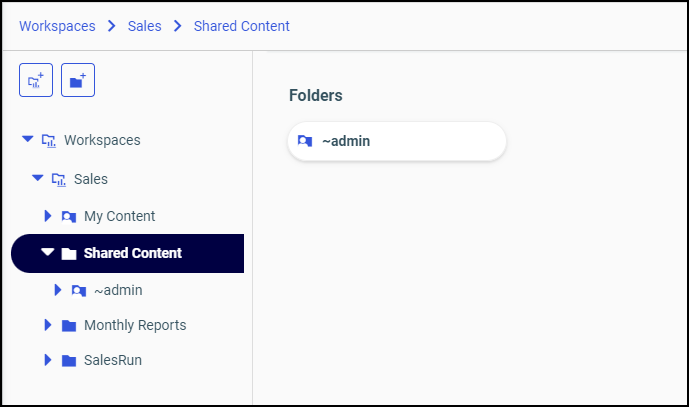
When you share a resource from your My Content folder or one of the folders within it, all users other than yourself will see it under a folder entitled Shared Content. When you open a Shared Content folder, you see a subfolder for each user who has shared content with you. This feature helps you distinguish between content you created, which appears in the My Content folder, and content created by others but shared with you. In the following image, the Administrator folder, which contains content the Administrator made available to an individual user, appears under the Shared Content folder as shown in the Content view.
Understanding How Sharing Affects Folders and Resources in the Hierarchy
In order to protect the integrity of unshared resources within a workspace while continuing to grant appropriate access to shared resources, the folders and parent folders that contain a resource adjust their own shared status automatically.
When you share a resource within a folder, that folder and all of its parent folders up to the My Content folder, are shared automatically. This automatic update helps ensure that a newly-shared resource will not be unavailable because it is located in a folder that is not shared. The same behavior occurs if you share a folder within a hierarchy. All folders above the shared folder, up to the My Content folder, are shared automatically. This behavior automatically ensures that no unshared folder in a hierarchy will block access to shared folders or resources under it.
If you unshare a folder after sharing it, the shared resources within it are also unshared automatically in keeping with the unshared status of the folder in which they appear. The same behavior occurs if you unshare a parent folder in a hierarchy. All folders and resources under the newly unshared folder are also unshared automatically. This behavior ensures that all folders and resources within an unshared folder are rendered unavailable and reinforces the decision to make a folder and the resources within it unavailable to other users.
If you share a folder again after unsharing it, the resources within it are not shared automatically. You must open the folder and share the resources within it individually. The same behavior occurs if you share a parent folder in a hierarchy after unsharing it. None of the folders and resources under the re-shared folder are shared again automatically. You must open and share them individually, but remember that sharing a resource within a hierarchy automatically shares the folder and any parent folders that contain it. This behavior enables you to maintain shared and unshared resources in the same folder, and keeps unshared resources unavailable even though they are located within a shared folder.
When you unshare an individual resource within a shared folder, you do not automatically unshare the folder in which it appears. That folder continues to be shared until you unshare the folder itself. This feature ensures that a folder continues to provide access to shared resources even though one or more resources within it are no longer shared. The same behavior occurs if you unshare a folder within a hierarchy, the folders above it remain shared until you change the shared status of those folders individually.
As a rule, sharing a resource or folder automatically shares the folders above it. Unsharing a folder automatically unshares the folders and resources below it. The only exception to this rule are individual resources or folders that have no folders under them. When you unshare these items, there is no impact anywhere else in the hierarchy.
Once you share an individual resource, that resource remains shared until you unshare it or until you unshare the folder or parent folder that contains it. Once you share a folder, it remains shared until you unshare it or a parent folder. You can unshare an individual resource without unsharing the folders that contain it. This behavior keeps shared resources available even if they are included in a folder with unshared resources.
Sharing Resources
The ability to share or unshare private resources only applies to resources located in the My Content folder of a workspace or in one of the child folders within the My Content folder. For more information about how to share resources, see the Configuring and Using Your TIBCO WebFOCUS® Environment technical content.
