Changing the Color Palette
|
How to: |
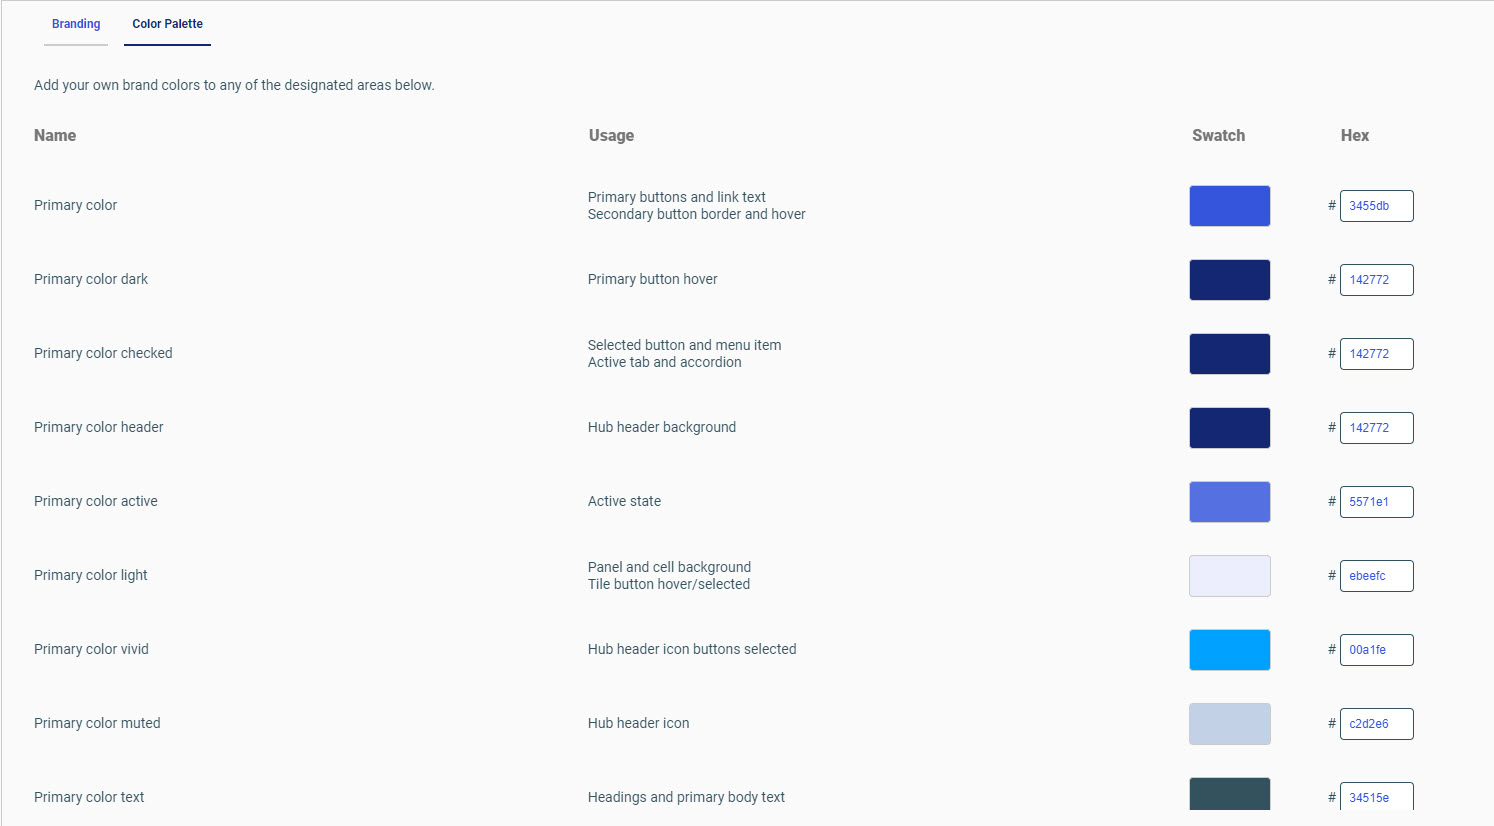
The Color Palette tab allows you to change the color of various designated interface areas according to the requirements of your organization. Each color palette for a selected area is assigned a hexadecimal number representing the color assigned to that specific number, as shown in the following image.

For each selected area, the Color Palette tab displays the name of the selected area, a description of the usage of the color in that selected area, a swatch showing a preview of the selected color, and the hexadecimal number associated with it. The changes you make are visible to you, after you select Save. You can use this feature to review and revise your changes to ensure they conform to your expectations. Your changes become available to other users only after you select Publish.
Procedure: How to Change the Color Palette From the User Interface
- In the Hex column text box for the area you want to change, enter the hexadecimal code of the desired color.
Note: If the hex color is not valid, it will appear in red. If this happens, review the hex code and enter a valid one.
- Select Save to make the changes visible to you.
Procedure: How to Change the Color Palette From a Text File Upload
Before you begin: If you prefer to make updates directly to a text file, we recommend that you download the colorpalette.txt file from the Color Palette tab, and use it to make your changes. You can then upload this file to make them visible on the Color Palette tab. By downloading this file and using it as a template for your color changes, you can help ensure that the appropriate field names and value formats are present and that the changes will appear as expected when you upload the file.
- Select Download and save the colorpalette.txt file to an location where you can open and edit its contents. Do not change the file name.
- Make changes to the hexcode written on the file as per your requirements and save it.
- Select Upload, select your altered file from the Open dialog box, and click Open.
- Select Save to make the changes visible to you.
Procedure: How to Publish or Revoke your Changes
- Select Reset to Default to return to the default user interface.
- Select Revert to the Last Published to restore the previously published user interface.
- Select Publish button to make your user interface changes visible to all users.