RStat Scoring Routines in InfoAssist

In this section:

The Define and Compute functionality in InfoAssist, which is used to create virtual fields, supports the use of functions. These functions can be used to create expressions and calculations for use in your reports and charts.

Predictive models or scoring routines, built with the separately licensed WebFOCUS RStat for Predictive Analytics, allow you to add predictive analytics to your reports and charts in InfoAssist. In order to access a scoring routine, an administrator or other designated individual must first deploy the scoring routine using TIBCO WebFOCUS® App Studio. Once the scoring routine is deployed, it will appear in the RStat Scoring Routines folder and can be used when creating a virtual field.

For more information on scoring routine deployment and creating scoring routines, see the TIBCO WebFOCUS® App Studio User’s Manual and the Using WebFOCUS RStat for Predictive Analytics manual.

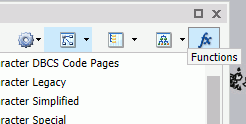
To access functions in InfoAssist, open the Define or Compute dialog box and click the Functions button, as shown in the following image.
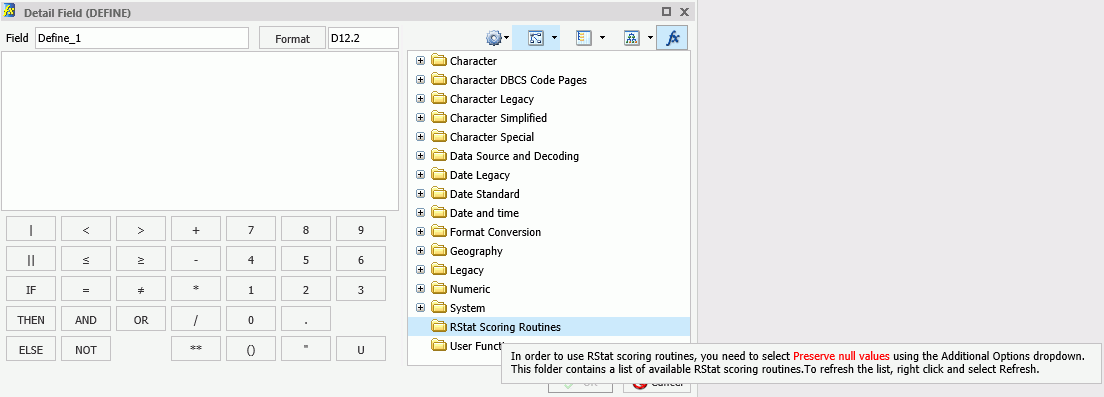
The list of available functions is displayed, including the RStat Scoring Routines folder. If one or more scoring routines have been deployed, the RStat Scoring Routines folder will have a plus sign (+) next to it, indicating that the scoring routines are available and ready for use.
Using the RStat Scoring Routines in InfoAssist

In this section:

When a RStat predictive model is deployed, it is transformed into a function that is similar to any other WebFOCUS function. You can create expressions for incorporating predictive analytics into your report or chart.

Note: The success of this procedure is contingent on the availability of the scoring routines, which must be deployed prior to accessing the RStat Scoring Routines folder in the Functions list in the Define and Compute dialog boxes.

Step 1: Creating the Report or Chart

  1. From the WebFOCUS , create a report or chart.
  2. In the Tool Setup dialog box, click the Assign Applications check box so it is selected.
  3. In the Tool Setup dialog box, click the Application Paths button.

    This enables you to assign an application path, giving you access to the folder containing the deployed scoring routine(s) and Master Files (.mas) to be used in the report or chart.

    Note: Scoring routines are not globally available. Therefore, you must obtain the correct application folder name from an administrator or the individual who performs the deployment of scoring routines within your organization.

  4. Choose from the available Application Paths, then click OK.

    InfoAssist opens.

  5. From the Open dialog box, choose the .mas file to be used in the report or chart.
  6. Add data fields to the report or chart.

Step 2: Creating the Virtual Field: Define or Compute

  1. On the Data tab, in the Calculation group, click one of the following options:
    • Detail (Define)
    • Summary (Compute)
  2. On the relevant dialog box that displays, click the Functions button on the toolbar.

    The functions are listed.

  3. Click the RStat Scoring Routines folder to access the deployed, stored functions.
  4. Double-click a scoring routine to add it to the Formula text box.
  5. Once you have selected the scoring model, replace the model’s parameters with the actual field names from the Master File, if needed.

    Note: On the dialog box’s toolbar, click View Fields in a Sortable Grid. This will enable the display of the field names in the Master File.

  6. Highlight a parameter in the Formula text box and double-click the parallel or replacement value in the Master File list.

    This places the value of the field from the Master File in the Define or Compute, overwriting the originating parameter supplied from the scoring routine. This enables you to use the scoring routine to develop a unique Define or Compute using fields from your Master File. Optionally, you can type over the parameters and replace them with the corresponding field names.

    Note:
    • The parameters used in a scoring routine are positional parameters, meaning that the order of the fields must be correct. In addition, take note of the placement of commas and other facets of your scoring routine to ensure the accuracy of your Define or Compute.
    • A Compute becomes a COMPUTE statement in the body of the TABLE or GRAPH statement. A Define statement is placed prior to the TABLE or GRAPH statement in the procedure (.fex).

Step 3: Handling Missing Values

Missing data refers to variables that have no data value in the current observation or record. In order for a scoring routine to recognize input parameter values and for the algorithm to derive the score appropriately, you must add the SET MISSINGTEST command to the procedure (.fex). For more information, see the Missing Data in Scoring Routines topic in the Using WebFOCUS RStat for Predictive Analytics manual or the online Help.

When using the deployed RStat Scoring Routines, you must set the option to Preserve Null Values. This directive appears in the tooltip when you hover over the RStat Scoring Routines folder, as shown in the following image.

To set the option to preserve null values:

  1. From the toolbar in the Define or Compute dialog box, click Additional Options and select Preserve null value.

    This sets the WebFOCUS environment parameter MISSINGTEST to SPECIAL (that is, SET MISSINGTEST=SPECIAL).

  2. Optionally, on the Quick Access toolbar, click View code.

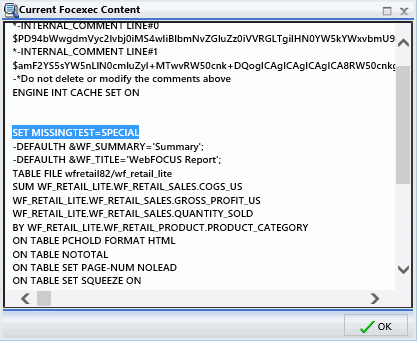
    The following image displays the SET MISSINGTEST=SPECIAL value in the procedure (.fex). In order for a scoring routine to recognize missing input parameter values, the SET MISSINGTEST=SPECIAL command must be in the procedure (.fex).

  3. Once you are finished, click OK. The resulting Define or Compute is placed in the Data pane for selection and inclusion in your report or chart.

    Note: Computes are also placed in the Query pane, by default.