In this section: |
You can join two or more related data sources to create a larger integrated data structure from which you can report in a single request. The joined structure is virtual. It is a way of accessing multiple data sources as if they were a single data source. This can greatly increase the number of fields available for use in your content, giving you an expanded selection for your reporting and charting purposes.
Using conditional joins, you can establish joins based on conditions other than equality between fields. In addition, the host and cross-referenced join fields do not have to contain matching formats, and the cross-referenced field does not have to be indexed.
Note: You can edit the description of a join by clicking Edit in the Join dialog box and typing in the Description section. You can only use letters and numbers in your description. The following special characters are not allowed.
space ! " # $ & ' ( ) * + , / : ; ? @ [ ¥ ] ^ _ ` { | } ~ %
The conditional join is supported for TIBCO FOCUS® and all relational data adapters. Because each data source differs in its ability to handle complex conditional criteria, the optimization of the WHERE syntax differs depending on the specific data sources involved in the join and the complexity of the conditional criteria.
For FOCUS® data sources, if the host and cross-referenced join fields do not have common matching formats, the following message appears.
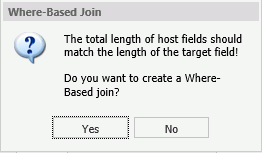
Note: If you click Yes, the Filter dialog box opens, where you can create a Where-Based Join.
If the cross-referenced join field does not have an index, the following message appears.
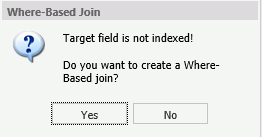
Note: If you click Yes, the Filter dialog box opens, where you can create a where-based join.
To create a where-based join, create a filtering condition.
How to: |
The blend option allows you to explicitly select the data fields that you want to include. More specifically, you can join multi-fact data structures and combine pertinent external data into your current data source, creating a blended data resource. This can be from local or other system resources.
Blending is used to create customized data sources. For example, you may have some of the basic fields available in the current data source, but you can use the blend option to add relevant data fields from a different data source to the current data source in order to create a unique data set.
The blend option allows a new fact table to be added to a cluster master as a parent segment to an existing child segment. This option is available from the Join dialog box. You may want to blend data if you are reporting from two different fact tables that share a common dimension, such as a product dimension. For an example of this, you can view the sample retail database, wf_retail_lite. The wf_retail_lite Master File contains the WF_RETAIL_STORE_SALES segment and the WF_RETAIL_SALES segment. The WF_RETAIL_SALES segment is defined as the parent of the WF_RETAIL_STORE_SALES segment. You may want to add a second fact table to the report. The second fact table in this example will be an Excel spreadsheet that you upload to InfoAssist for use with a report or chart. The data in the spreadsheet file that you upload will be joined to the wf_retail_lite database using a common field.
Note: You can find supported, common fields in your selected database (for example, wf_retail_lite) using the search feature in the Data pane. If necessary, you may need to add a field in your spreadsheet to map your data to the structure of the database. For example, ID_CUSTOMER. In addition, the name of the primary sheet in Microsoft Excel becomes the name of your data source, so be sure to name the file accordingly.
The following list provides some general rules that apply to the Blend option:
This procedure describes how to blend data from an external data source into an existing data source. This example uses a Microsoft Excel spreadsheet file.
The Join dialog box displays.
The Open dialog box displays.
Note: The options that display on the Open dialog box depend on your user privileges.
The Upload wizard opens.
The next screen of the Upload wizard opens. You can use the options on this screen to preview and change spreadsheets and delimited data files before you upload them to the target environment. This screen shows you the default breakdown of your data as measures, dimensions, and hierarchies.
The Target Load Options dialog box opens.
Note: By default, the Bulk Load check box is selected. Clear this check box if you do not have a bulk load program that supports your target environment. For example, if you are using Microsoft SQL Server, you may use a Bulk Copy Program (BCP). If you are unsure about whether you have a bulk load program installed, contact your system Administrator.
The Upload wizard closes, and you return to the Open dialog box.
Note: If there are informational messages or if your upload is unsuccessful, the Status screen opens.
The blended data source fields are now available in the Data pane.