In WebFOCUS Designer Document mode, you can:
- Create a new document or edit an existing document.
- Build a document using content that resides in your repository.
- Combine reports, charts, and images in a single document.
- Add pages to your document.
- Save your final document as a PDF for easy access and distribution.
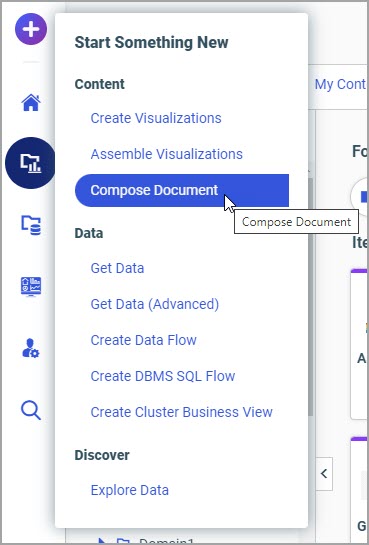
To launch WebFOCUS Designer in Document mode, on the WebFOCUS Hub, click the Plus button and then click Compose Document, as shown in the following image.

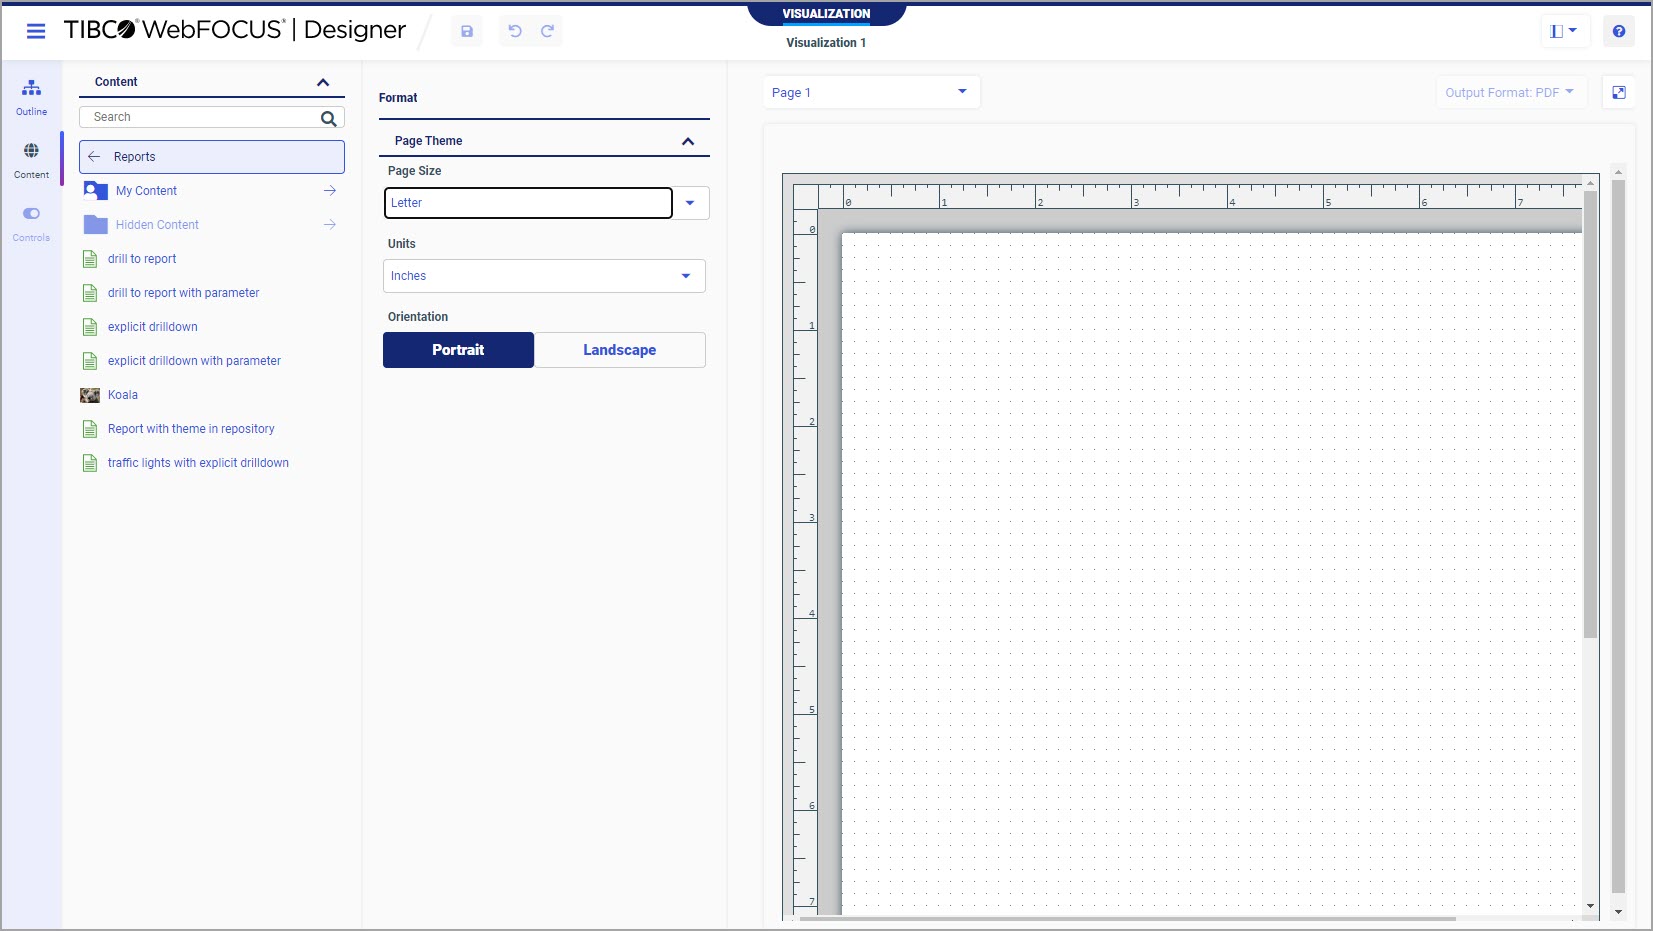
WebFOCUS Designer opens. The blank Document mode interface is shown in the following image.

The main features of the Document mode interface include:
- Canvas. The pixel-perfect canvas of the Document mode allows you to move and position your content with precision. When you add items to the document canvas, they may overlap. You can resize an item by dragging the lower corner of its container. To move an item, click and drag it to a desired location on the canvas. The rulers on the top and left edges of the canvas provide additional help in designing your layout. When an item is selected on the canvas, a dotted line appears around it as an indicator. You can multi-select items by holding the Shift key and clicking them. You can move multi-selected items together by clicking and dragging one of the items.
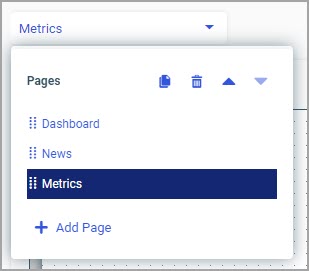
- Pages drop-down box. The Pages drop-down box allows you to add new pages, change the order of existing pages, and configure your page options.
The page options, displayed on the top of the Pages dialog box, include:
- Duplicate page. Creates an exact copy of the selected page and adds it underneath the selected page.
- Delete page. Deletes the selected page.
Note: When you click the Delete page icon, the confirmation pop-up message appears where you can confirm or cancel your deletion request.
- Move page up. Moves the page up on the list.
- Move page down. Moves the page down on the list.
Note: Another way to move pages up and down is to click and drag them to a desired position on the list.
Click Add page to add a new page to your document. To rename a page, double-click its name on the list and type a new name. An example of the Pages dialog box is shown in the following image.

- Format panel. The Format panel displays options for the element that is selected on the canvas.
The format options for a page include:
- Page size. Provides a choice between the page sizes for your document. The options are: A3, A4, A5, Letter, Tabloid, Legal, PowerPoint Slide, and Large Size. The default option is Letter.
- Units. Selects the type of measuring units for the rulers. The options are: Points, Pixel, Centimeters, and Inches. The default option is Centimeters.
- Orientation. Allows you to alternate between the Portrait and Landscape orientations of the page. The default option is Portrait.
The format options for an item include:
- Height and Width. Reflects the existing height and width of the selected item. Allows you to set a specific height and width for an item on the canvas.
- Lock Aspect Ratio. If selected, allows you to preserve the original proportions of the item, which remain the same when you resize it using the Height and Width options.
- Resources panel. Allows you to navigate the repository to select content for your document. You can click the folders and use the back arrow to navigate through your repository. If you know the name of a specific item that you want to add to your document, you can use the search feature of the Content tab of the Resource panel.