Adding and Removing Dimensions

How to:

Since all of the values in a dimensions hierarchy are available in an OLAP report, you can add dimensions to the OLAP report at any time, without returning to the original report request. You can add dimensions from an OLAP report and from the OLAP Control Pane.

Procedure: How to Add a Dimension Element from the OLAP Control Panel

  1. Open the OLAP Control Panel.
  2. Select a report layout pane (Drill Down or Drill Across) to indicate how you want the new sort dimension to be used in the report.
  3. Expand a dimension in the Dimensions pane at the top of the window, then click the dimension element you want to add to the designated layout pane. The new dimension is added to the bottom of the list.
  4. If you wish to change the position of the new sort field, click the up arrow to reposition it.
  5. Click Run to execute your report with the new settings.

Example: Adding a Dimension Element from the OLAP Control Panel

  1. Run REP2.

    Initially, the report is sorted by quarter, store, and Product Type, as shown in the following image.
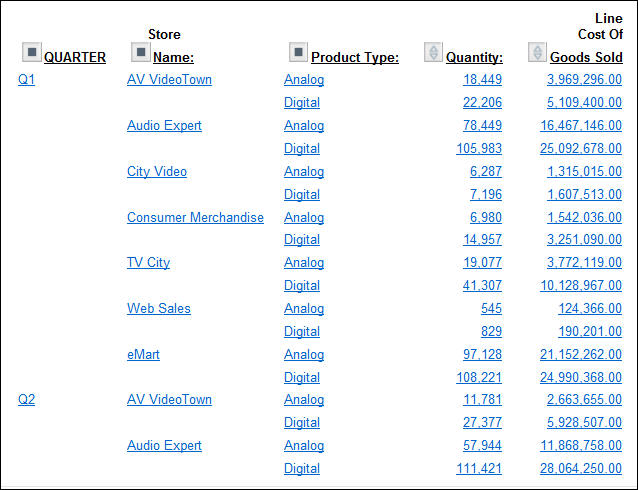
    OLAP Report 2 default

    You want to sort by month within each quarter.

  2. Click the square icon next to QUARTER to open the OLAP Control Panel.
  3. In the OLAP Control Panel:
    1. Expand the Time Period dimension and click MONTH. It is added to the bottom of the Drill Down list.
    2. Click the Shift Up arrow twice to move MONTH below QUARTER, as shown in the following image.
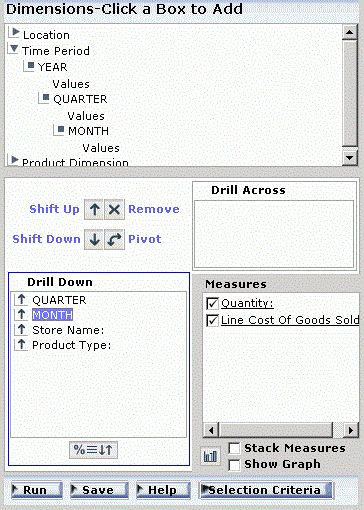
      WebFOCUS OLAP Control Panel
  4. Click Run at the bottom of the OLAP Control Panel.

    The report is now sorted by quarter, month, store, and Product Type, as shown in the following image.
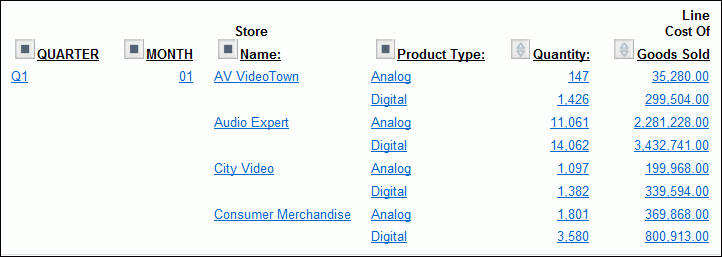
    OLAP Report 2. Month moved to follow Quarter.

Procedure: How to Delete a Dimension Element From the Report

Right-click the dimension column you wish to remove and choose Delete from the menu.

The report runs automatically.

Example: Deleting a Dimension Element From the Report

  1. Run OLAPREP2.

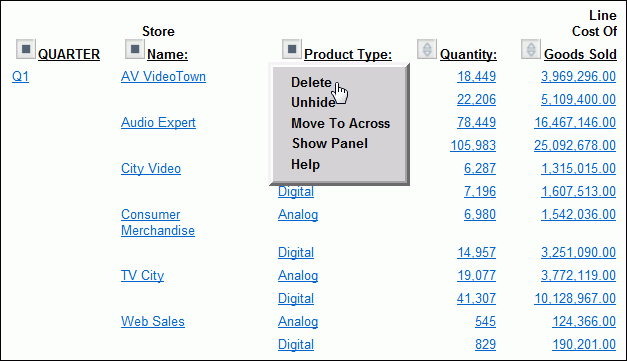
    Initially, the report is sorted by quarter, store, and Product Type. You wish to remove Product Type as a sort category.

  2. Right-click the Product Type column and choose Delete from the menu, as shown in the following image.
    OLAP Report 2, showing the Delete drop-down menu option

    Note: The options available may vary, depending on your OLAP format settings.

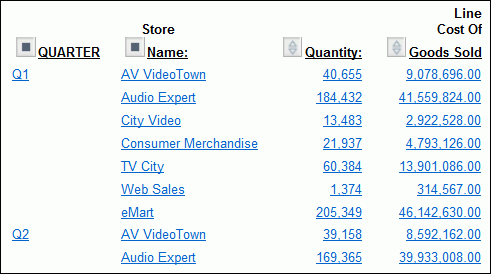
    The report runs automatically. The new report is sorted by quarter and store, as shown in the following image.

    OLAP Report 2 showing the Product Type dimention deleted

Procedure: How to Delete a Dimension Element from the OLAP Control Panel

  1. Select the element in the Drill Down or Drill Across pane. The buttons above the pane become active.
  2. Click Remove Remove. The element is deleted from the Drill Down or Drill Across pane.
  3. Click Run to see the new report.

Example: Deleting a Dimension Element from the OLAP Control Panel

The following is an example of deleting a dimension element from the OLAP Control Panel.

  1. Run OLAPREP2.

    Initially, the report is sorted by quarter, store, and Product Type. You wish to remove Product Type as a sort category.

  2. Click the square icon next to QUARTER to open the OLAP Control Panel.
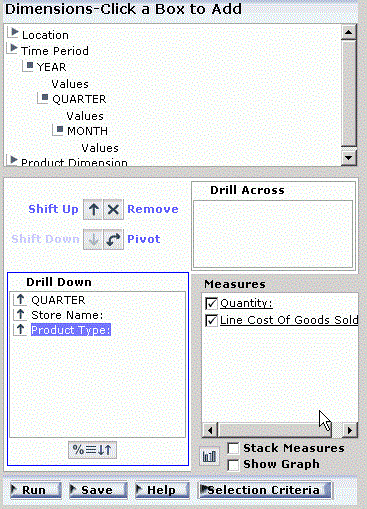
  3. Select Product Type in the Drill Down pane, as shown in the following image.
    WebFOCUS OLAP Control Panel
  4. Click the Remove Remove button.
  5. Click Run at the bottom of the OLAP Control Panel.

    The new report is sorted by quarter and store, as shown in the following image.

    OLAP Report 2 showing the Product Type dimention deleted