Creating the Data Sources
|
How to: |
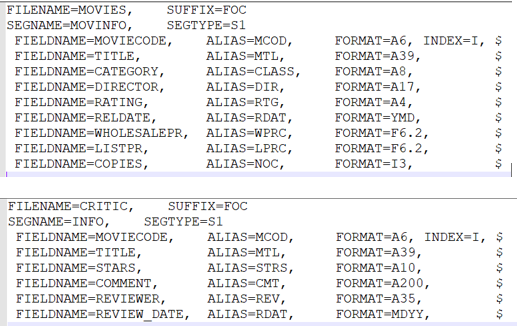
For the example in this topic, a movie critic must rate movies. There may or may not be a connection to the Reporting Server when saving the review. The example uses the movies sample data source, as well as a second data source, called critic. Notice that the critic data source uses the same Moviecode and Title fields as the movies data source. While movies and critic are FOCUS files (SUFFIX=FOC), they could be SQL or any of the other supported data sources.
Procedure: How to Create the Application
The components of this application reside in the repository.
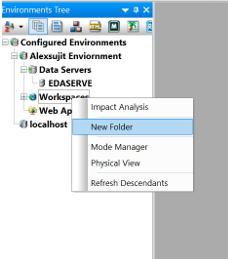
- In App Studio, from the Environments Tree
panel, right-click Workspaces and select New Folder, as shown in the following image.
- Name the folder asynch.
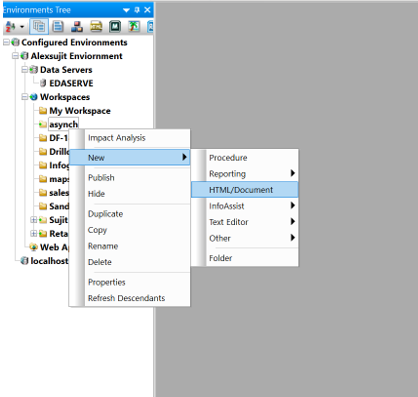
- Right-click asynch, point to New, and
click HTML/Document, as shown in the following image.
The HTML/Document Wizard opens.
- Click Next.
The Templates, Settings, and Themes dialog box opens.
- Click Finish.
- Open the Requests & Data Sources panel.
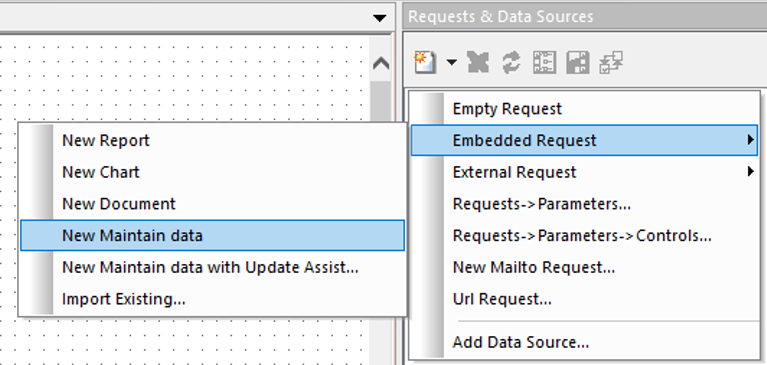
- From the Requests & Data Sources panel,
click the down arrow next to the New icon, select
Embedded Request, and then select New Maintain Data, as shown in the following image.
By default, for an Embedded Request, Request1 is created.
Procedure: How to Add the Data Sources
This application uses the movies and critic data sources. A Maintain Data application can manipulate up to 15 data sources in a single application.
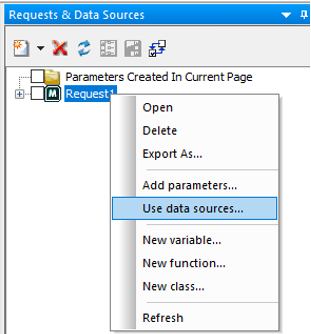
- From the Requests & Data Sources panel, right-click the
Request1
parameter and select
Use data sources, as shown in the following image.
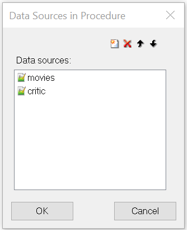
- From the Data Sources in Procedure dialog box, select New.
- Browse to the location of your Maintain Data data sources and select the ones to use (movies and critic).
- Locate the movies data source and click OK.
- Locate the critic data source and click
OK.
The Data Sources in Procedure dialog box should look similar to the following image.
Procedure: How to Create the Maintain Data Code
The HTML canvas contains two tabs, as shown in the following image.
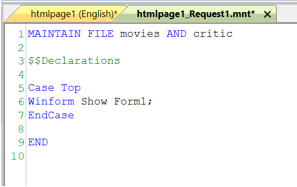
- The htmlpage1 tab displays the form and all the elements.
- The htmlpage1_Request1.mnt tab contains the Maintain Data code.
You can switch back and forth between the tabs.
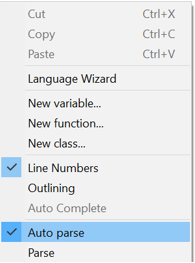
- Before editing the code, turn off Auto parse. Right-click the code and uncheck Auto parse from the menu as shown in the following image.
When creating a non-persistent Maintain Data application, every time you return to the code, you have to start with Top case. This is because the agent on the Reporting Server goes away once the form is displayed. You need to create a variable, in this case, Action, to branch to the proper case every time.
The code has three cases: Top, Loadrecs, and Includer, as shown in the following image.
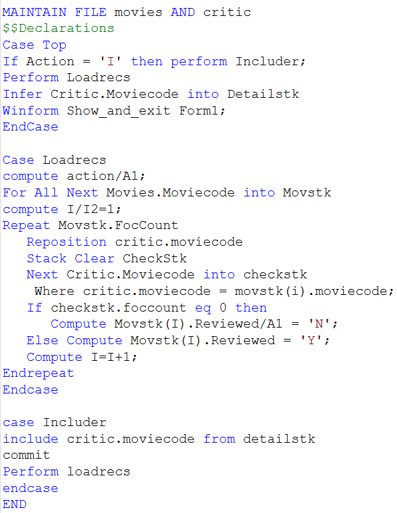
- Top case. Checks if the Action field is set to 'I'. If it is, the code branches to the Includer case to save a record to the data source. It also creates the Detailstk stack and performs the Loadrecs case. Finally, it displays the form. By using the Winform_show_and_Exit Form1 command, the form is displayed and the agent goes away. This is what makes the application non-persistent.
- Loadrecs case. Creates Movstk. This is the list of movies that the critic needs to review. Once the records are loaded, the records in Movstk are compared against the critic data source. If the movie has already been reviewed, the Reviewed Flag is set to Y. Otherwise, it is set to N.
- Includer case. Saves the record to the data source and reloads Movstk.
- Once you type the code, save your application.
Procedure: How to Create the Form
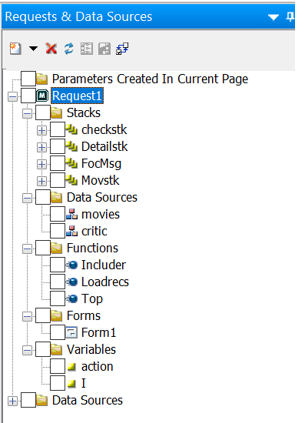
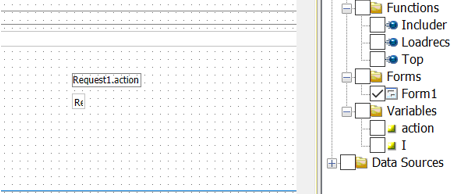
- From the Requests & Data Sources panel, expand all of the folders (Stacks, Data Sources, Functions, Forms, and Variables),
as shown in the following image.
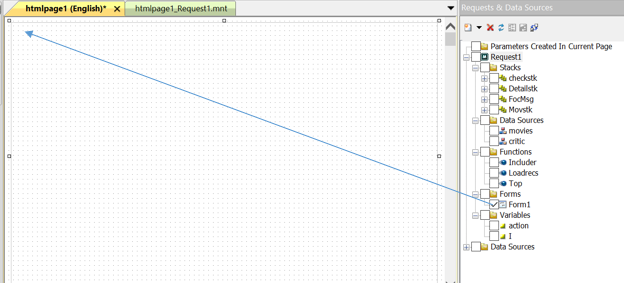
- Drag Form1 from the Forms folder to the top-left corner of the canvas, as shown in the following image.
- When prompted to create a multipage control, click No.
- Expand the form, so it fills the canvas.
Procedure: How to Display the Stack
Movstk contains the list of movies that the critic needs to review. An HTML table is used to display and select the next movie to review.
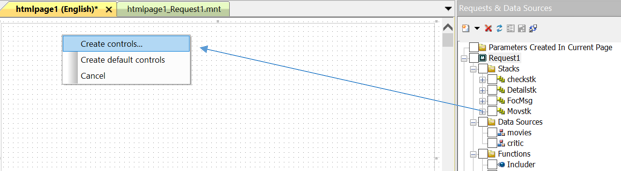
- From the Requests & Data Sources panel, right-click Movstk and drag it onto the top-left corner of the form.
- Select Create controls, as shown in the following image.
Note: If you accidentally left-click Movstk and fields are created, click the undo icon, and make sure to right-click the stack before you drag it onto the form.
- To display only Moviecode, Title, and Reviewed in the
HTML table:
- In the Parameters dialog box, change the values in the Create control column to Don't create for all the other fields.
- In the Control Type column for Moviecode, right-click the Control Type column and select Html Table, as shown in the following image.
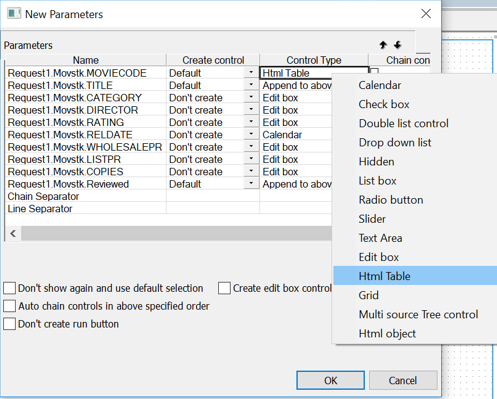
- Click OK to create the control.
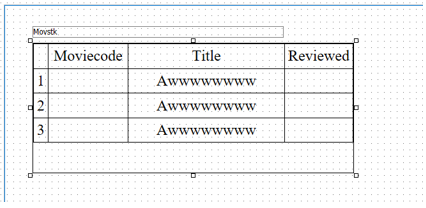
The HTML table is shown in the following image.
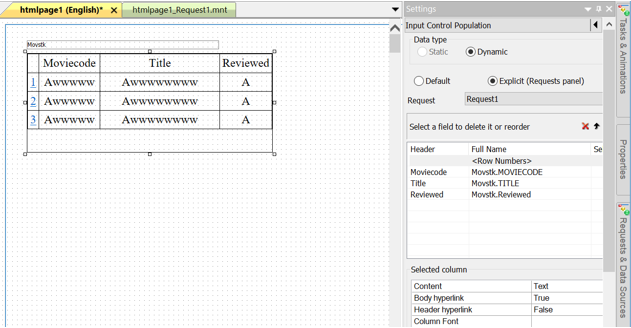
- Click the HTML table and open the Settings panel.
- Click <Row Numbers> and change the Body
hyperlink
property to True, as shown in the following image.
- From the Requests & Data Sources panel, left-click and drag Detailstk to the form under the Html table, as shown in the following image. The default controls (edit boxes) are created.
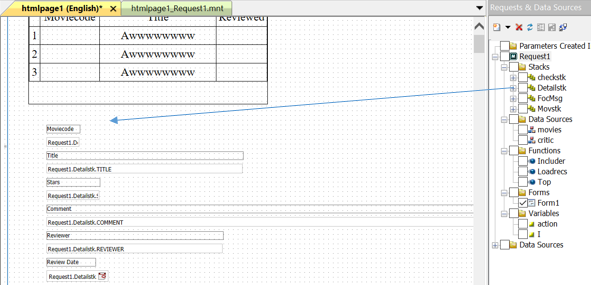
Note: By default, the edit box for Moviecode is named edit1 and the edit box for Title is named edit2.
- Open the Properties panel.
- Click the Moviecode edit box and change the Unique Identifier from edit1 to moviecode.
- Click the Title edit box and change the Unique Identifier from edit2 to title.
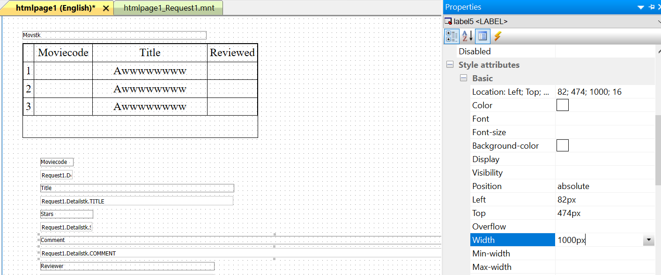
- If the Comment field is too long for the form, select the Comment field and the Comment label. Open the Properties panel,
if not already open, and change Width to 1000px, as shown in the following image.
- From the Requests & Data Sources panel, drag the action field from the Variables folder onto the form, as shown in the following
image.
The Action field determines where to branch when returning to your Maintain Data code. The Action field must be on the form, but does not need to be visible. You can select the field and the label and in the Properties panel make the objects not visible (Visible No).
- In the Properties panel, click the action edit box and change the Unique Identifier to action.
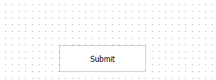
- Draw a button on the form and change the text to Submit, as shown in the following image.
Procedure: How to Add Tasks
All Maintain Data applications must have a Load task. The Load task launches the Maintain Data code and displays the forms. A persistent Maintain Data application can have multiple tasks that perform multiple cases. A non-persistent application only needs the Load task. This is because the Maintain Data code is always initiated from the Top case and why the Action field needs to be set in the JavaScript code.
- Open the Tasks & Animations panel.
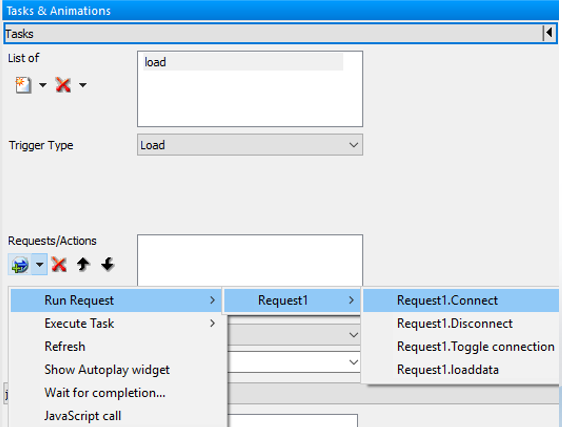
- Add the load task.
- In the Requests/Actions section, click the arrow for Requests selections, select Run Request, then select Request1, and then select Request1.Connect, as shown in the following image.
Procedure: How to Add Events
While tasks can connect directly to the Maintain Data code, you use events to perform JavaScript.
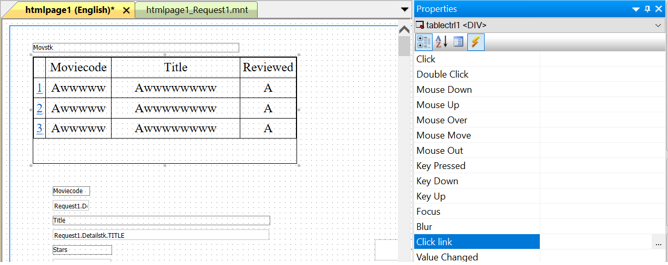
- Click the HTML table and open the Properties panel.
- Click the lightning
bolt
and double-click Click
link, as shown in the following image.
- Click the ellipse (…) to open the Embedded JavaScript tab.
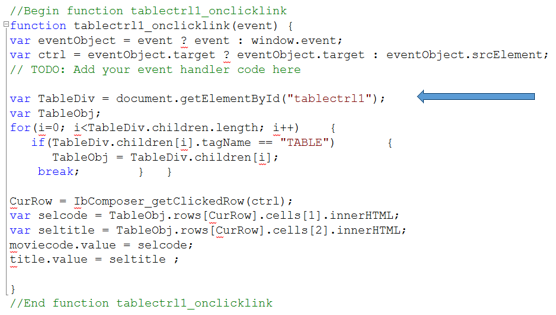
- Locate the event for tablectrl1_onclicklink. If your tablectrl is not named tablectrl1, locate the specific clicklink event.
- Type the JavaScript code, as shown in the following image. Remember, case matters. If your tablectrl is not named tablectrl1,
make sure the indicated row contains the name of your tablectrl.
- Redisplay the form by clicking the Design tab on the bottom left of the page.
Note: At runtime, when you select a row from the HTML table, the JavaScript has Moviecode populate the moviecode field and Title populate the title field.
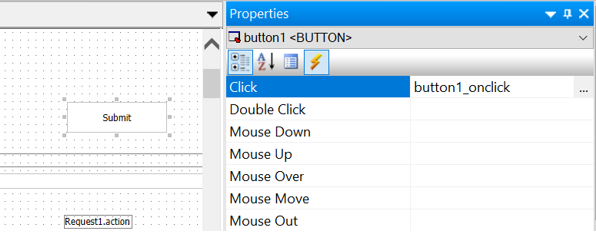
- Select the Submit button.
- Open the Properties panel.
- Click the lightning
bolt
and double-click the Click event, as shown in the following image.
- Type the JavaScript code, as shown in the following image. Remember, case matters. If your tablectrl is not named tablectrl1,
make sure the indicated row contains the name of your tablectrl.
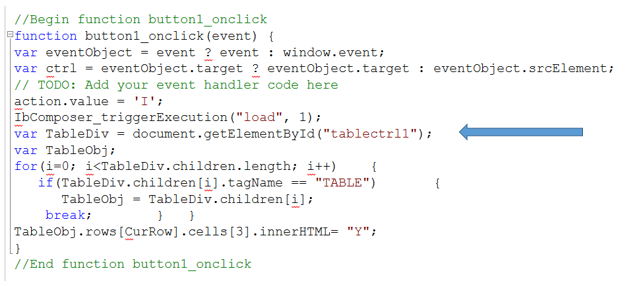
- At runtime, when you click the button to set the action field to 'I' and perform the Load task. The Maintain Data code is performed and the code branches to the Includer case to save the record. When you return to the form, the Reviewed flag is changed from Y to N so the critic knows this review is done.
- Save the code and run the application.
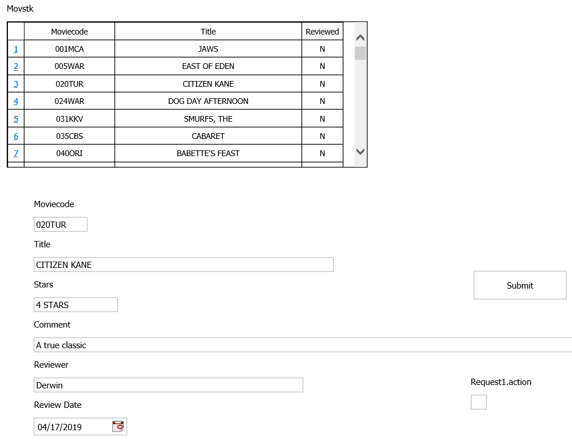
You can select and review a movie, as shown in the following image.
Now that you have created the non-persistent application, you can make it so that it can work in an asynchronous environment.
- Click the canvas, not the form. When you open the Properties panel, you should see Document, not Form, as shown in the following
image.
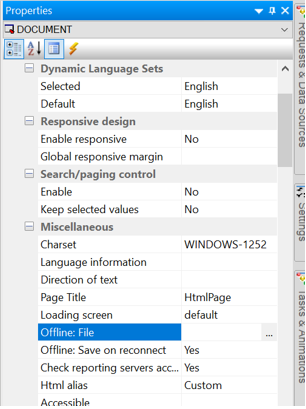 There are two Offline parameters:
- Offline: File. Is the name of the file run from the mobile device.
- Offline: Save on reconnect. Any records saved to your mobile device automatically get sent to the Reporting Server the next time the application connects.
- Click the Offline: File ellipse (…) to select a file, as shown in the following image.
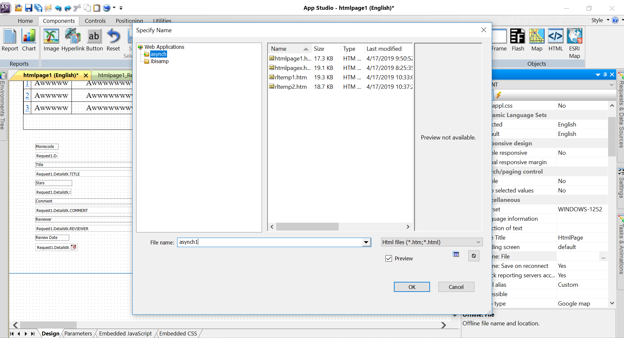
- Place the file in the asynch folder and name it asynch1.
- Click OK.
If prompted to create the file, select Yes.
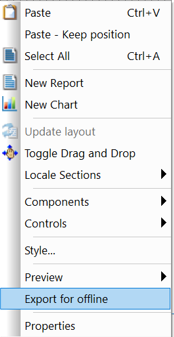
- Right-click the canvas, not the form.
- Select Export for offline, as shown in the following image.
 Two files are created:
- asynch1.htm. Contains all of the forms and code.
- asynch1.appcache. Contains all of the resources that the application needs to run offline.
Procedure: How to Run the Application on a Mobile Device
The first time you run the application, you must be connected to the Reporting Server. All of the components and data is loaded onto your mobile device.
- Click the browser upload button and select Add to Home Screen, as shown in the following image.
- Change the name to asynch1 and click Add.
- Asynch1 now appears on the home screen on your mobile device.
You can run Asynch1 from your mobile device. If you are connected to the Reporting Server, the updates take place in real time. If you are not connected to the Reporting Server, the updates are saved to your mobile device. The next time you run the application while connected to the Reporting Server, all your changes are saved.