Creating Request-Response Service

Before you configure Request-Response Service, you have to create a service of Request-Response Service.

You can use the Create Service Wizard window to create an adapter service.

Prerequisites

An adapter configuration is created in a project.

Procedure

  1. Use one of the following ways to open the Create Service Wizard window:
    • In the Project Explorer view, right-click the Adapter Services folder of the adapter configuration, and from the pop-up menu, click New Service.
    • In the All Adapter Services panel of the Adapter Services tab, either click Add, or right-click the service list pane and from the pop-up menu, click Add Service.
    • In the Schema Browser view: fetch a table or stored procedure and then drag the fetched object into the All Adapter Services panel. For details on how to fetch an object in the Schema Browser view, see Fetching Tables and Stored Procedures.
    Note: The default service type and transport in the Create Service Wizard window are determined by the adapter preferences. To modify or maintain the adapter preferences, click Window > Preferences to open the Preferences window.
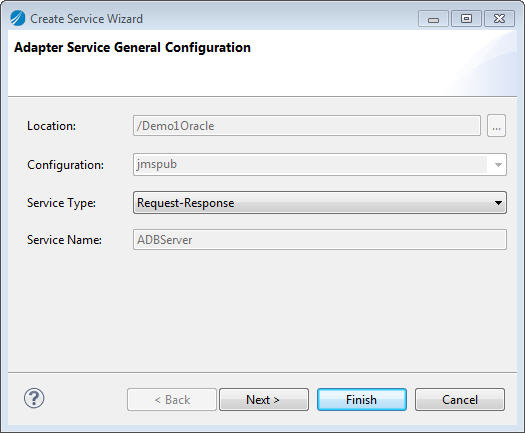
  2. In the Adapter Service General Configuration window, select Request-Response from the Service Type list and click Next.
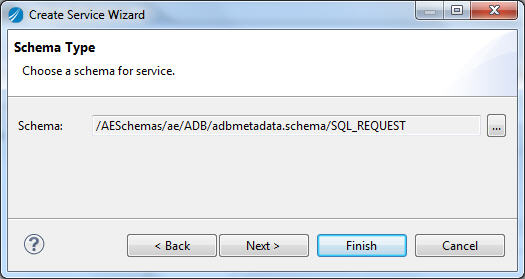
    The adapter Location, Configuration, and Service Name fields are filled automatically.

  3. In the Schema Type window, select a stored procedure, function, or package and click Next.
    By default, the Schema field is automatically filled with the SQL_REQUEST class.

    For the detailed procedure, see Fetching a Schema Object for Custom RPC Service.

  4. Optional: In the Transport Session window, create a transport session for the service.
    The Transport Session window displays the default transport for a service. You can create a different transport session.
    1. Click the browse button to open the Model Select window.

    2. In the Model Select window, click New.
    3. In the New Transport window, specify a name for the transport you want to use, select a transport type and a specific option. Click Finish.
    4. Back in the Model Select window, select the transport you just created and click OK.

  5. Click Finish to exit the Create Service Wizard window.

What to do next

After you create Request-Response Service, the service-specific tabs are displayed in the configuration panel. You can use these tabs to configure Request-Response Service.