Renaming a Resource
When users log into a BPM application, they must enter their resource name. Initially, each user’s resource name is established as the value that is stored in an attribute in an LDAP source. The LDAP attribute is specified when you create an LDAP container.
After a resource is added to an LDAP container, you can specify a name different than the one stored in the LDAP source attribute. This can be done in the following ways:
- On the Create Resource(s) dialog. This dialog is displayed when you do one of the following:
- create a resource using the Create Resource function; for information, see Using the Create Resource Function.
- map a potential resource (that is, a resource who has not yet been created nor mapped to a group or position) to a group or position; for information, see Mapping Resources.
- Using the Rename / Move Resource function. Note, however, that this function can be used only after a resource has been created or mapped to a group or position, that is, it cannot be a potential resource. This function is described below.
Procedure
-
From the resource list Tools menu, select Rename / Move Resource.
Note: The Rename / Move Resource function is not available if the resource is from an LDAP server that is currently offline.
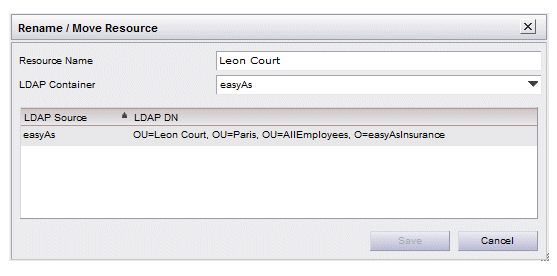
The Rename / Move Resource dialog is displayed:
Note: You can also use this dialog to move a resource to a different LDAP container, or to change a resource’s DN. For information, see Moving a Resource to a Different LDAP Container .
Copyright © Cloud Software Group, Inc. All rights reserved.