If you are configuring a custom callout handler for a deployed, running application, you can use the Configuration Administrator to update the application’s configuration file, rather than opening and updating the file (config.xml) directly.
Procedure
-
Access the Configuration Administrator from Workspace by clicking the
Admin button in the Workspace toolbar, then selecting
Configuration.
-
In the Configuration Administrator, click on
config.xml in the left pane.
-
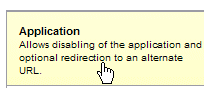
In the
Graphical Editor tab, click in the
Application
section:
-
Select the
Enable Callout Interfaces box.
-
Click the
Add button.
-
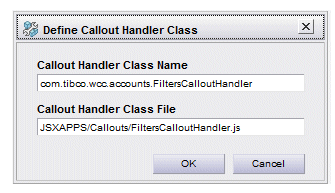
In the
Callout Handler Class Name field on the
Define Callout Handler Class dialog, enter the fully qualified name of the callout handler class. This must be in the form:
com.tibco.wcc.appName.calloutClassName
where:
- appName is the name of the WCC application. This is “workspace” if you are using the Workspace application, or the name given to your application if you are using a custom WCC application.
- calloutClassName is the name of the callout handler. The name of the default callout handler is “CalloutHandler”, but if you are using a custom callout handler, this could be something like “FiltersCalloutHandler”.
-
In the
Callout Handler Class File field on the
Define Callout Handler Class dialog, enter the path to callout handler file, starting from the
JSXAPPS directory. For example:
JSXAPPS/Callouts/calloutFileName
where:
-
Click
OK to close the
Define Callout Handler Class dialog.
-
Repeat
step 5 -
step 8 if you have multiple callout handlers.
-
Click
OK to close the Configuration Administrator.
-
Return to
step 6 of the
Callout Handler Configuration topic to complete the callout handler configuration.
Copyright © 2022. TIBCO Software Inc. All Rights Reserved.