To deploy a project you need a CDD file and an EAR file. The CDD is not included in the project's EAR. This means you can reconfigure a project’s deployment configuration without having to rebuild the EAR.
What is an EAR? The Enterprise Archive or EAR file contains details for all the resources in a project, and project global variables. It also contains any Java code that was added to the project.
What is a CDD? The project’s deployment configuration is defined in an XML file called the Cluster Deployment Descriptor, or CDD. You edit this file using the TIBCO BusinessEvents® Extreme Studio Cluster Deployment Descriptor editor.
How do I set up preprocessors and startup and
shutdown rule functions? The CDD is where you configure rule
functions to act as event preprocessors, startup rule functions, or
shutdown rule functions. Only rule functions whose
Validity setting is Action are valid
for these uses. (These rule functions cannot require anything to be in
their scope, because they execute outside of the context of the Rete
network and TIBCO BusinessEvents® Extreme
project resources.) A preprocessor is associated
with a destination. It processes events arriving at that
destination.
What is an inference agent? An agent does certain work within a JVM. Inference agents listen for messages arriving at destinations, and transform them into events. The events trigger rules, using the agent’s Rete network and forward chaining, and the inference agent executes the rules.
![[Note]](images/note.png) | |
In TIBCO BusinessEvents® Extreme Application Developer’s Guide, see these chapters:
|
In TIBCO BusinessEvents® Extreme Studio Explorer, right click the project name,
FraudDetection, and selectNew > Cluster Deployment Descriptor. You see theNew Cluster Configuration Wizard.You can create multiple CDD files for a project and at deploy time use the one that has the configuration you want to use.
In the File name field, type
FraudDetectionand clickNext.Unlike other project resources, you can change the name later as desired.
In the Object Management dialog, select Cache from the Object Management Type drop-down list. Then click . The cluster configuration page appears.
Click the
Collectionstab, and do the following:Select Input Destinations and click .
In the Input Destinations Collection field, type
HTTPand again click .In the Select Input Destinations dialog, select
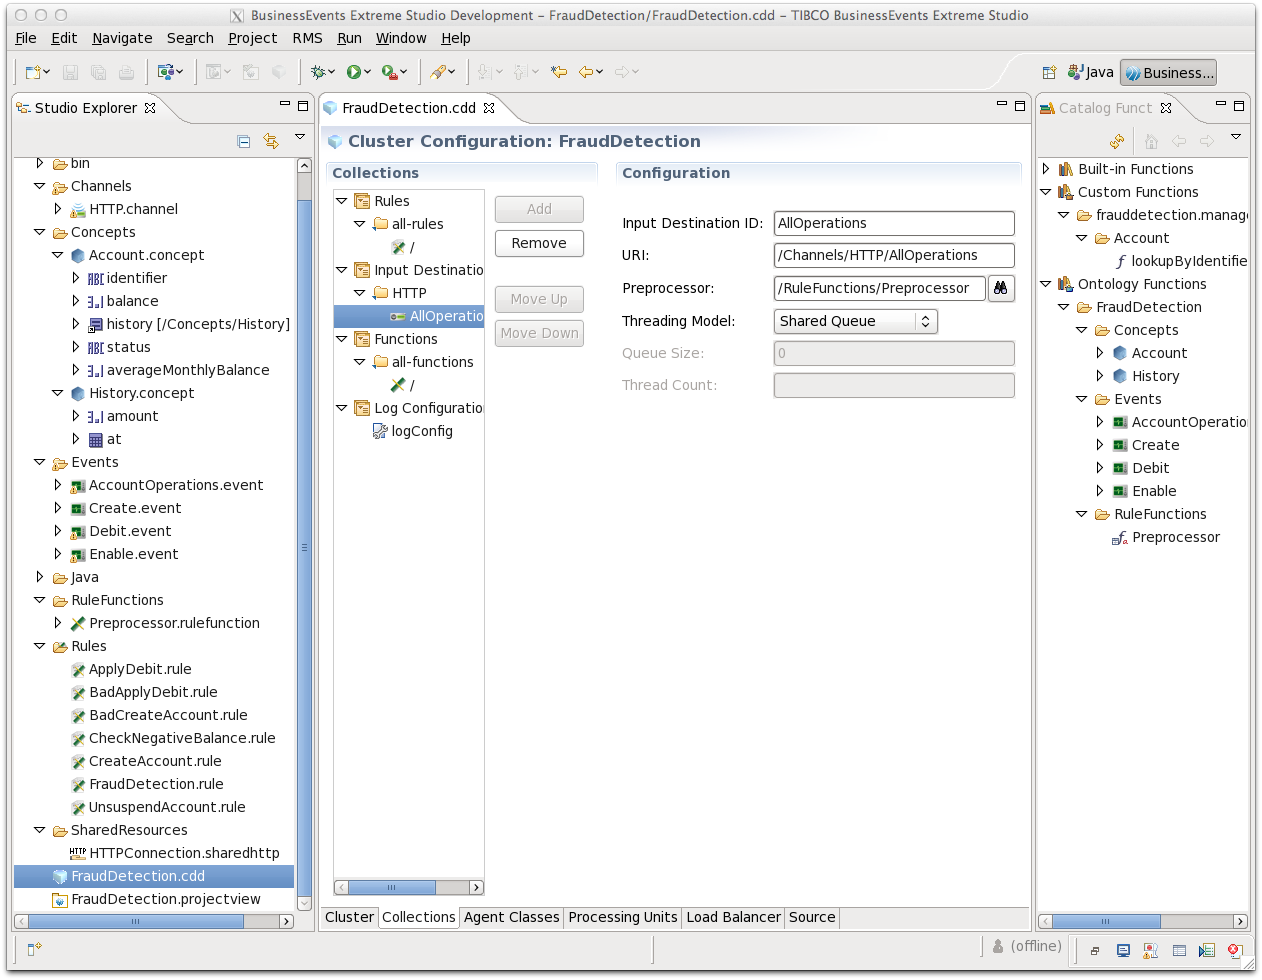
/Channels/HTTP/AllOperationsand click . A Configuration panel appears.In the Input Destination ID field, edit the identifier to read
AllOperations.In the Preprocessor field, select
/RuleFunctions/PreProcessorNow this preprocessor will act on events arriving at the
AllOperationsdestination.
The Configuration panel looks like this:
Collections enable you to create resources you can reuse when configuring multiple agent classes. Collections are used here to demonstrate the feature. In simple projects, you could simply configure the agent class without using collections.
Select the Agent Classes tab to display the
defaultagent class, which is calledinference-class.When configuring an agent class, you can select a subset of the project rules, select and configure destinations, and select startup and shutdown rule functions. Thus different agent classes can behave quite differently at runtime.
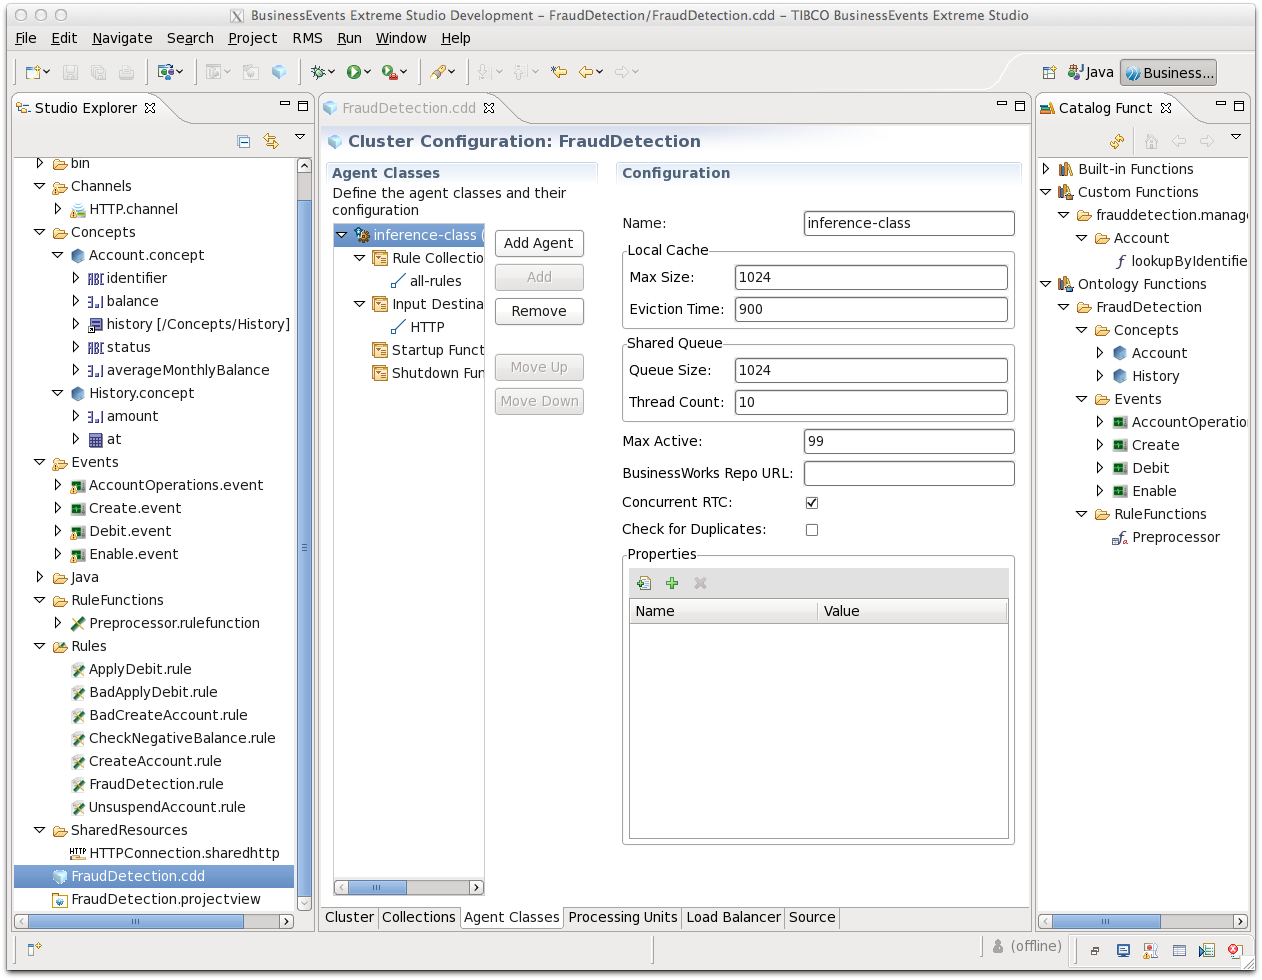
Check the Enable Concurrent RTC check box.
Select Input Destination Collections and click . You see the Select Input Destinations dialog. In the Reference Collections area, select
HTTPand click .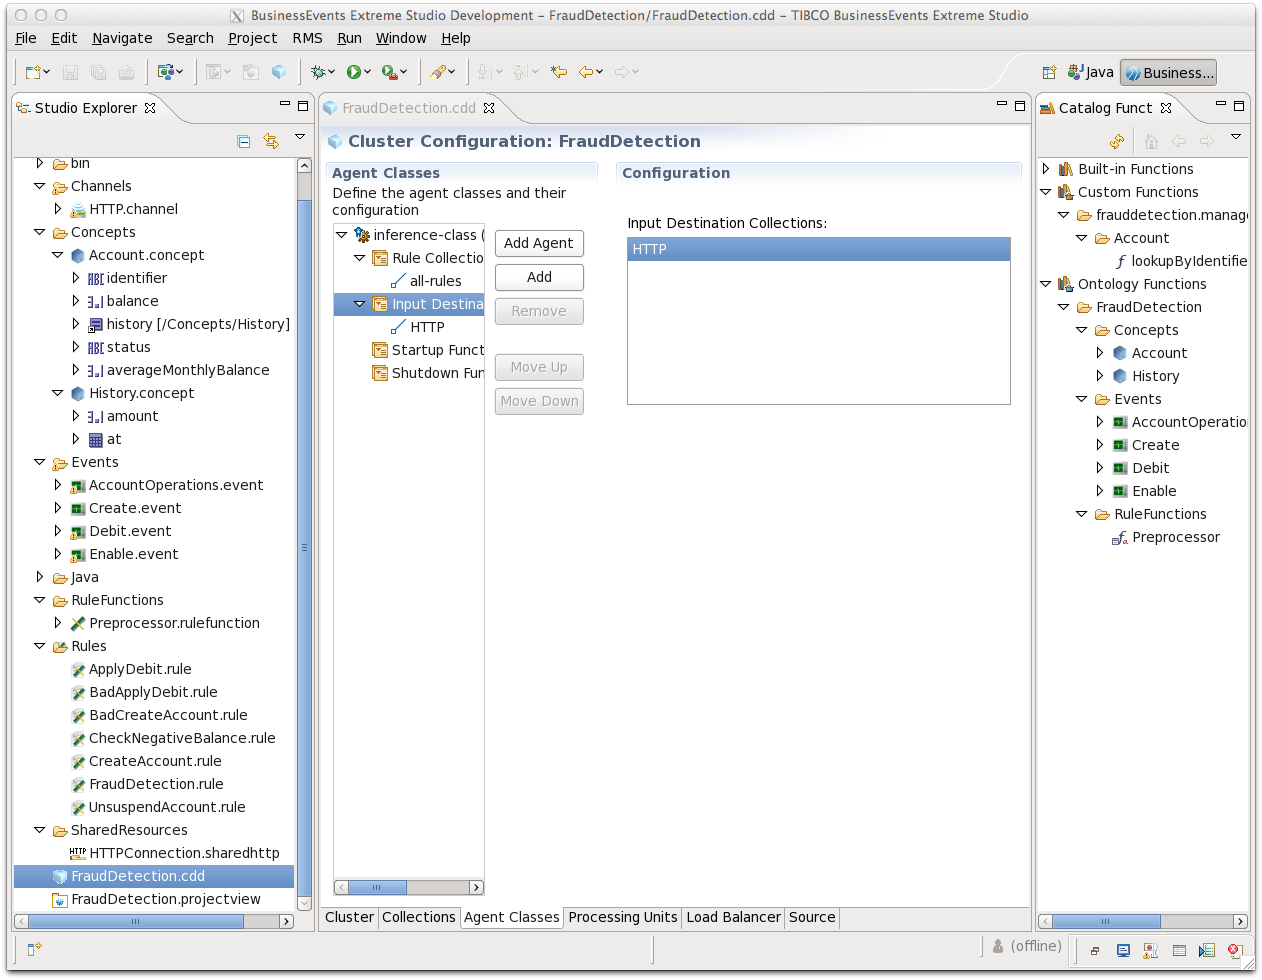
As mentioned above, you can configure input destinations here, or link to input destinations configured in the Collections tab—or use both methods. Here we reference the collection you already defined.
Save and close the CDD.
In TIBCO BusinessEvents® Extreme Studio Explorer, highlight the project name, then from the top menu select .
If you see a message asking you to save all project resources, click . It means an unsaved resource editor is open.
In the File Location field, browse to and select the directory above the project directory.
Click Save.
Click , then click . You see messages as the EAR file builds, then you see a message that the EAR file has built correctly:
Congratulations! You are ready to deploy the
FraudDetection project.
The next chapter discusses how to start server nodes to host the
FraudDetection project and how to deploy the project
to the nodes. It then provides details on injecting events into the
deployed project to execute the rules you built.