Installing TIBCO Business Studio - BPM Edition
The procedure to install TIBCO Business Studio - BPM Edition in Linux/UNIX and Windows is same. In Linux/UNIX, there is an additional step of acceptance of an extra license file.
Log in to the computer on which you want to install TIBCO Business Studio - BPM Edition. For more information, see Installer Accounts. If you want the installer to automatically install Hibernate 3.2.7, make sure you are online. For more information, see Third-party Software Requirements.
Open the physical media or download the TIBCO Business Studio - BPM Edition package to the computer on which you want to install TIBCO Business Studio - BPM Edition.
Extract the installation files to a temporary directory.
- Procedure
- Run the shell script TIBCOUniversalInstaller-lnx-x nn.bin or double-click TIBCOUniversalInstaller.
-
Review the information on the Welcome page and click Next.
Review the terms of the license agreement and, if you agree to them, click I accept the terms of the license agreement. Then click Next to continue with the installation.
If you do not agree to the terms of the license agreement, click Cancel to exit from the installation process.
- On the
TIBCO Installation Home page, TIBCO_HOME is the preferred top-level installation directory for all TIBCO products on your computer. Select one of the following options and click Next.
Create a new TIBCO_HOME: Click Browse to enter an environment location (a directory path to an empty folder into which the software is installed), or accept the default environment location (which is the last directory in the path selected). If you have already installed another TIBCO software, create a new TIBCO_HOME folder.
Use an existing TIBCO_HOME: Select an existing TIBCO_HOME from the drop-down list.
Enter your own environment name (by default environment name is empty).
- To use the TIBCO ActiveMatrix® Service Grid applications in TIBCO Business Studio - BPM Edition, from the list in the left pane, select the SOA Development profile.
By default, the BPM Development profile is selected.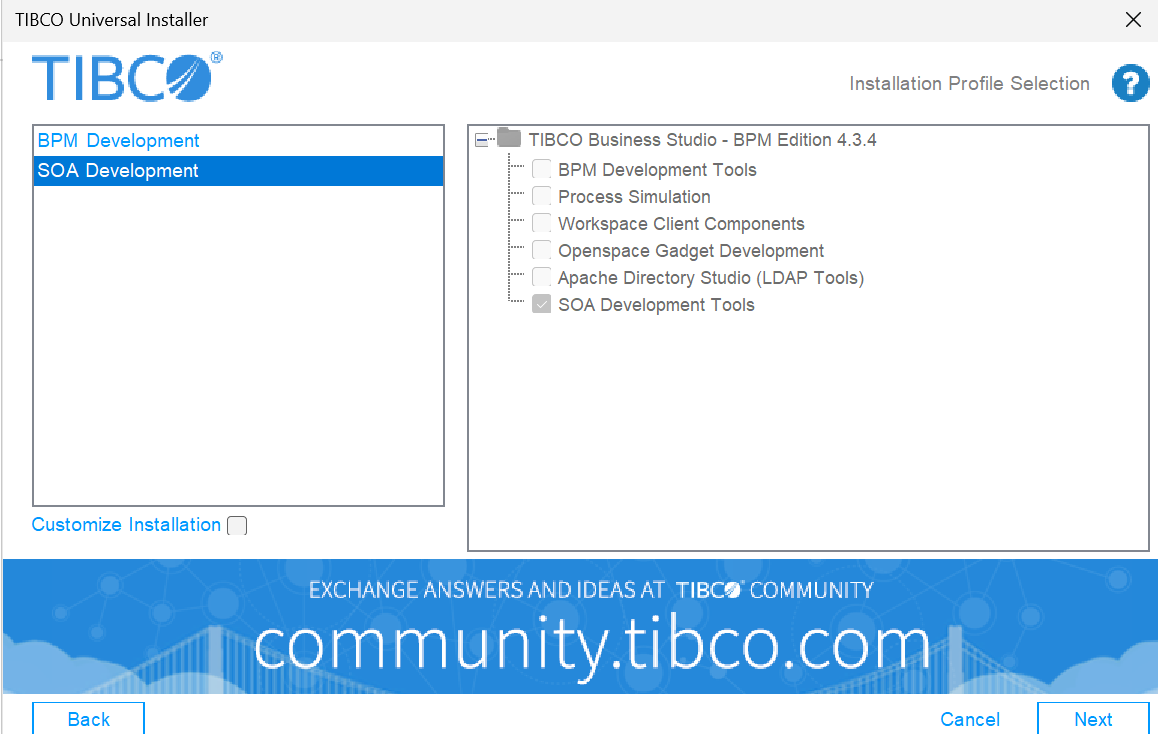
- To customize the installation features, click Customize Installation and select the features in the right-hand pane and click Next.
For more information, see Installation Features. - Review the terms of the LGPL License Agreement, click I accept the terms of the license agreement, and click Next.
- (For Linux/UNIX only) To accept the Gnome license:
- Accept the Gnome License Agreement that uses the LGPL License.
- Click
Download Gnome Binding assembly from TIBCO.
If you do not agree to the terms of the license agreement, click Cancel to exit from the installation process.
-
On the Pre-Install Summary page, review the install information and click Install.
The installation begins. When the installer has finished the installation tasks, the Running Product ANT Tasks page is displayed. You can click Show Details to see the tasks that the installer is performing. -
To exit the installer, click Finish.
There is a slight delay as the installer deletes temporary files.