JDBC Connection
JDBC Connection resource describes a JDBC connection. JDBC connections are used when specifying activities from the JDBC palette.
JDBC Connection
This section has the following fields.
| Field | Literal Value/Module Property | Description |
|---|---|---|
| Connection Type | None | Specifies the kind of JDBC connection you want to create. |
| Maximum Connections | Yes | The maximum number of database connections to allocate. The default maximum is 10. The minimum value that can be specified is 1. |
| Login Credentials | Yes | The user name used to connect to the database.
The password used to connect to the database. |
JDBC Driver
This section has the following fields.
| Field | Literal Value/Module Property | Description |
|---|---|---|
| Database Driver | Yes | The name of the JDBC driver class. If you select a supported driver from a list of supported drivers, the
Database URL field is populated with a template for the URL of the driver.
The following drivers are packaged: In addition, the JDBC palette also supports the MySQL, Oracle,
and DB2,
and MariaDB database.
Note: The
TIBCO Business Studio™ for BusinessWorks™ product can connect with MariaDB ® or MySQL through use of MariaDB® Connector/J, which is subject to free and open source software license terms and available at
https://mariadb.com/downloads/mariadb-tx/connector. MariaDB Connector/J is not part of the product and therefore not within the scope of your license for the
TIBCO Business Studio for BusinessWorks product. Accordingly, MariaDB Connector /J is not covered by the terms of your agreement with TIBCO, including any terms concerning support, maintenance, or warranties. Download and use of MariaDB Connector/J is solely at your own discretion and subject to the free and open source license terms applicable to MariaDB Connector/J.
When editing this field, you can also specify for the JDBC Palette to use a custom JDBC driver. For instructions on how to do this, see
Using Custom Drivers.
|
| Database URL | Yes | The URL to use to connect to the database. A template of the URL is supplied for the selected JDBC driver. You must supply the portions of the URL that are in angle brackets (<>). |
| Login Timeout (secs) | Yes | The length of time (in seconds) to wait for a successful database connection.
Only JDBC drivers that support connection timeouts can use this field. If the JDBC driver does not support connection timeouts, the value of this field is ignored. Most JDBC drivers support connection timeouts. |
| Connection Idle Timeout | Yes |
This option monitors the given time. When the time lapses, it cleanly closes the connection awaiting inside the pool of connections. When you choose Minutes option and then select the Hours option, the value is rounded up to the nearest whole number. That is, 300 seconds are converted to 5 minutes or 1 hour. When you choose Hours and then select Minutes option, the rounding takes place at the most convenient whole number. That is, 1 hour becomes 60 minutes or 3600 seconds. The default value is 300 seconds. |
Test Connection
Click the Test Connection button to test whether the specified configuration fields result in a valid connection to a database.
Installing Supported Drivers for Run Time
If you want to use other databases, other than PostgreSQL or Microsoft SQL Server, you must add them separately. This is a one-time process for every installation of TIBCO BusinessWorks™ Container Edition
To add the drivers at run time for Oracle, MySQL, DB2, or MariaDB, run the bwinstall command from TIBCO_HOME/bwce/version/bin. Ensure that you run bwinstall with no arguments to access the help and instructions to add the driver to the run time.
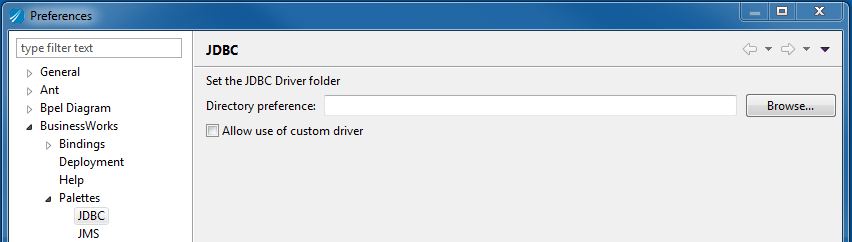
Enabling Custom Drivers
In TIBCO Business Studio for BusinessWorks, you can enable the JDBC palette to use custom drivers. Before you do this, ensure that you place the drivers in TIBCO_HOME/bwce/version/config/design/thirdparty.
Configuring Use for a Custom Driver
Follow these steps to configure the JDBC Connection Shared Resourceto use a custom driver:
- Open the JDBC Connection Shared Resource from the Project Explorer.
- Click in the Database Driver field, and select the custom.jdbc.driver option from the drop-down menu.
- Edit the following fields that display under the
Login Timeout (sec) field:
- Database Driver: Type the name of the driver class to use.
- Database Name: Type the name of the database to connect to. If the database name is the name of a schema, type the schema to connect to.
- Jar File: Type the name of the Jar archive file stored at TIBCO_HOME/bwce/version/config/design/. This file to create the driver. If you are adding multiple Jar files, separate the file names with commas.
- Click
Test Connection. If you have entered the correct database connection details, and have already created a plugin project to support the custom driver,
TIBCO Business Studio for BusinessWorks confirms that you have successfully connected to the database.
Note: If you are unable to connect to the database you specified, check the configurations you made to the JDBC Connection Shared Resource. The database connection field can also fail if you have not created a plug-in project to support the custom driver at run time. In this case, TIBCO Business Studio for BusinessWorks displays a warning message indicating that it does not recognize the custom driver you selected. Click OK and complete step 5.
- Follow these steps:
- In the Create New Plug-in Project wizard that displays, enter a name in the Project name field, accept the default selections, and click Next.
- In the Content pane, accept the default values, and click Next.
- In the Custom Driver Properties pane, edit the following fields:
- Datasource Class: Type the name of the class that TIBCO BusinessWorks Container Edition should use to establish a connection data source between the JDBC Connection Shared Resource and the database.
- Pooled Datasource Class: Type the name of the class that TIBCO BusinessWorks Container Edition should use to create a pooled connection data source data source between the JDBC Connection Shared Resource and the database.
- Click Finish, and the newly created plug-in project displays on the Project Explorer pane. Click the custom plug-in project to expand it.
- Click the src folder to display the java file, and double-click the java file to edit it. Locate the following instructions in the Java file, and follow them to import packages that contain the datasource and pooldatacourse classes:
 /****************************** TODO************************************
* Import the packages from jar that contain the data source and drivers  *
* by hovering over the data source class name with your mouse and        *
* select the import option                                               *
*************************************************************************/
- Edit the methods and properties provided in the template file, or add your own.
Setting up Custom Drivers for Run Time
Follow these steps to set up custom drivers for run time:- Export the custom driver JAR file by right-clicking on the Plugin-Project from the Project Pane and clicking .
- In the Export wizard, complete the following steps:
- Click
Finish to export the plug-in project as a JAR file. The JAR file is exported to the plugins folder at
<BWCE_HOME>/system/shared/plugins.
For Docker, see Extending the Base Docker Image in the TIBCO BusinessWorks™ Container Edition Application Development guide.
For Cloud Foundry, see The TIBCO BusinessWorks™ Container Edition Buildpack in the TIBCO BusinessWorks™ Container Edition Application Development guide.
Uninstalling Drivers for Run Time
To uninstall the drivers at run time for Oracle, MySQL, DB2, and MariaDB, run the bwuninstall command from TIBCO_HOME/bwce/version/bin/thirdparty. Ensure that you run bwuninstall with no arguments to access the help and instructions to uninstall the driver at run time.