Adding a Table
In the Getting Started tutorial, the third task you must do using the plug-in is to add a table.
A Table shared resource represents a table. The Table shared resource is embedded in the DataGrid shared resource. To use the ActiveSpaces DataGrid activities, you must create a DataGrid connection and then add a table to the DataGrid.
Before you begin
You must create a DataGrid connection as described in Creating a DataGrid Connection in the project.
- Procedure
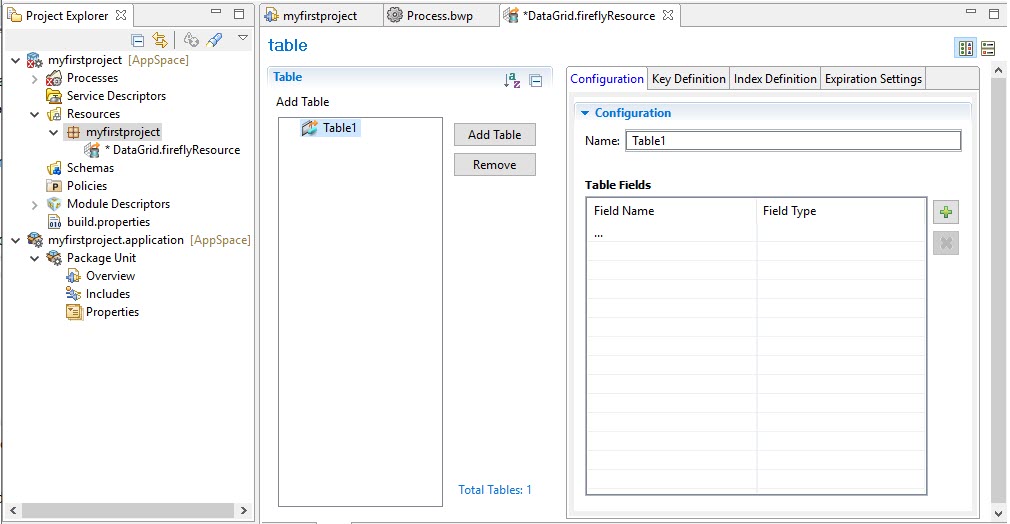
- In the DataGrid Editor, click the
Table tab.
The Table Editor opens.
- In the
Table panel,
- Click
Add Table to add a table and related fields in the datagrid.
 The table parameters that you can specify for configuration are displayed in the right panel. See Table Connection Parameters.
 - Enter the Table Name.
- Click
Add Table to add a table and related fields in the datagrid.
- Click the
Configuration tab. In the
Configuration panel, provide the following details where required.
- Click the "+" button beside the Table Fields definition.
- Enter the Field Name.
- Enter the Field Type.
- Repeat all the sub-steps to add more fields.
- Click the
Key Definition tab. In the
Key Definition panel, provide the following details where required.
- Click
 . In the
Select
dialog box, select the
Key Field Names. Click
Apply.
. In the
Select
dialog box, select the
Key Field Names. Click
Apply.
- Click
- Optional: Click the
Index Definition tab. In the
Index Definition panel, provide the following details as required.
- Enter the Index Name.
- Click
 , and enter the
Index Field Names.
, and enter the
Index Field Names.
You can manage the tables, by using Add Table to add a table or Remove to remove a table. - Optional: Click the
Expiration Settings tab. In the
Expiration Settings panel,
- Select the Enable Expiration Settings check box.
- Enter the required value in Time To Live (seconds).
- Enter the required value in Expiration Scan Period (seconds).
What to do next
After you have added a table, the next task is to configure a process. See the Getting Started tutorial.