Configuring Outbound Proxy Settings
You can set an outbound proxy for all the activities.
Procedure
- Open the process for which you want to start the outbound proxy.
- From the menu, click Run > Run Configurations.
- Click BusinessWorks Application > BWApplication in the left panel.
- Click the Arguments tab in the right panel.
-
In the
VM arguments field, add the following parameters:
- -Dcom.tibco.plugin.facebook.http.proxySet=true
- -Dcom.tibco.plugin.facebook.http.proxyHost=proxy_host_IP
- -Dcom.tibco.plugin.facebook.http.proxyPort=proxy_port_number
- -Dcom.tibco.plugin.facebook.http.proxyUser=username
- -Dcom.tibco.plugin.facebook.http.proxyPassword=password
Note:- If you want to close the outbound proxy, delete all the previous parameters, or set the -Dcom.tibco.plugin.facebook.http.proxySet parameter to false.
- The username and password parameters are optional when the connection is anonymous.
- If the password is encrypted, see Using Encrypted Password.
-
Click
Apply.
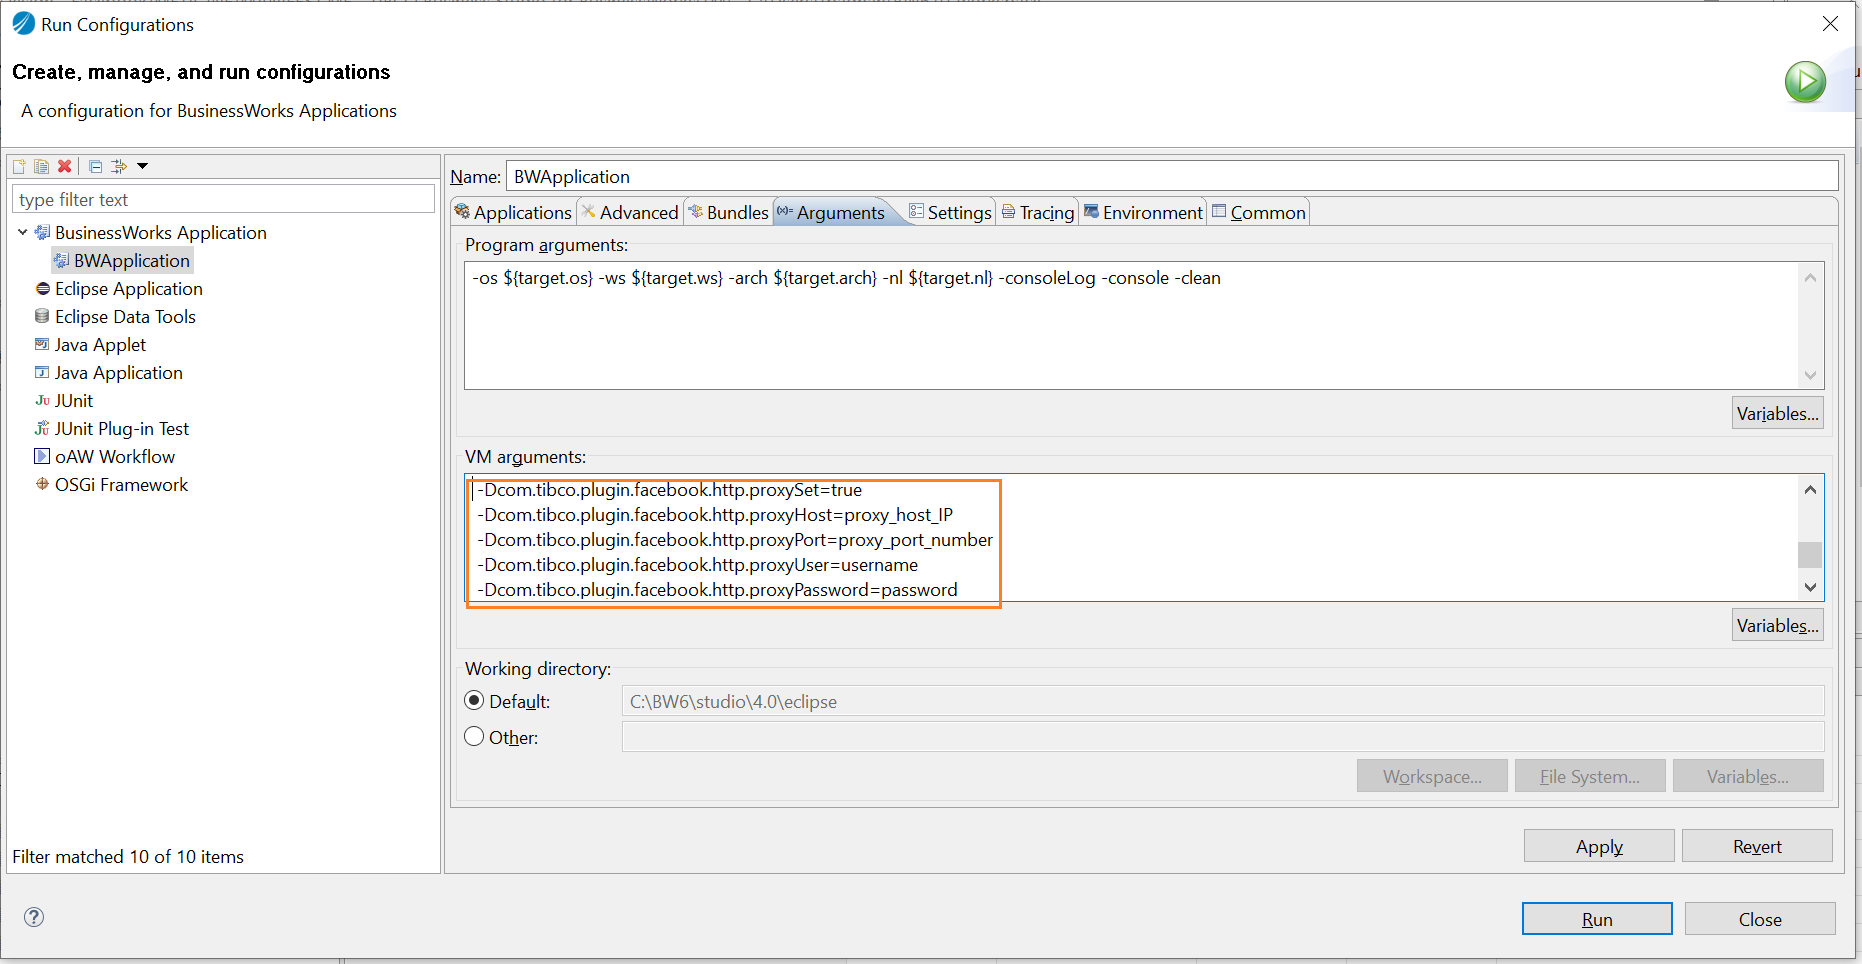
Note: If you want to deploy the process, you have to add the following parameters to the bwcommon.tra file, which is located in the TIBCO_HOME\bw\version\bin directory:
java.extended.properties=-Dcom.tibco.plugin.facebook.http.proxySet=true
-Dcom.tibco.plugin.facebook.http.proxyHost=proxy_host_IP
-Dcom.tibco.plugin.facebook.http.proxyPort=proxy_port_number
-Dcom.tibco.plugin.facebook.http.proxyUser=username
-Dcom.tibco.plugin.facebook.http.proxyPassword="password"
See TIBCO ActiveMatrix BusinessWorks Administration Guide for more details.
Copyright © 2021. Cloud Software Group, Inc. All Rights Reserved.