After creating a project, you can add an SAP Connection shared resource to establish connections between the plug-in and the SAP system.
Prerequisites
The SAP Connection shared resource is available at the
Resources level. Ensure that you have created a project. See
Creating a Project for details.
Procedure
-
In the Project Explorer view, expand the created project.
-
Right-click the
Resources folder, and then click
to open the
SAP Connection wizard.
-
In the
New SAP Connection dialog, the resource folder, package name, and resource name of the SAP connection are provided by default. If you do not want to use the default configurations, change them accordingly. Click
Finish to open the SAP Connection editor.
Note: In a project, all the SAP Connection shared resources cannot use the same name, even if the shared resources belong to different packages.
-
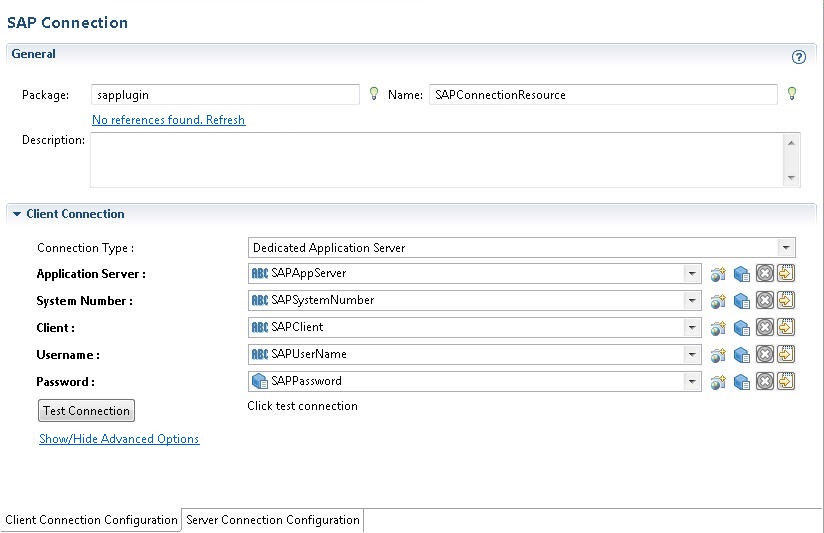
In the
Client Connection panel, select a client connection type from the
Connection Type list.
-
In the Project Explorer view, expand the
Module Descriptors folder under the created project, and then double-click
Module Properties to open the Module Properties editor.
-
Specify the corresponding module properties inherited by the basic parameters of the client connection.
-
Click
Save.
-
Return to the SAP Connection editor, and then click
Test Connection to validate the client connection in the
Client Connection Configuration tab.
-
If you want to establish an outbound connection with the SAP system, click the
Server Connection Configuration tab to configure the server connection:
-
In the
Server Connection panel, select the
Enabled check box.
-
From the
Connection Type list, select a connection type.
-
In the Module Properties editor, specify the corresponding module properties inherited by the basic parameters of the server connection.
-
Click
Save.
Copyright © Cloud Software Group, Inc. All Rights Reserved.