Validating Data

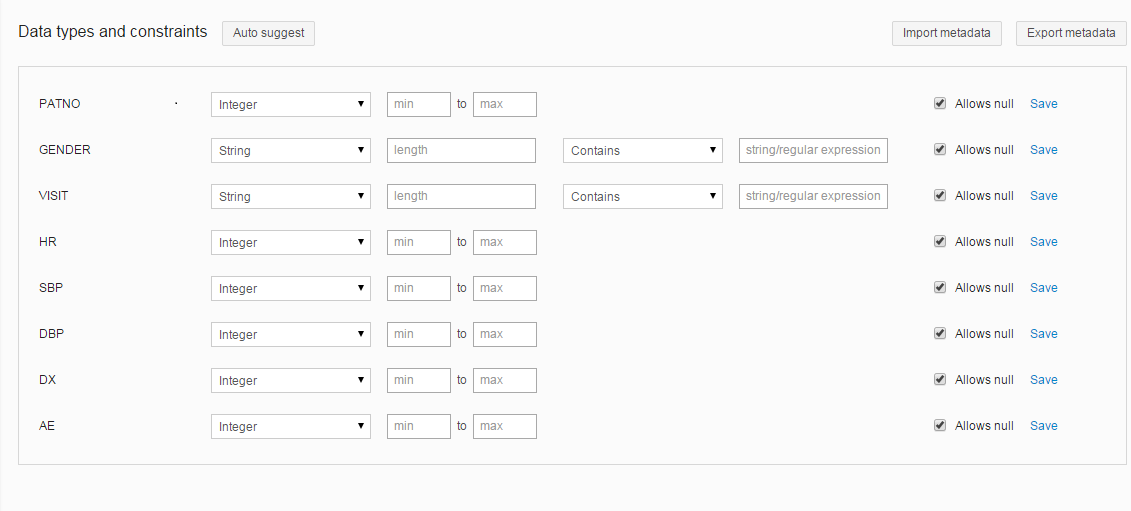
TIBCO Clarity validates your data according to the data types and constraints defined for columns. It checks whether a column value conforms to the defined data types and constraints.

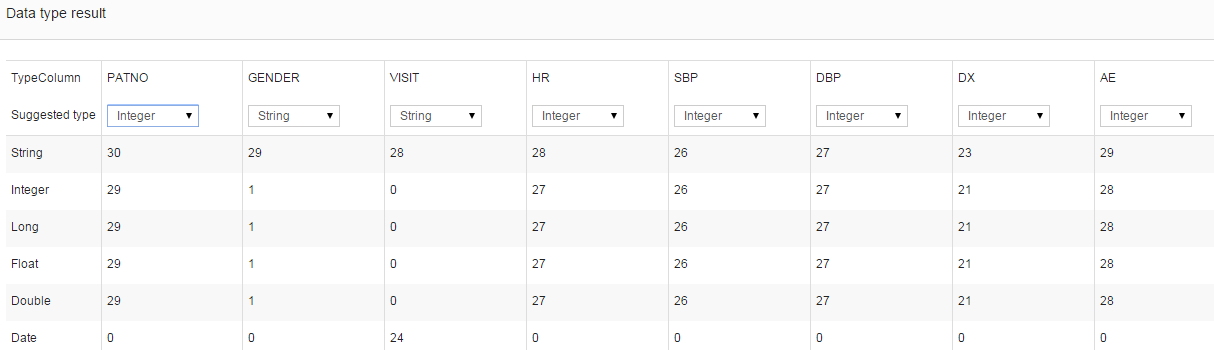
TIBCO Clarity automatically assigns data type for each column. You can change the data type for a column by manually assigning a new one to the column.

Procedure

  1. On the project data page, click Validate.

  2. Optional: Click Import metadata to import the data types from a JSON file.
  3. Click Auto suggest to automatically assign data types to the columns that you want to validate:
    1. In the "Configure data type" dialog, select the number of rows to analyze the data type.
    2. Specify an accuracy threshold.
    3. Click Next.
      The assigned data type for each column is displayed in the "Data type result" dialog.

    4. If you think the assigned data type of a column is incorrect, select a data type that you want to assign for the column. Click Next.
  4. Optional: If you want to assign data types for the columns manually, select a data type for each column. You can use the constraints to create a new data type to assign.
    See Adding New Custom Data Types for more details.
  5. Click Save changes to validate the project data.

Result

When the validation finishes, you are brought to the project data page. The rows that contain invalid values are marked with the icon, and displayed in yellow.