Task 5: Activating matching
The final step to setting up a configuration is to active matching on the table configuration. You only need to perform this step once per table configuration. As a best practice you can wait until creating several table configurations and enable them all at once.
Note
If matching is enabled for multiple tables from the same data model and you need to re-activate one table, you must select and activate all of the configurations from the same model.
To enable matching:
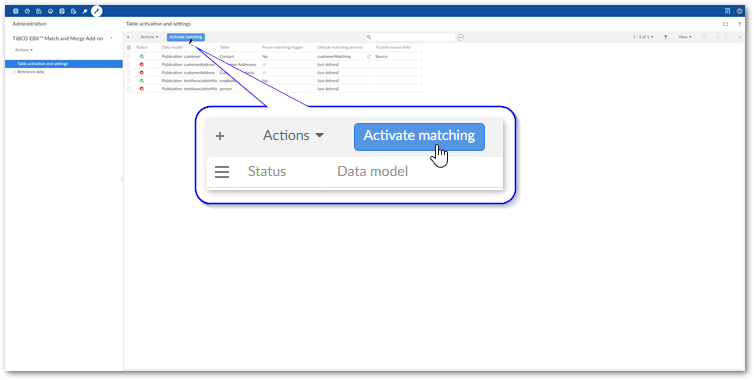
Navigate to Table activation and settings and select each configuration you want to activate. As a shortcut to activating all configurations, do not select any records.
Select Activate matching at the top of the screen.
Part of this operation includes validating the matching configuration. You will see a validation page with any errors or warnings that you might want to address prior to using the matching configuration.
After activating matching you can use the add-on's Evaluate matching service. This service allows you to run a match on selected record and review the results to ensure they are consistent with your expectations. See Evaluating matching for more information.