Viewing add-on metadata
Opening the view
The add-on uses metadata to track records where the add-on is active. The metadata includes information about record state, groups, and target records. Additionally, the metadata tracks matching execution. To view record metadata:
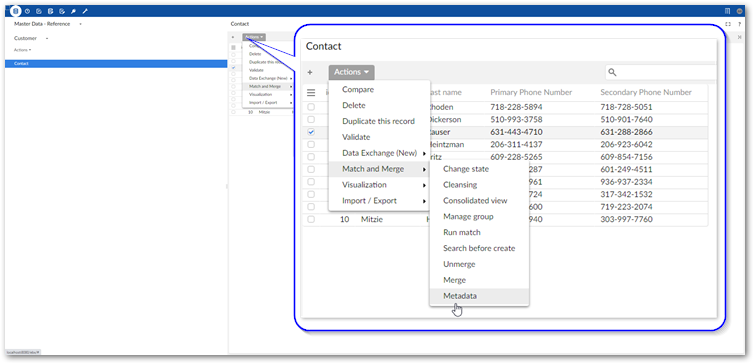
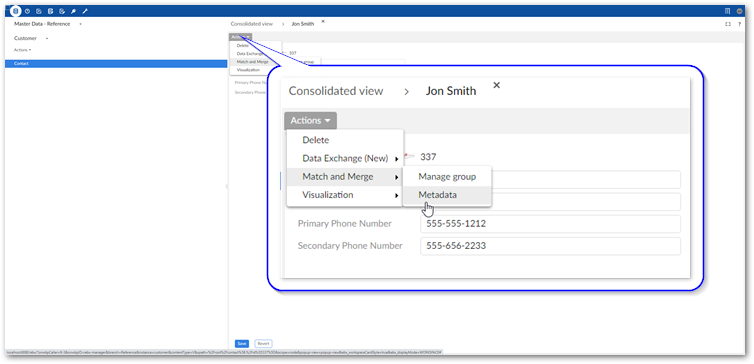
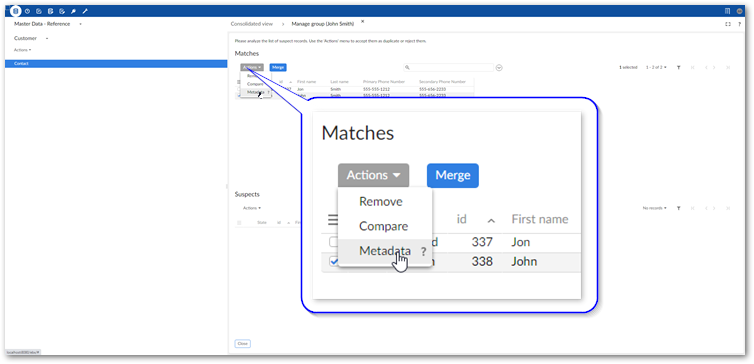
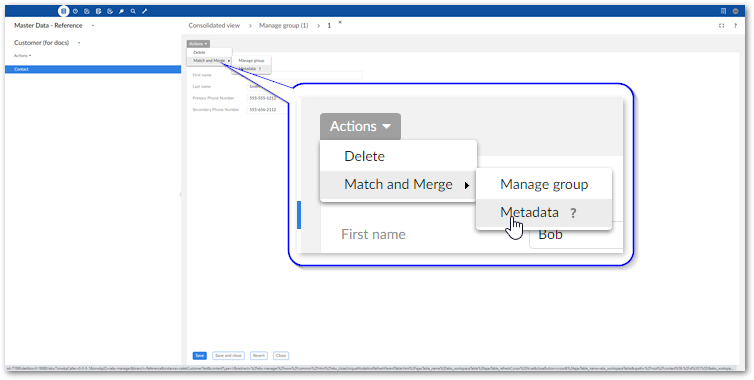
Select a record and from the Actions menu, select Match and Merge > Metadata. As shown in the images below you can access the view from several locations:
Table view:
Record details view:
Stewardship screens such as Manage group:
From the metadata screen you can perform the actions described below:
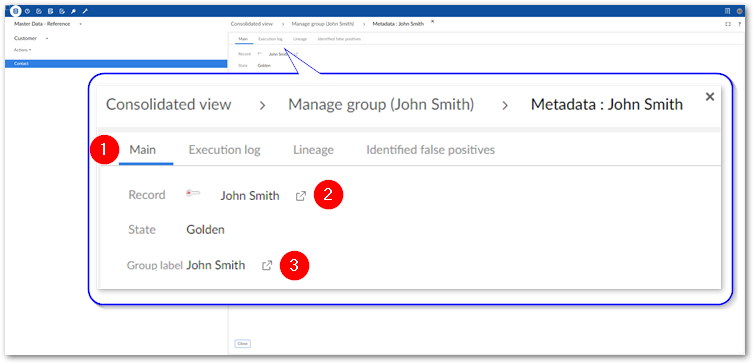
1) Execution log, Lineage, and Identified as false positives tabs
These tabs contain the following information:
Execution log: Displays the most recent matching execution date and time. Additionally, it shows the most recent stewardship decision, date and time, and user that performed the action.
Lineage: Shows any lineage related to a golden record including values from records that were merged into this record.
Identified as false positives: Lists any records that were rejected as suspects or matches with this record. The false positive records will no longer be grouped with this record in future matching operations.
2) Record icon
Use this icon to open the record in edit mode.
3) Group icon
Select this icon to open the Manage group screen. You can confirm suspect records from this screen.
Viewing golden record lineage
The Metadata screen contains the Lineage tab which allows you to view the values from records that were merged into a golden record. To ensure the most accurate lineage is tracked, you must enable EBX® history in the Data Model Assistant.
Access the Lineage tab in the following ways:
Select a record and from a table's Actions menu choose View lineage.
When in a record's details view, open the Actions menu and choose View lineage.
When viewing a record's metadata, select the lineage tab.
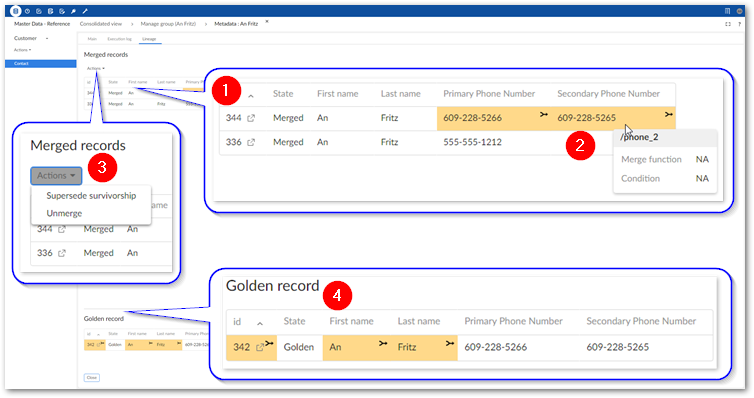
1) Merged records | The list of merged records includes any records that were part of a merge operation to create the golden record. This is true even if no values from a given record were merged into the golden record. |
2) Highlighted values | These values were merged into the golden record. Hovering your mouse over a highlighted value shows the merge function and condition used to determine that this value should be merged into the golden. |
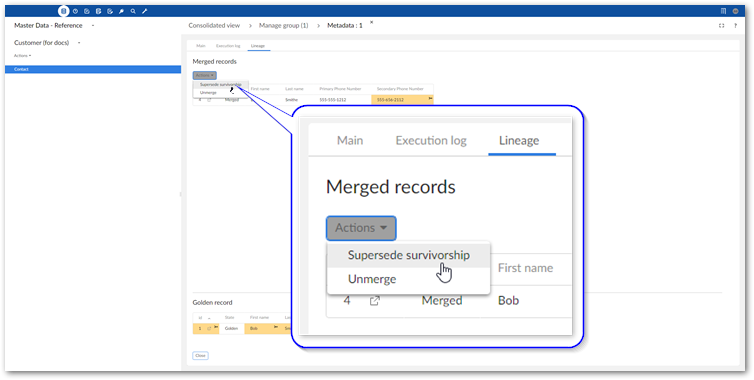
3) Actions menu options | The Actions menu in the Lineage tab includes the following options:
|
4) Golden record and highlighted values | This group shows the golden record that resulted from a merge. Highlighted values are those that survived from the original record. In the example shown, the golden record kept its original values from the id, First name, and Last name fields. |
Superseding survivorship
In some instances incorrect values are merged into golden records. When this happens, you can run the Supersede survivorship service to change the values in the golden record. This service allows you to reverse merge decisions on specific attributes without using the Unmerge service to completely revert the merge process.
Depending on how an administrator has configured trusted source options, the decision you make to override a previous merge can impact future automatic merges, or merge recommendations during manual merge. For example, you might override a value so that it comes from an HR system over an IT system. The next time the record is involved in a merge operation, the add-on can automatically prioritize the value coming from the HR system. If you are in an administrative role and would like to learn more about using and configuring trusted sources, see Setting trusted sources.
To supersede surviviorship:
Open the Metadata screen for a golden record using one of the following methods:
From a table view, select a golden record and from the Actions menu, select Match and Merge > Metadata.
From the Manage group view, select a golden record and from the Actions menu, select Metadata.
Alternatively, open a golden record from the Manage group view and select Metadata from the Actions menu.
Run the Supersede survivorship service:
Select the Lineage tab.
From the Actions menu, select Supersede survivorship.
Select the values to survive into the golden record. Selected values are shaded in gray.
Select Next.
Double-check the results and select Supersede to perform the operation and view the results page.