Quick Start
Overview
Use this quick start section to get your Mashery Local Docker images built and deployed with minimal (one container of each component) and default configuration on a single Linux-based or MacOS-based host.
This creates the Mashery Local cluster in untethered mode.
Software Prerequisites
- Docker must be installed and running on your machine.
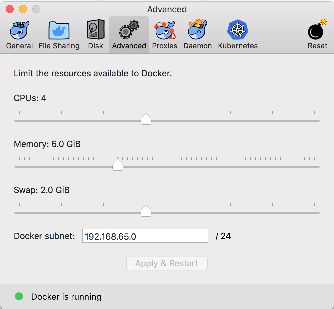
- Docker has been allocated minimum of 6GB memory for Mashery Local cluster and Installer.
- 'jq' must be installed on your machine.
- You have the TIBCO Mashery Local Installer in tar.gz format (Example : TIB_mash-local_5.2.0.60_cf.tar.gz) on your machine.
Platform Prerequisites
The quick start setup is supported on Linux-based and MacOS-based machines. Quick start uses the local physical machine and not a virtual machine. It sets up a bare-metal swarm cluster of one node (the local physical machine) and one instance of each type of component. It creates a Docker overlay network for the components to communicate over. There are no additional prerequisites for the quick start setup.
Planning
The Mashery Local cluster has a single, logical zone, one instance of each type of component, and uses the local machine as the single node. No additional planning is required for the quick start setup.
Configuration
The Mashery Local cluster created using the quick start setup uses the untethered mode of configuration. It uses default credentials and does not need any user inputs to configure the properties, sizes or credentials.
Building and Deploying
- Extract the Installer tar.gz file to your desired location and navigate to the folder /<Extracted Folder>/tml-quickstart/ on your terminal.
- For smooth execution, if it recommended to stop any previously-running tml-installer container (if any) and remove the volme associated with it. Execute the following command in sequence. This step can be skipped if you are running tml-installer for the first time.
-
Currently, these parameters are mandatory.
Sample execution./quick-start.sh -b true -d true
- The installer will use default inputs and build the Mashery Local images.
- The quick start script will then create an overlay Docker network, use swarm to create a single node cluster and proceed to create the simple Mashery Local cluster.
- If everything goes well, the Mashery Local cluster should be ready in around 30-35 minutes (Including Mashery Local image building and deployment). At the end of the deployment stage, you may see the message Waiting for TML components to be ready for a long time (10-15 minutes) until everything is active.
- The
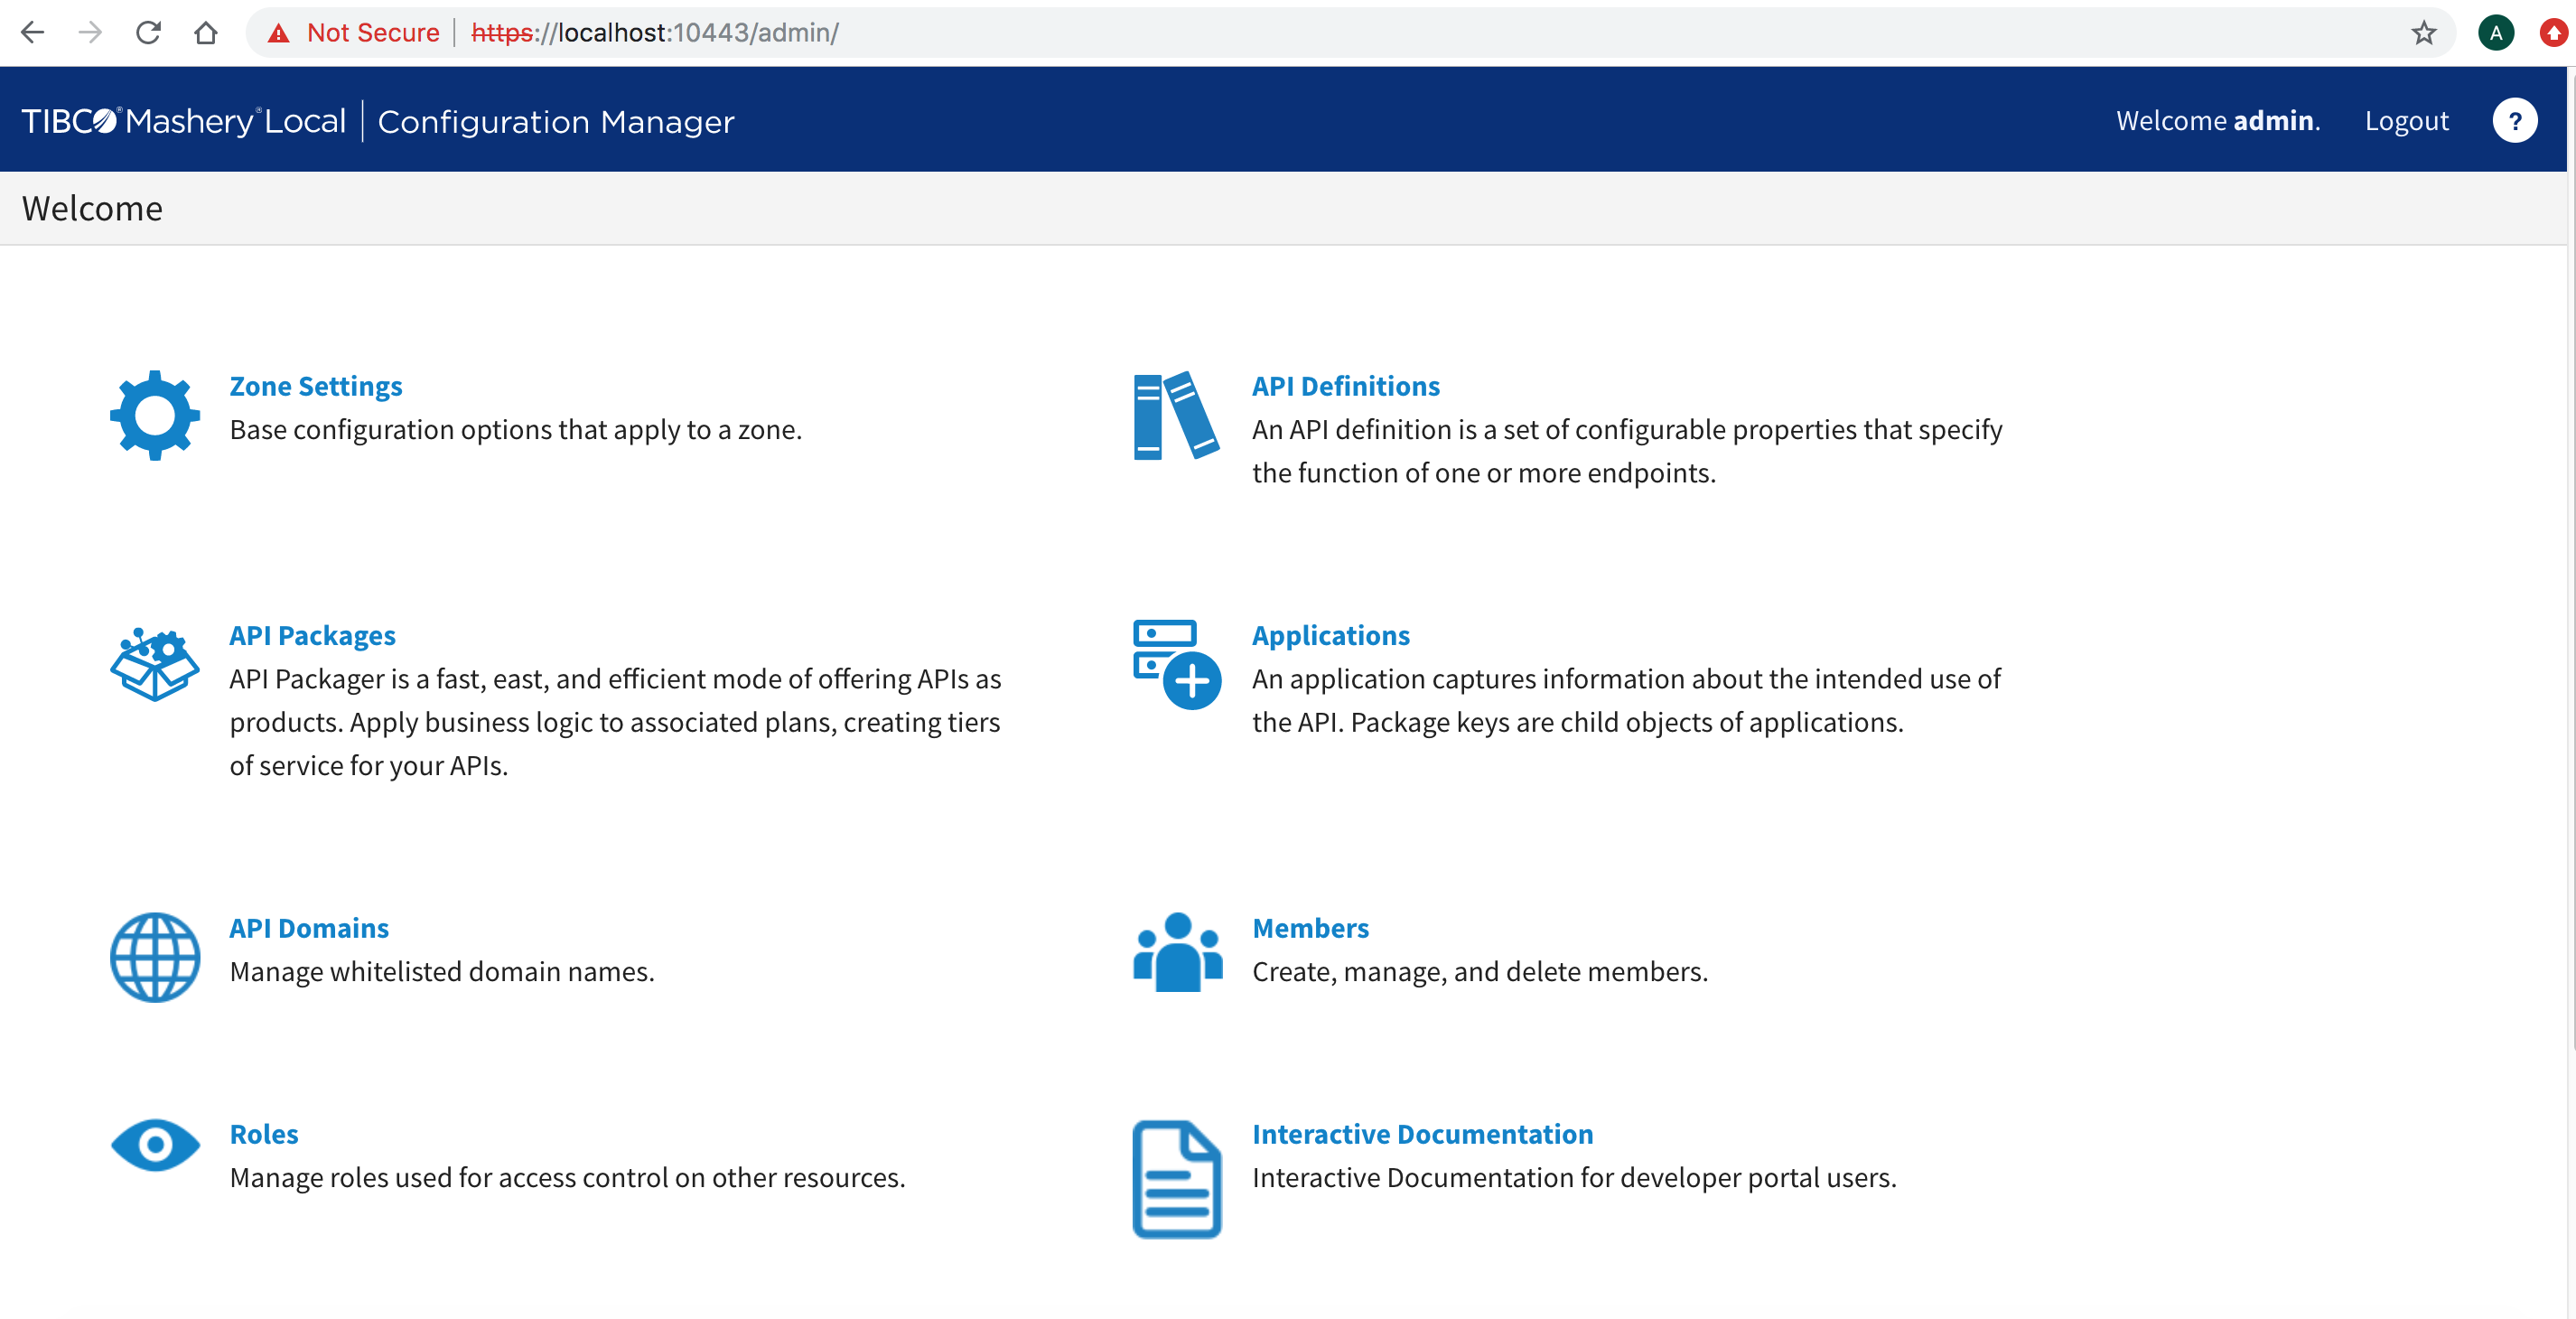
Developer Portal can be accessed at
https://localhost:10443/ and
Configuration Manager can be accessed at
https://localhost:10443/admin.
Note: Since the cluster is created with default values, you can use the following default username and password to login into Configuration Manager:
UserName: admin
Password: Ap1Us3rPasswd
The default username and password used to log in to the Configuration Manager can also be found in the tml_papi_properties.json file (see the Platform API Properties topic in Configuring Properties Common to all Deployments).
Troubleshooting
Other Use Cases
./quick-start.sh -b true -d falseIf you built the image previously, and now want to run deployment only, run the following script:
./quick-start.sh -b false -d true
Validating the Mashery Local Cluster
- Check the running Docker processes:
$ docker ps
CONTAINER ID        IMAGE                      COMMAND                  CREATED              STATUS                   PORTS                                              NAMES
8544fa2e38d4        tml-tm:v5.2.0.1            "/usr/local/bin/tm-e…"   About a minute ago   Up About a minute        22/tcp, 80/tcp, 443/tcp, 8000/tcp, 8083-8084/tcp   tmstack_tm.1.i40jamp8r5m6x6zoszezl7y0h
45bda152014d        tml-cache:v5.2.0.1         "/usr/local/bin/cach…"   About a minute ago   Up About a minute        11211-11216/tcp                                    cachestack_cache.1.nylb994ie42d7isjndap3cpvw
62186c91e18e        tml-sql:v5.2.0.1           "/usr/local/bin/sql-…"   About a minute ago   Up About a minute        3306/tcp                                           sqlstack_sql.1.4uk80bcz1dbrbpephki0ikx6r
5b22a452dc9f        tml-log:v5.2.0.1           "/usr/local/bin/log-…"   About a minute ago   Up About a minute        24023/tcp, 24220/tcp, 24224/tcp                    logstack_log.1.ue4vb7di5ir8sl55hb8y28fjl
5a527d7ef2ab        tml-cm:v5.2.0.1            "/usr/local/bin/cm-e…"   2 minutes ago        Up 2 minutes (healthy)                                                      cmstack_tmlcm.1.tj6dbpr1p6zjk4gfh482iwlmh
365297c18733        tml-nosql:v5.2.0.1         "/usr/local/bin/nosq…"   2 minutes ago        Up 2 minutes (healthy)   7000-7001/tcp, 7199/tcp, 9042/tcp, 9160/tcp        nosqlstack_nosql_seed.1.n2ci4fu3i75kc80lq7p49v24x
5bd04361f7ee        tml-installer:v5.2.0.119   "/sbin/tini -- /usr/…"   26 minutes ago       Up 26 minutes            0.0.0.0:8080->8080/tcp, 0.0.0.0:50000->50000/tcp   tml-installer
- Log in to the Configuration Manager container and check the components and their states:
$ docker exec -ti 5a527d7ef2ab bash
[root@5a527d7ef2ab builder]#
[root@5a527d7ef2ab builder]# alias cm=clustermanager
[root@5a527d7ef2ab builder]# cm ls components
Using cluster [Tibco Mashery Local Reference Cluster]
Using Zone [local]
Component ID                          Component Type       Component Name       Component Status     Component Host       Component Agent Port   Component Service Port(s)
------------------------------------- -------------------- -------------------- -------------------- -------------------- ---------------------- ---------------------------
b38efc8f-bffa-4a68-bcf5-a21370434b78  cache                cache                ACTIVE               10.0.0.12            9080                   11212,11211,11213,11214,11215,11216
f1d75242-4c67-4eb9-a8b3-63195689410c  configmanager        cm                   RESOLVED             10.0.0.6             9080                   7080
11261544-ef93-4d1f-8da9-af71b1593763  logservice           log                  ACTIVE               10.0.0.8             9080                   24224
66157d26-43b5-40ff-aefe-b1f52aa2f44b  nosql                nosql                ACTIVE               10.0.0.3             9080                   9042
fa66dcbb-35af-4fb3-bc87-09382c0f20ef  sql                  sql                  ACTIVE               10.0.0.10            9080                   3306
84792b97-b4ba-4a28-b7f4-1b5cfbd6c76a  trafficmanager       tm                   STANDBY              10.0.0.14            9080                   8080
- Check the status of the overall cluster and see what action is pending:
[root@5a527d7ef2ab builder]# cm cluster status
*** Checking the status of Cluster 'Tibco Mashery Local Reference Cluster' ***
*** Checking the status of zone 'local' ***
TML component [66157d26-43b5-40ff-aefe-b1f52aa2f44b] of type [nosql] found with status [ACTIVE] on Host IP [10.0.0.3]..
TML component [11261544-ef93-4d1f-8da9-af71b1593763] of type [logservice] found with status [ACTIVE] on Host IP [10.0.0.8]..
TML component [fa66dcbb-35af-4fb3-bc87-09382c0f20ef] of type [sql] found with status [ACTIVE] on Host IP [10.0.0.10]..
TML component [b38efc8f-bffa-4a68-bcf5-a21370434b78] of type [cache] found with status [ACTIVE] on Host IP [10.0.0.12]..
TML component [84792b97-b4ba-4a28-b7f4-1b5cfbd6c76a] of type [trafficmanager] found with status [STANDBY] on Host IP [10.0.0.14]. See details below
Component ID                          Component Name       Component IP         Component Status     Pending Activity     Error
------------------------------------- -------------------- -------------------- -------------------- -------------------- ------------------------------
84792b97-b4ba-4a28-b7f4-1b5cfbd6c76a  tm                   10.0.0.14            Not Ready
- After some time, the cluster status should turn READY. You can check the last failing component for its individual status as follows. In this case, the Traffic Manager is running on 10.0.0.14 IP:
[root@5a527d7ef2ab builder]# curl http://10.0.0.14:9080/container/status { "tmgcId" : "84792b97-b4ba-4a28-b7f4-1b5cfbd6c76a", "ip" : "10.0.0.14", "name" : "tm", "pending_activity" : "checking component status ...", "status" : "Ready" } - As seen in previous step, the Traffic Manager is in ready status, despite what the pending activity indicates. The pending activity was the last successful activity performed by the container agent.
Creating the Cluster Configuration
- Login to Configuration Manager.
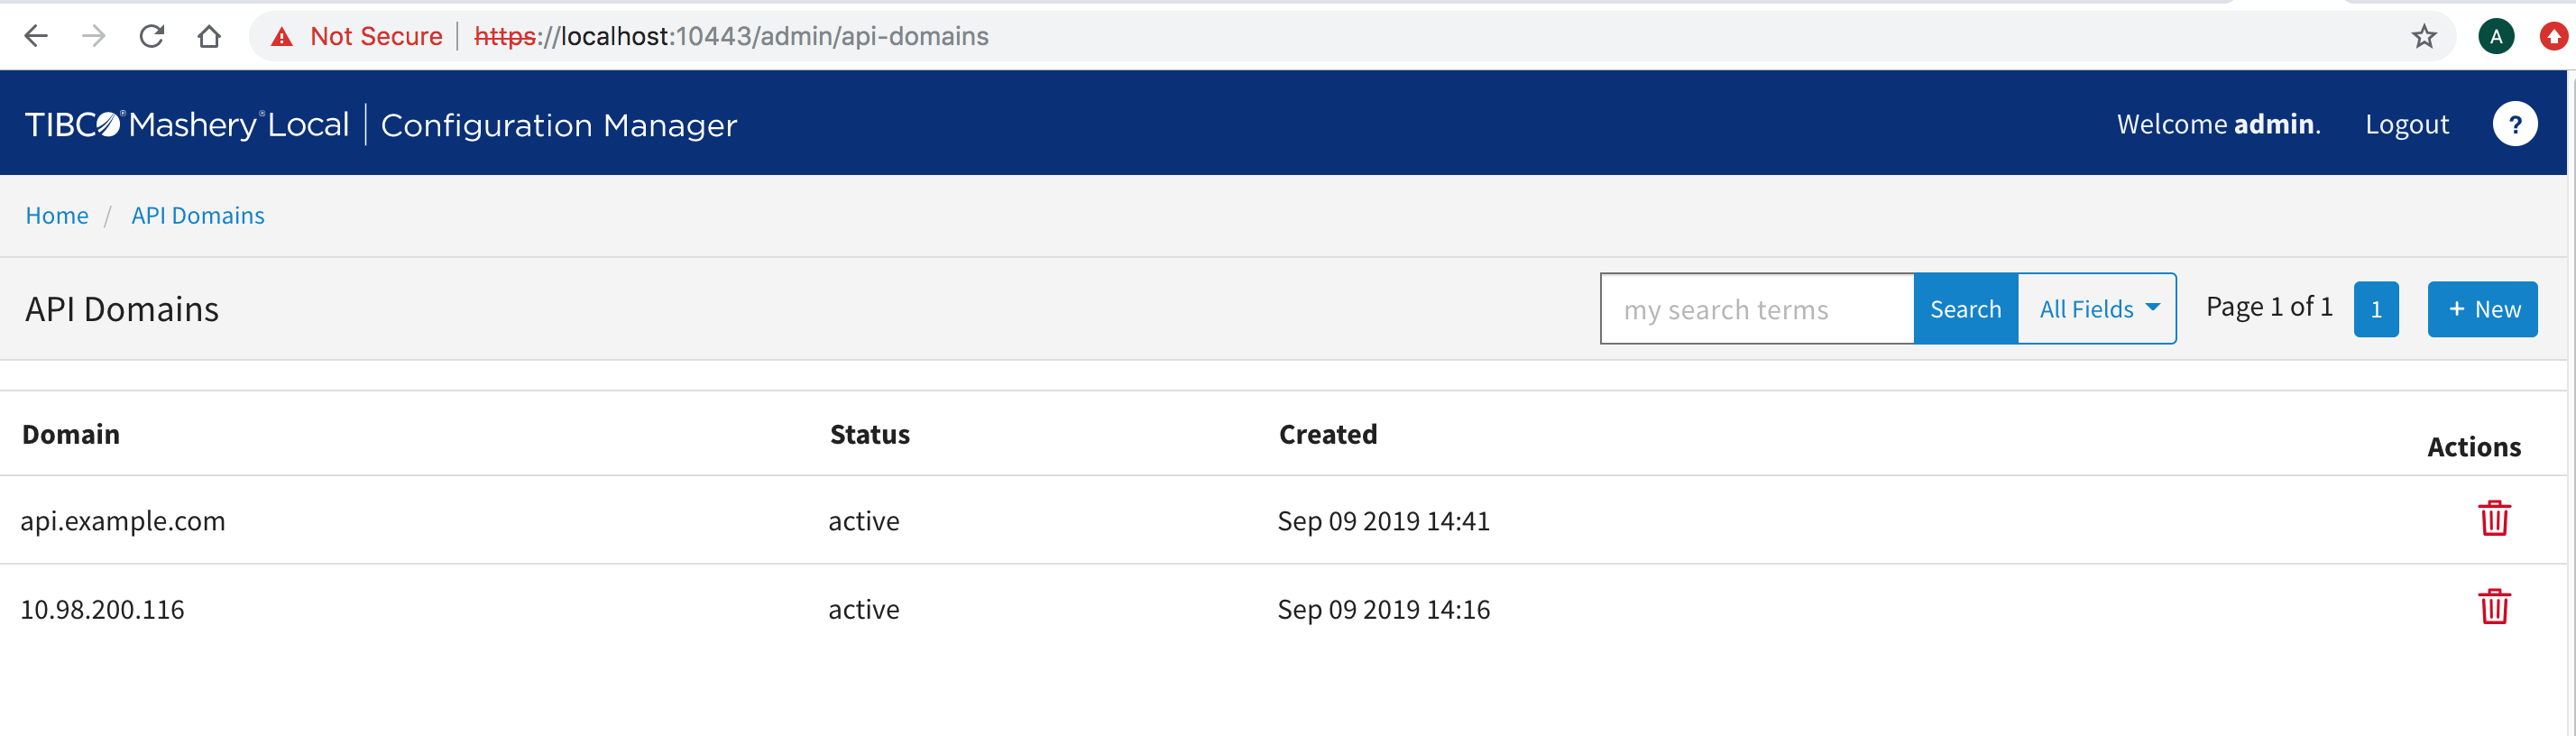
- Click on
API Domains to whitelist your public and internal api domains. Create a new entry for the external and internal domain you plan to use.
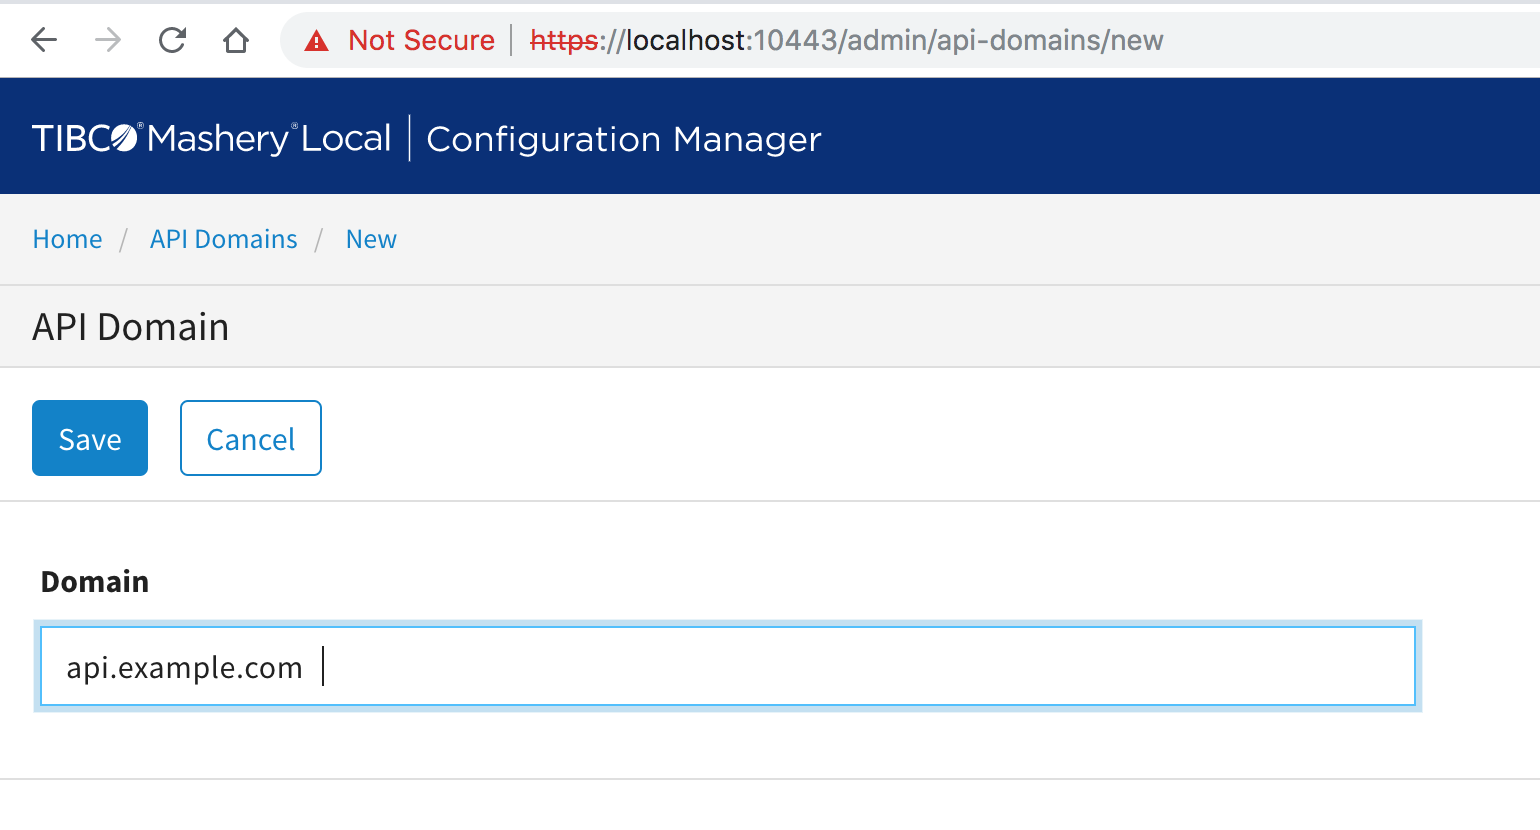
- Here, create two entries:
- api.example.com: The public domain name that you plan to use.
- <your local ip address>: To access your internal Hello World service that runs on your local machine.
- Return to the main screen and click
API Definitions. This is where you'll link your public and internal APIs.
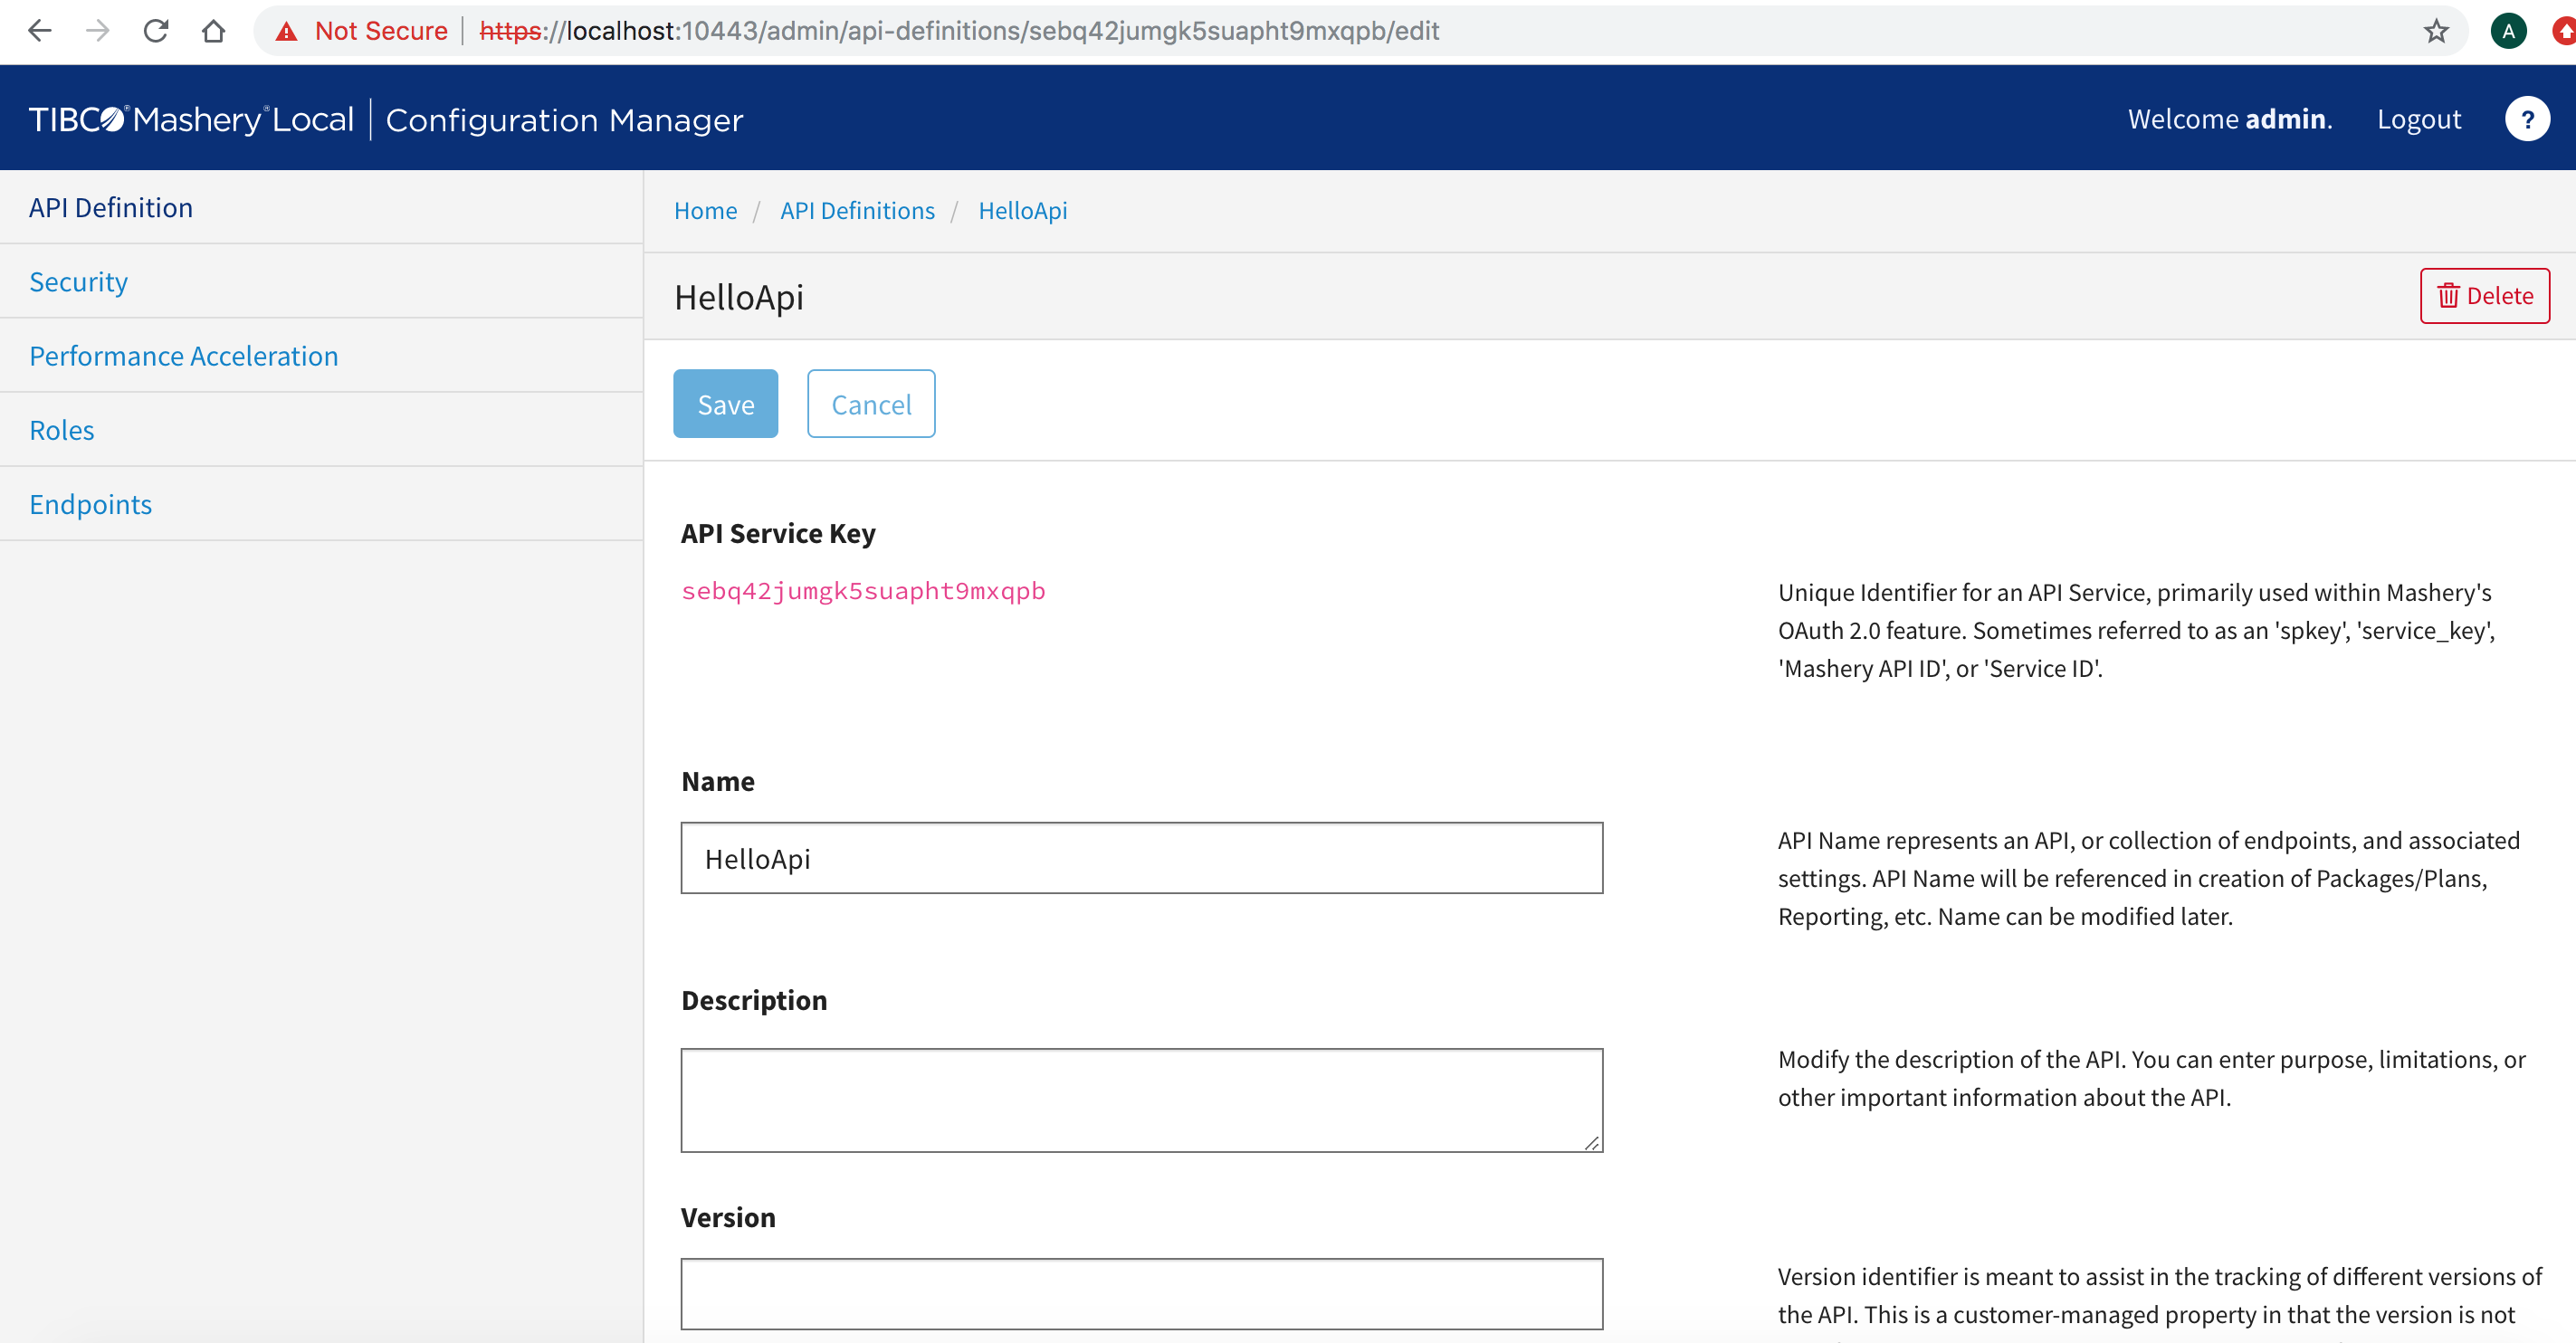
Create an API called HelloApi. - Click on
Endpoints on the left-hand navigation. Now you can link the public and internal domains that you whitelisted earlier and specify the API path details.
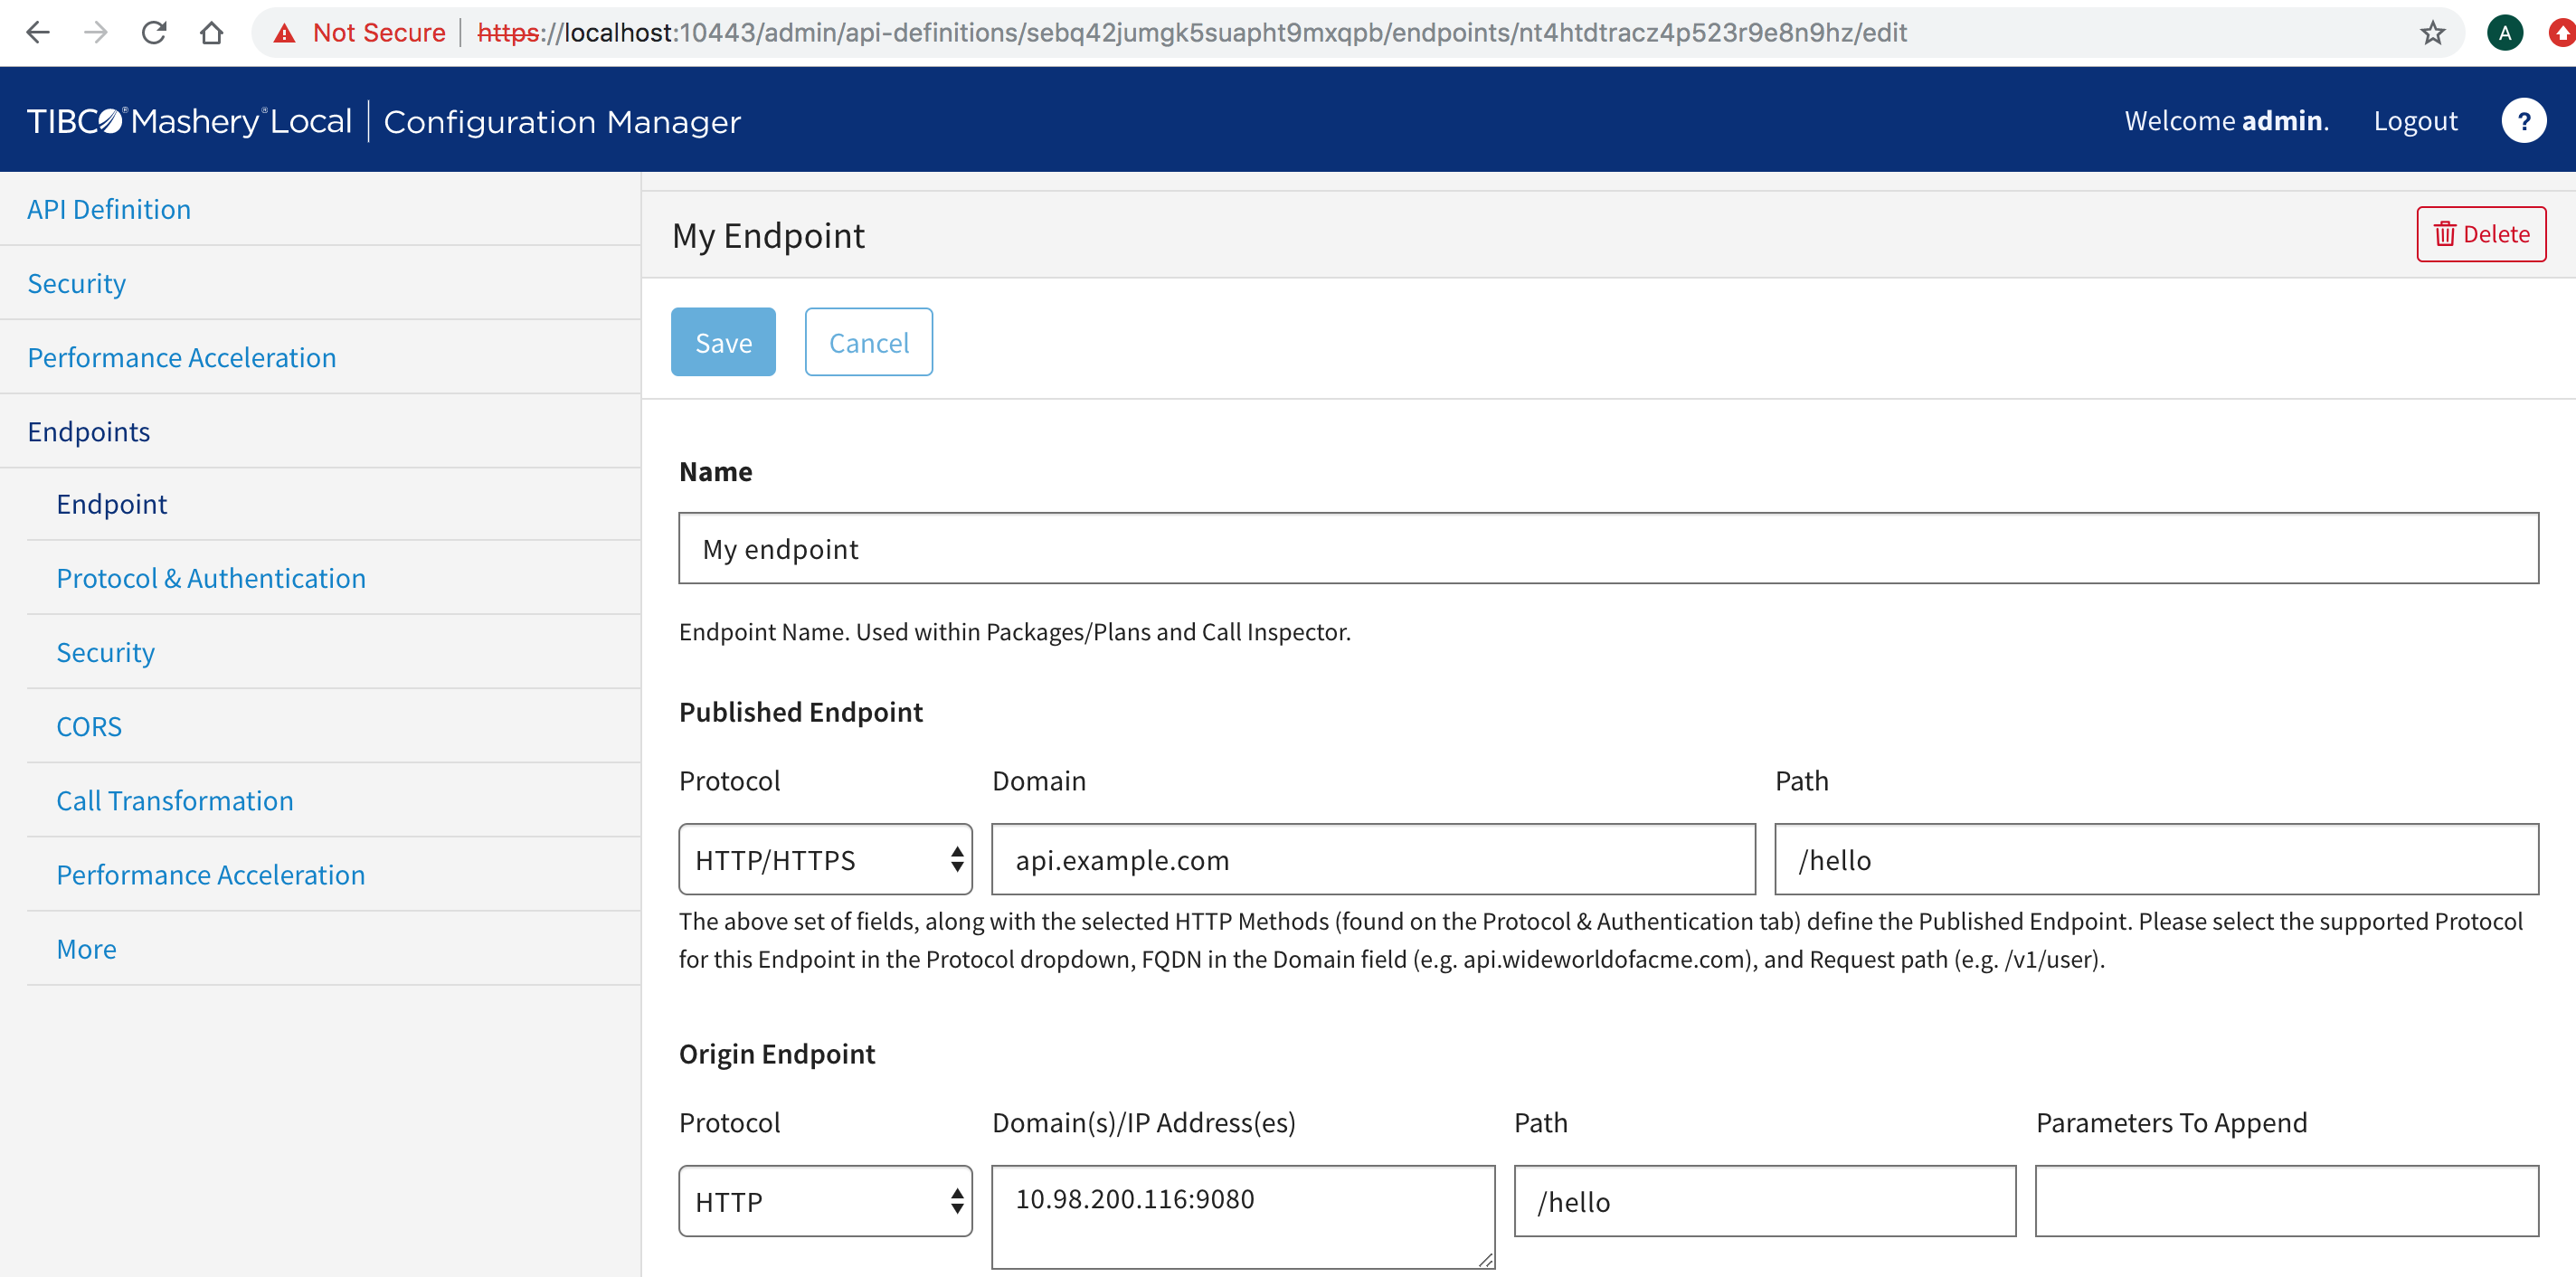
The published Endpoint will specify the publicly-accessible domain and path for your API. In this example, it would be api.example.com.
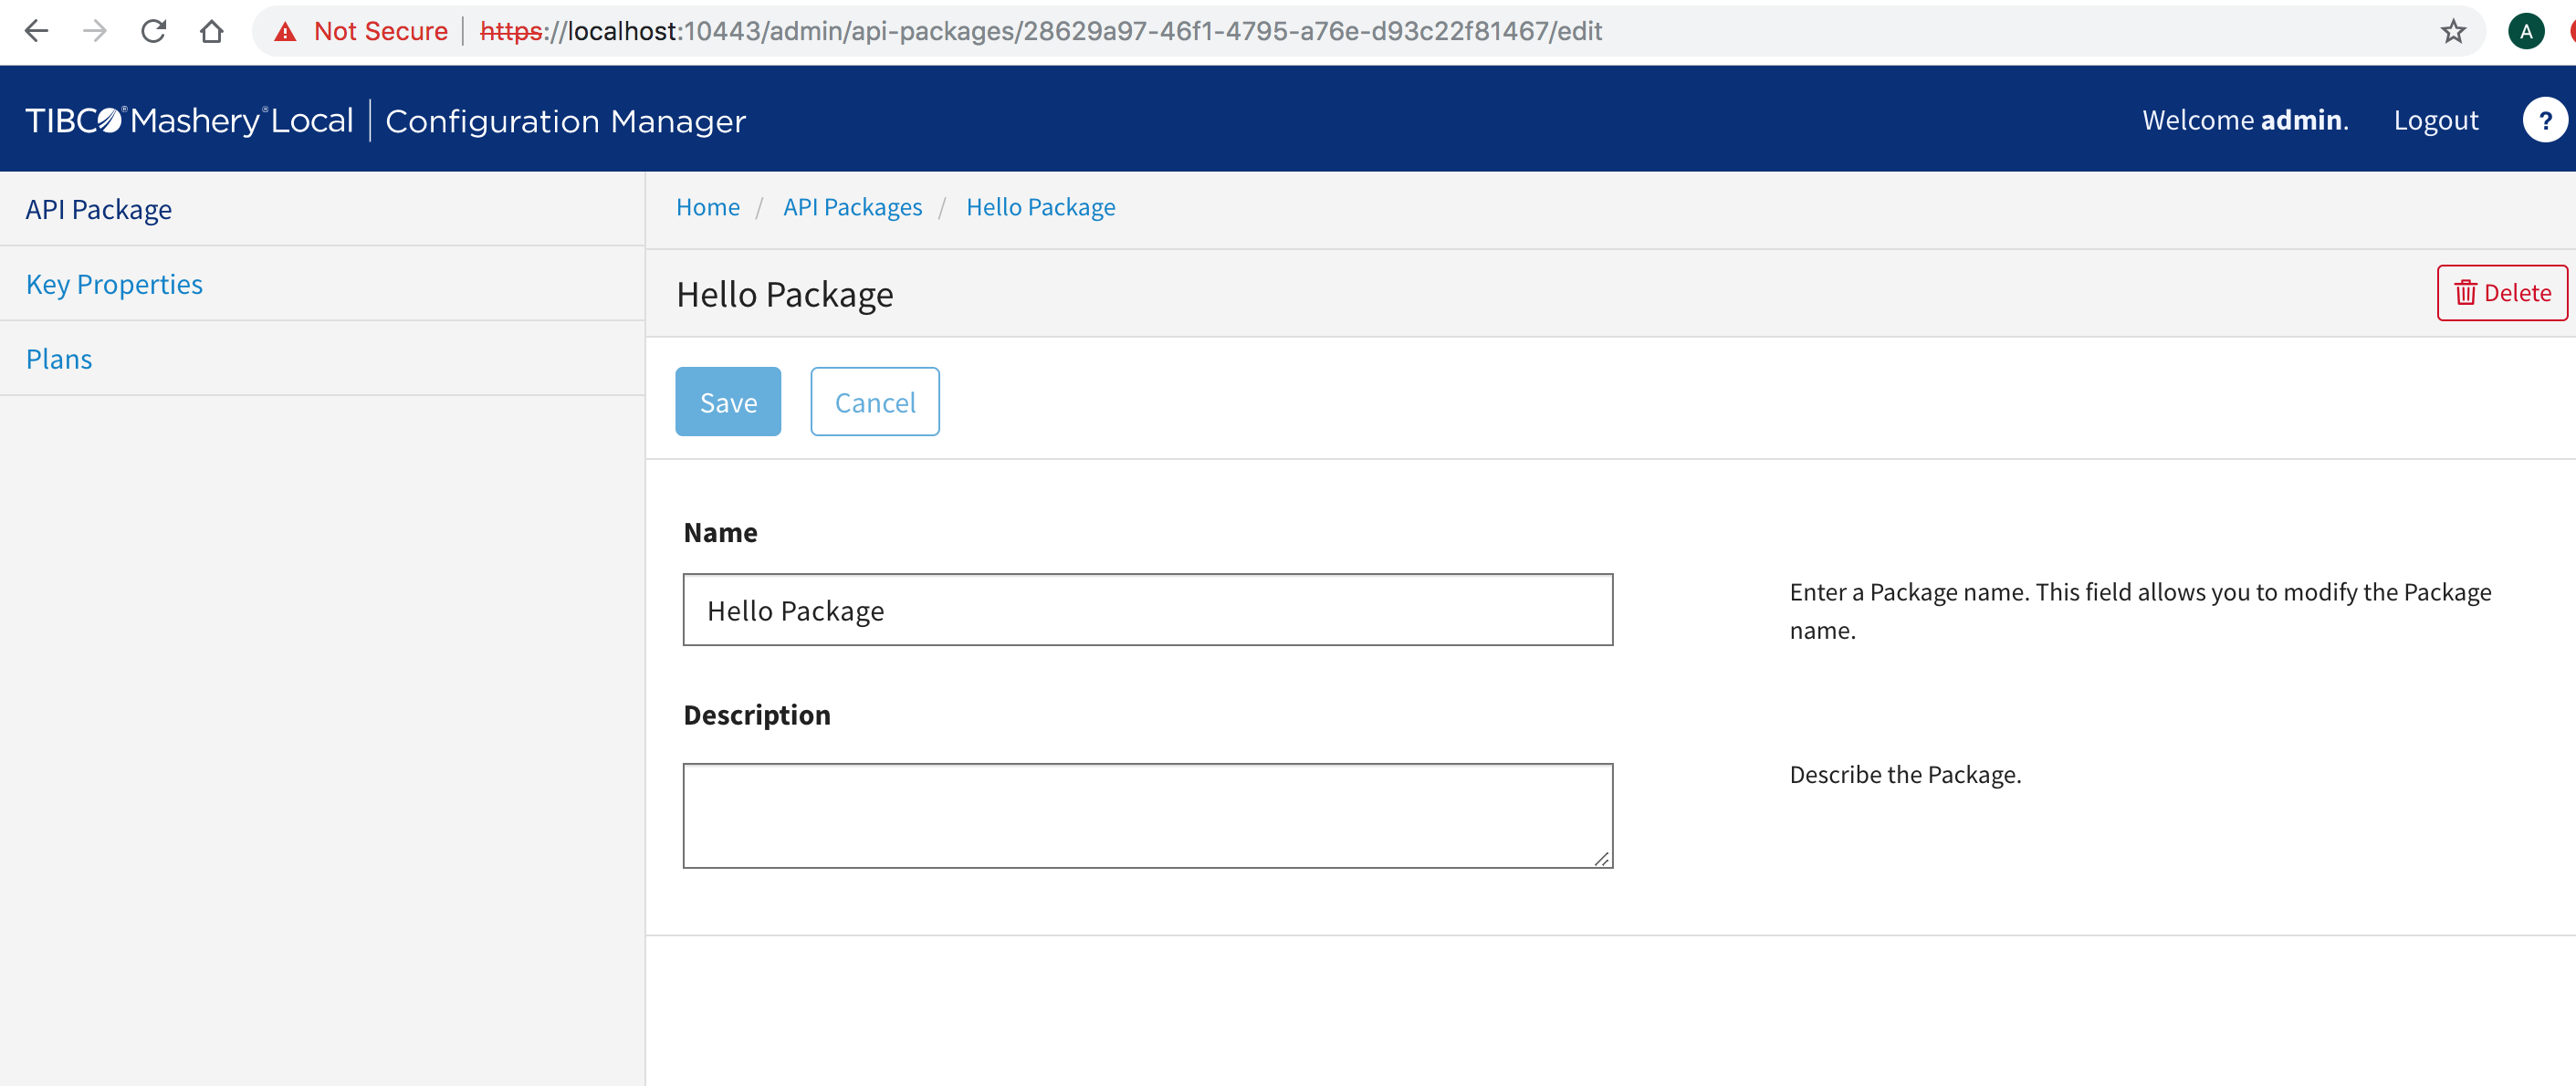
The Origin Endpoint will contain details about the service to be accessed. For this example, your hello service is used, which runs on your <local ip> on port 9080 having path /hello. - Now, return to the main screen and click on
API Packages. For your reference, the API package is called
Hello Package.
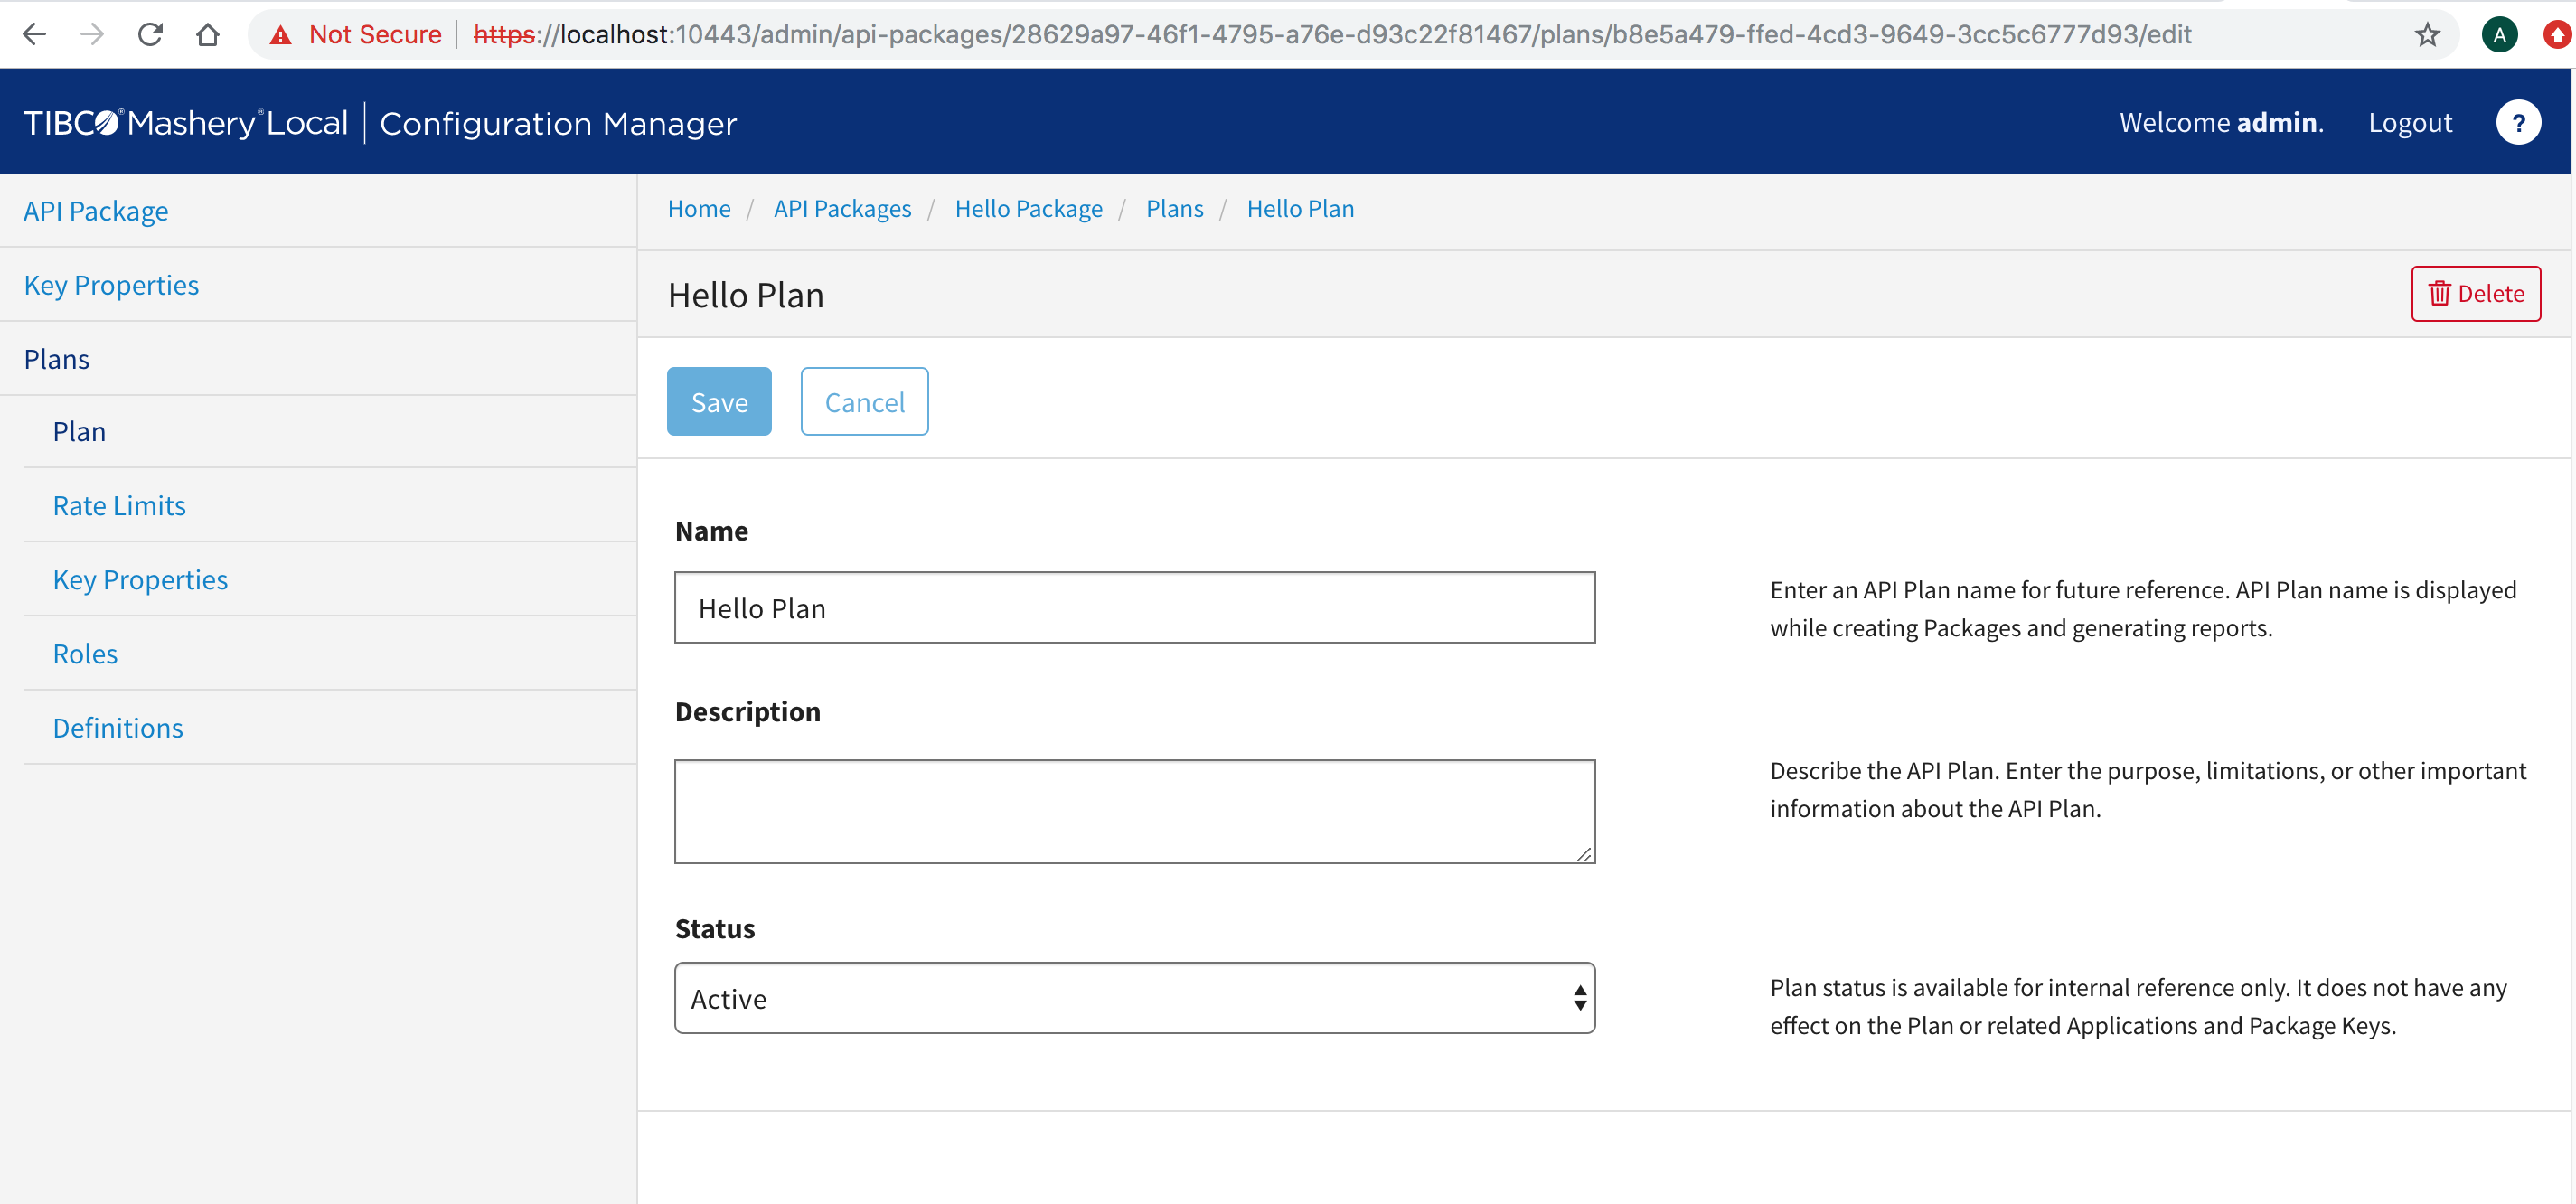
- Click on
Plans on the left-hand navigation and create a new Plan. For your reference, the Plan is called
Hello Plan.
- Click on
Definitions to link your previously-created endpoint to this package and plan.
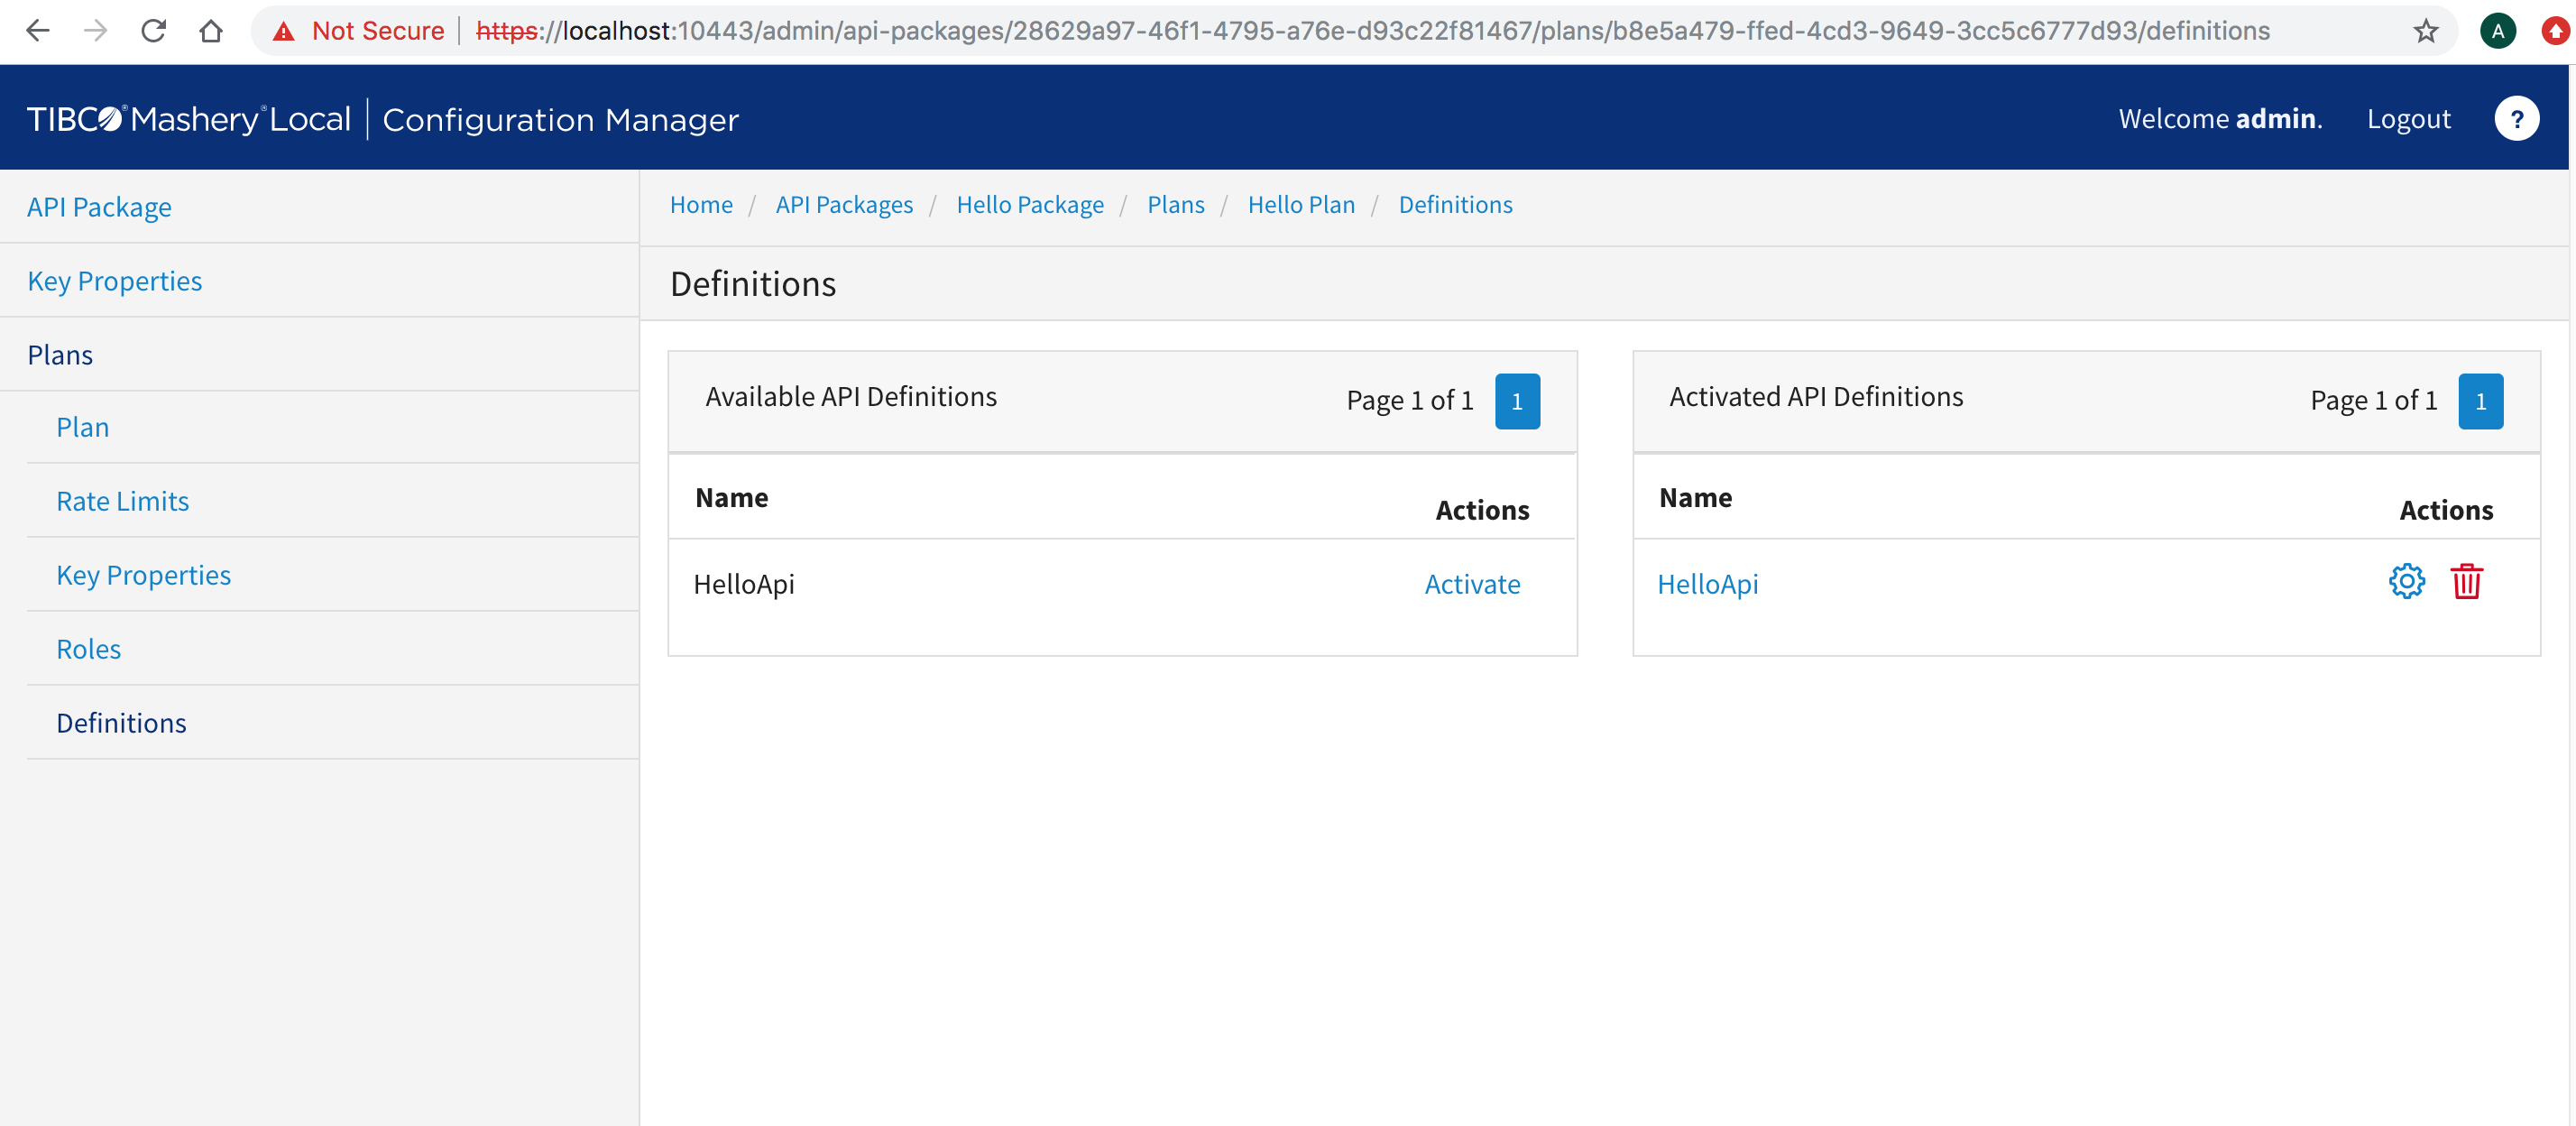
Activate the API definition to associate with your package and plan from the available list of "Available API Definitions".
Once you activate the API defintions, they will show up as Activated API Definitions as seen in the previous screenshot.
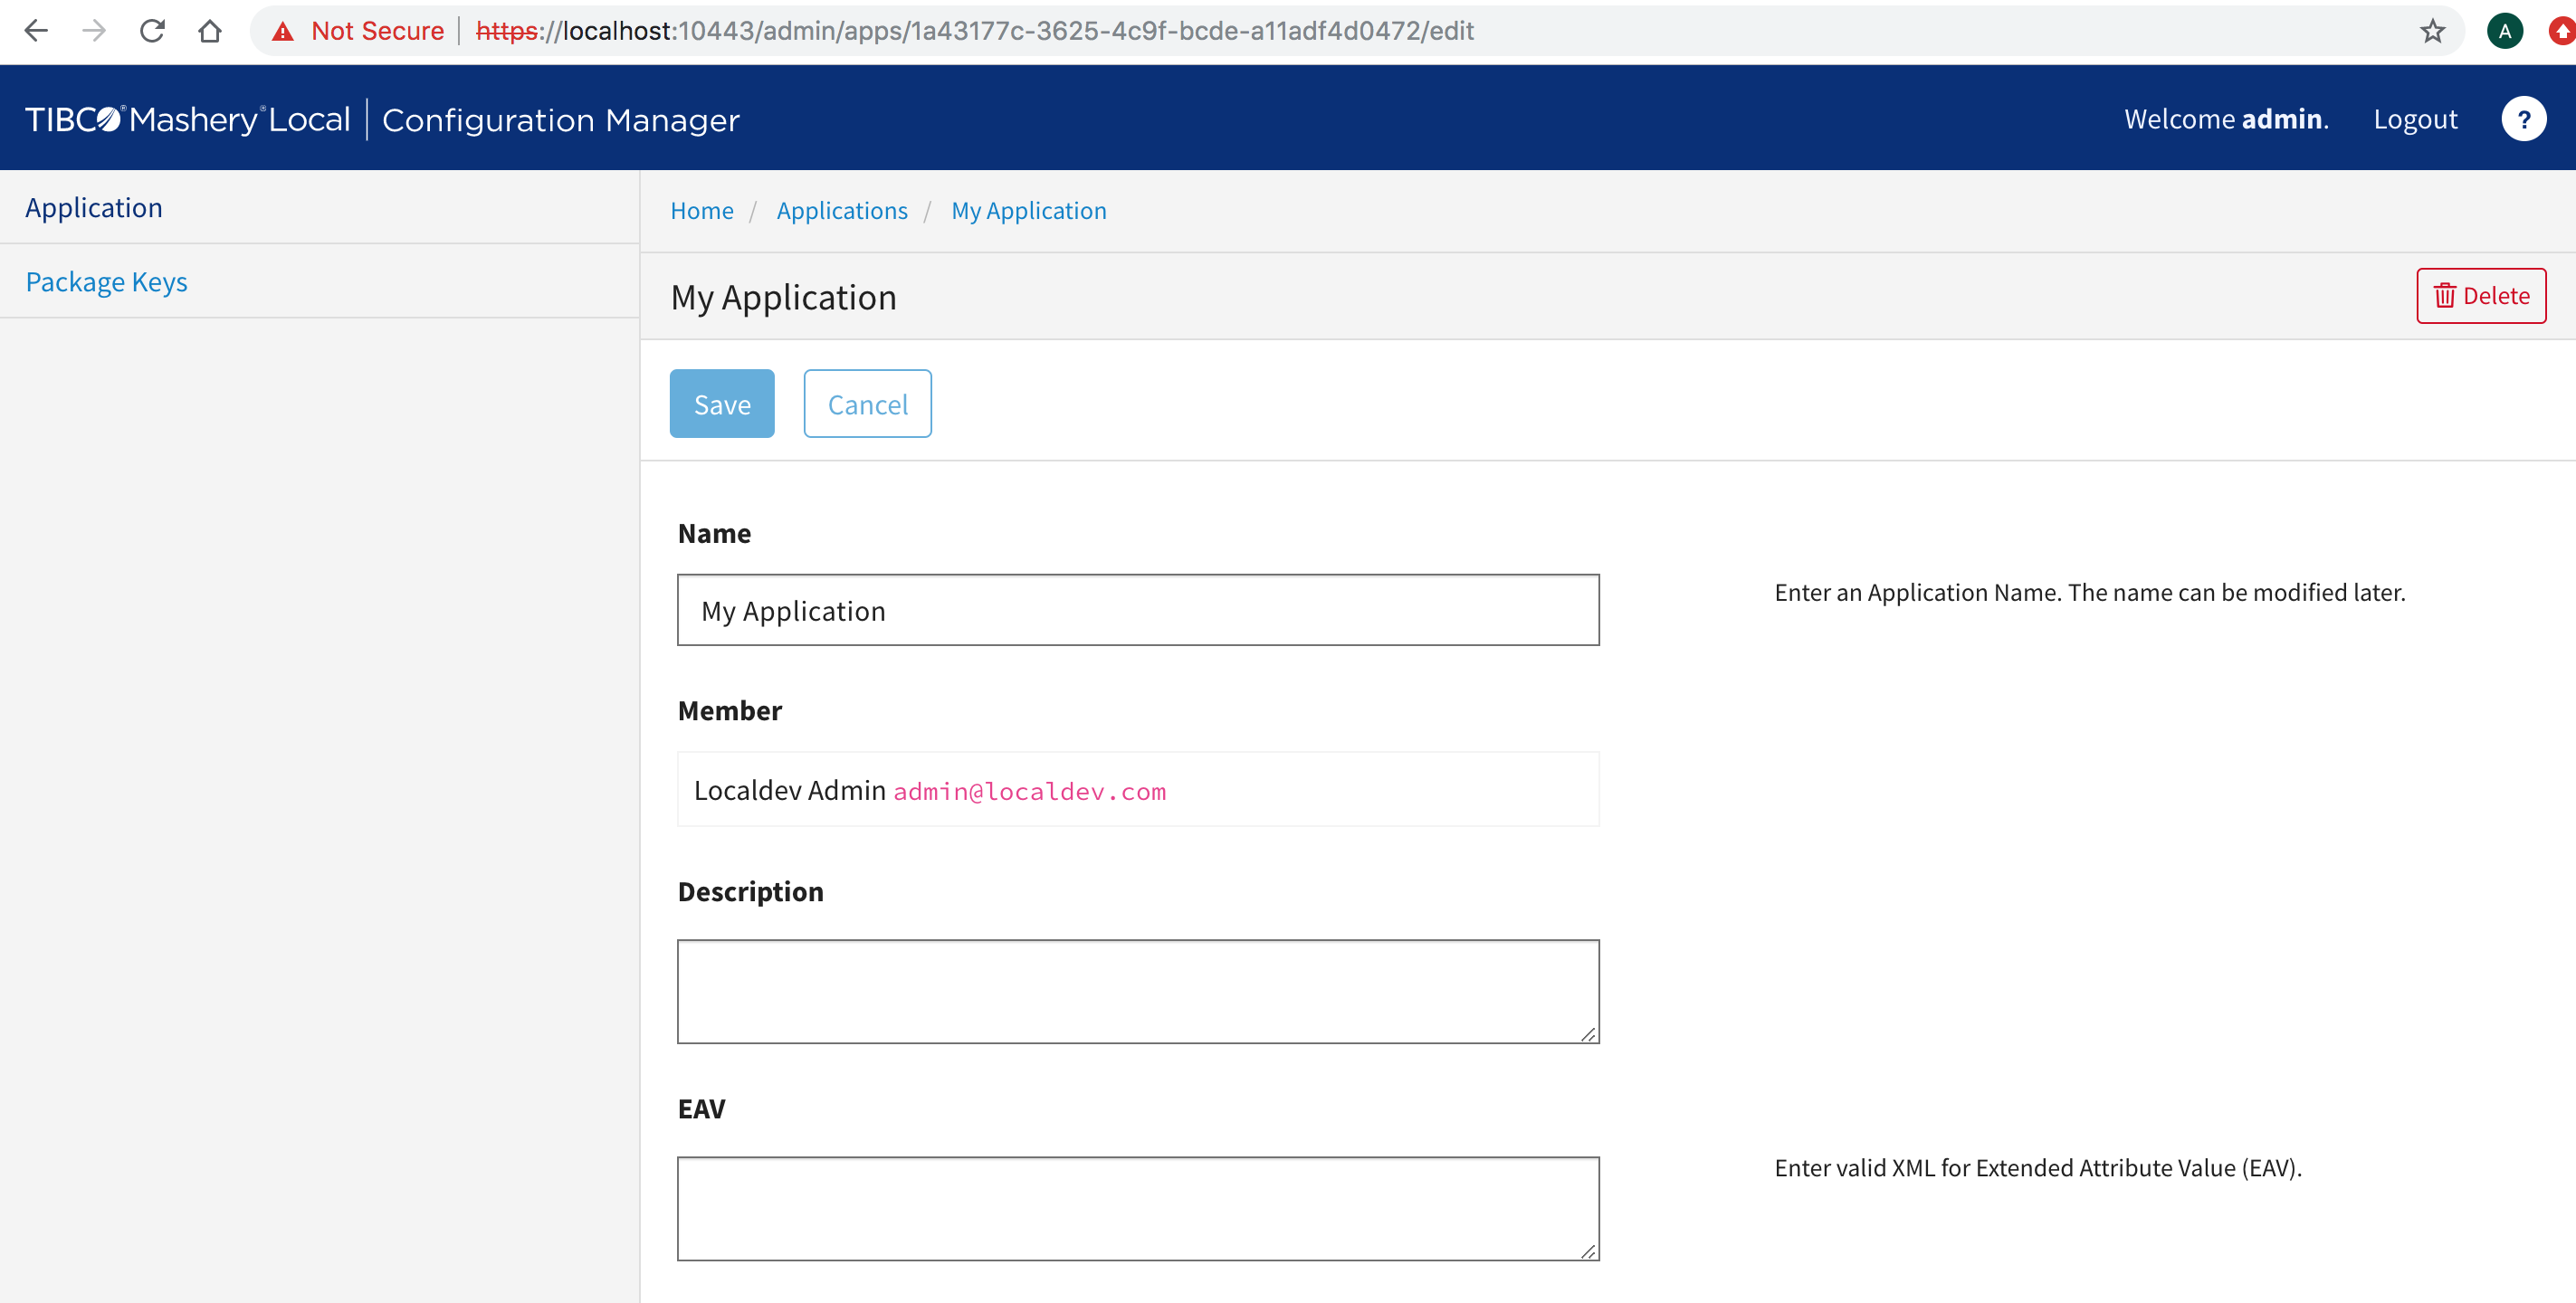
- Return to the main screen and click on
Applications. Create a new Application and select a member for it.
- Click Package Keys on the left-hand navigation and create a new API key for your service.
- Choose your package and plan. In this example, select
Hello Package and
Hello Plan. Make sure the status is changed to
Active, then click
Save.
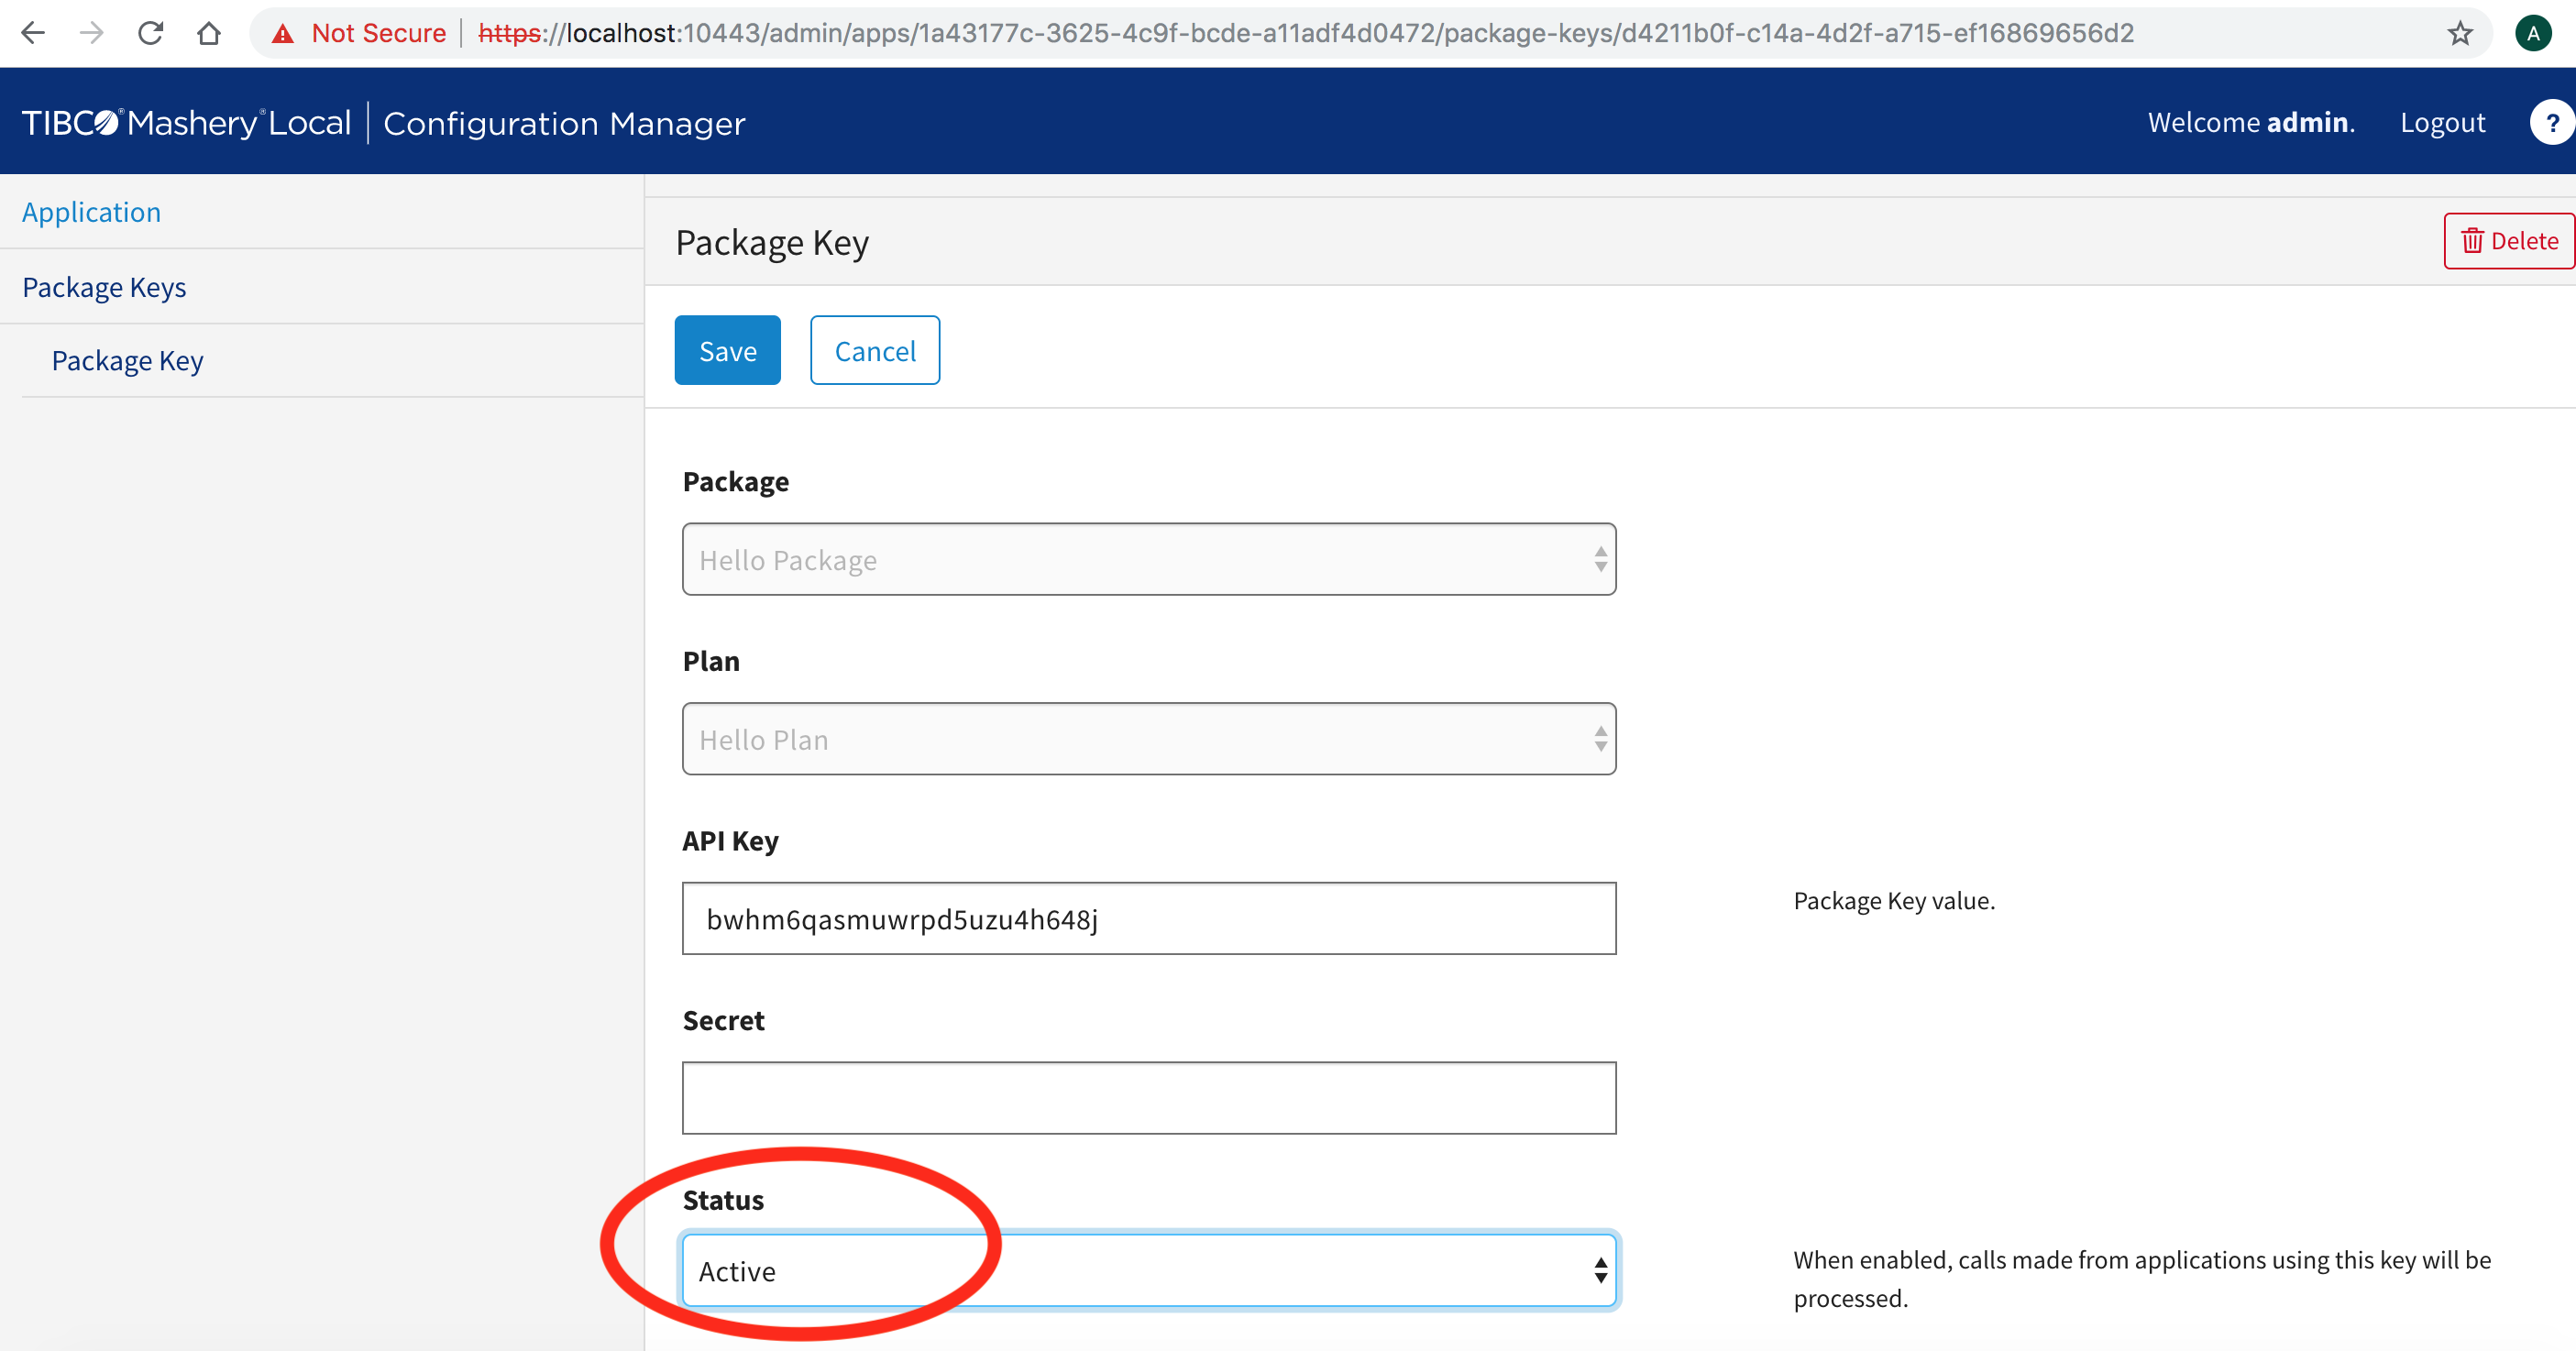
- When you click on
Package Keys on the left-hand pane, you should see the API key as
ACTIVE.
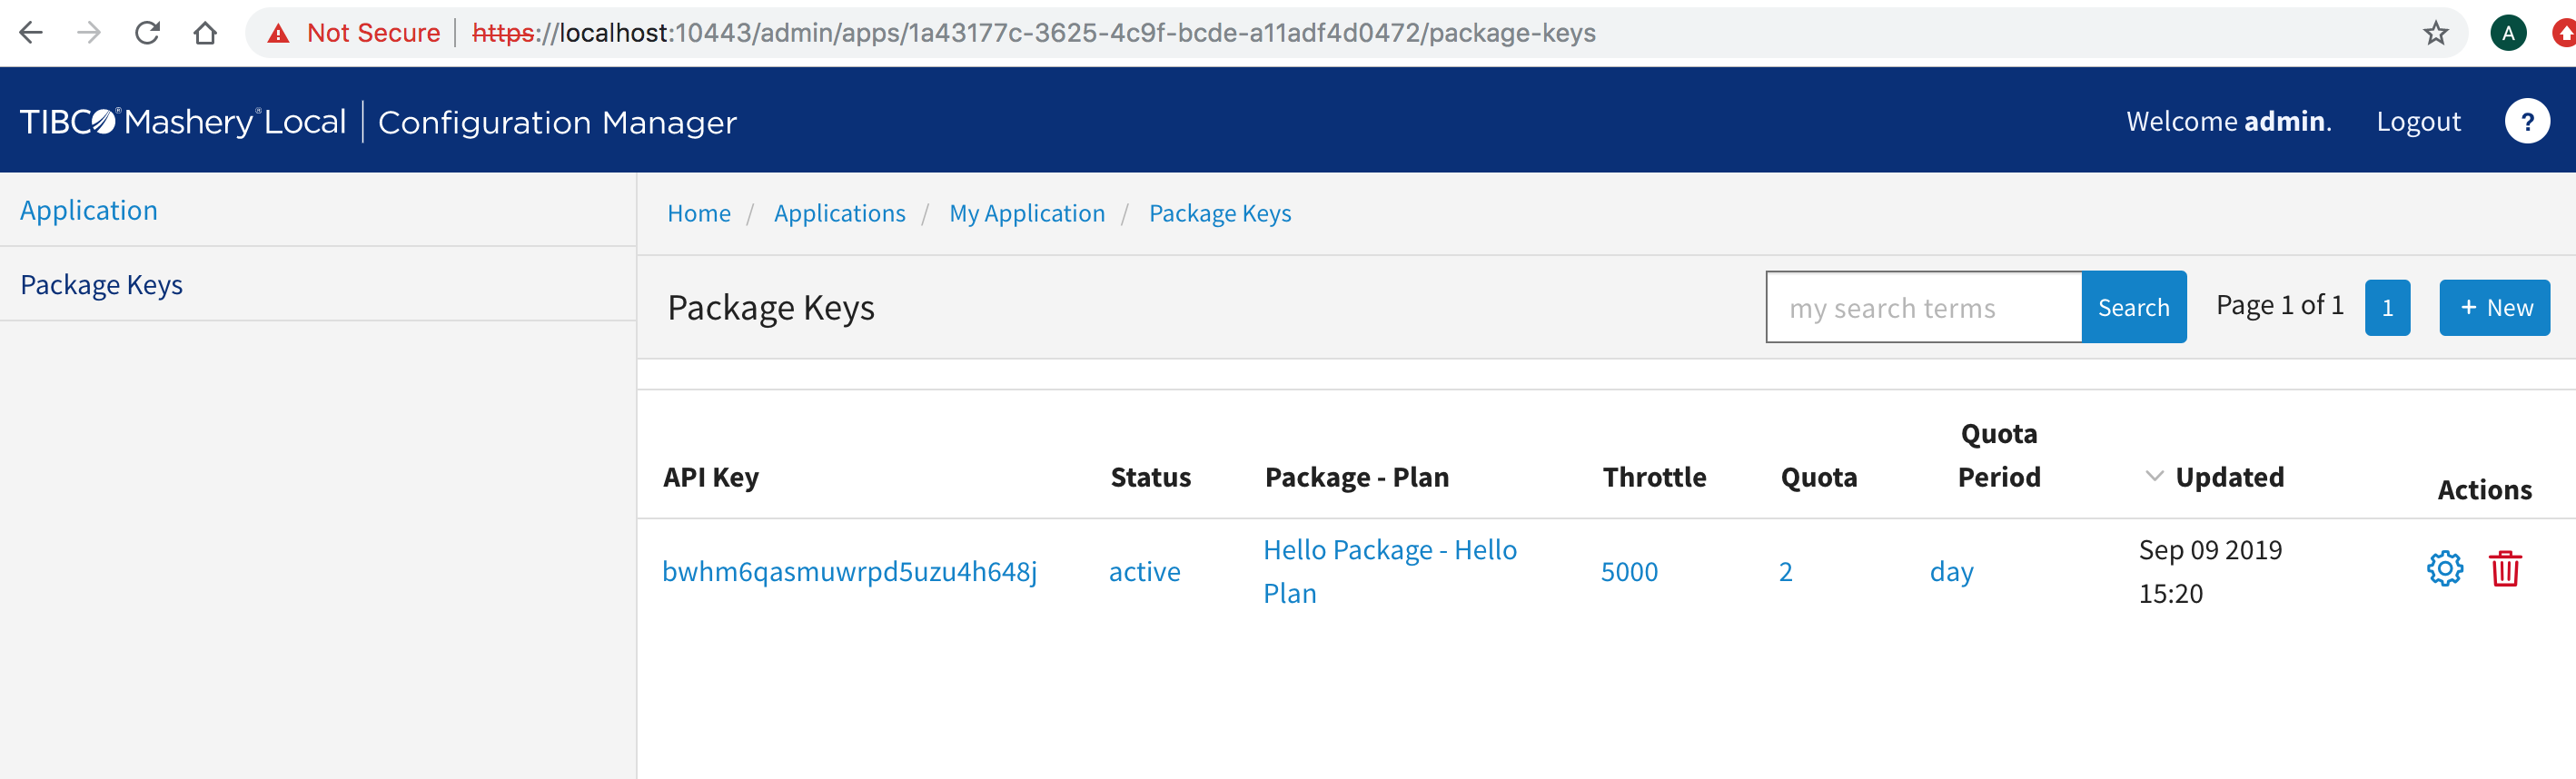
-
Once the API key is ACTIVE, note your API key value. Your endpoint will now flow through Mashery Local and should be available for successful invocation in a maximum of 15 minutes.
- Test the API key by invoking the curl call:
$ curl -H 'Host: api.example.com' 'http://localhost/hello?api_key=bwhm6qasmuwrpd5uzu4h648j'

{"time":"2019-09-09 22:36:02.630+0000","message":"Hello world"}