Hierarchy Editor
You can access the hierarchy editor by clicking Edit on the view hierarchy page and by clicking . Hierarchy is represented as a tree graph on the user interface. By default, the tree graph spans from top to bottom. The easiest way to understand the structuring of the hierarchy model is to hover over the different nodes of a hierarchy.
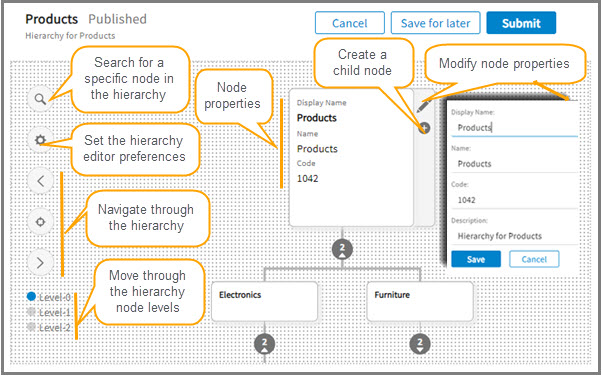
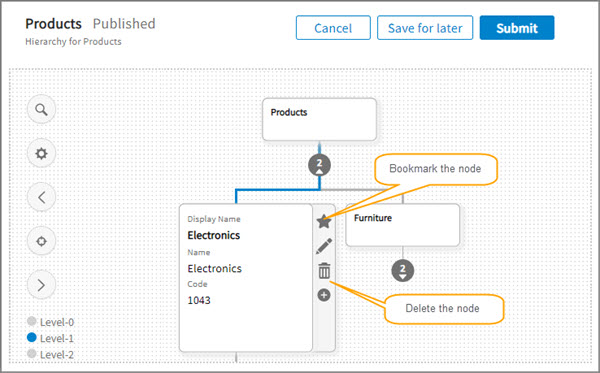
- When you select a node (root or child), a toolbar is displayed on the right side of the node with a list of actions that can be performed.
- To search for a specific node in the hierarchy, click the
Search icon and type minimum of three characters to view the search result. The search result is matched against the code, name, and display name properties of the nodes.
The search result displays the details about the matched property. You can select one of the matched results to navigate directly to the matching node on the hierarchy tree graph.
If the search result contains more than five entries, the More results link is displayed.
- Set or change the preferences of the hierarchy. The tooltip is available for all the preferences options.
Preferences are saved for the user session, that is, for two different users two different preferences setting can be applied.
- Navigate the hierarchy tree on the left, right, and at the center of the canvas.
Click the level number to directly navigate to the selected level in the tree. For example, if you click Level-0, the root-level hierarchy node is displayed.
- Cancel, save, or submit the modified hierarchy. For information, see Creating Hierarchy.