Creating Hierarchies

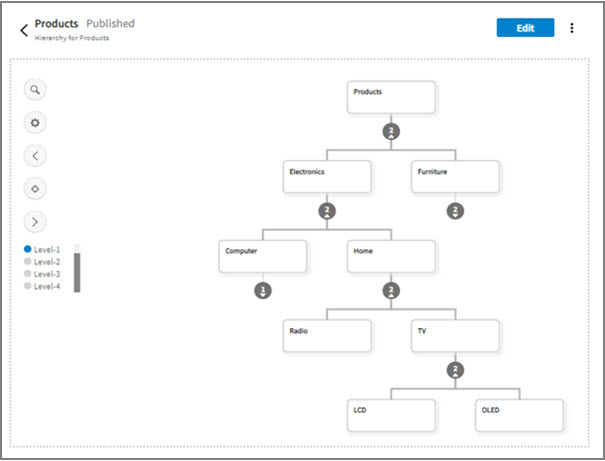
Create a hierarchy from the beginning. By default, an initial node (root node) is available, and you can create a fully functional hierarchy from this starting point. Root node properties also define the hierarchy properties example name. The following diagram illustrates the sample product hierarchy:

Procedure

  1. On the Hierarchies page, click Create > New Hierarchy.
    The NewHierarchy_nodeID node is displayed on the hierarchy editor. The node name is displayed based on the value defined in Configurator for the Hierarchy name default value configuration property. For information, see Configuration Properties for Hierarchies.
  2. In the hierarchy editor, click the NewHierarchy_nodeID root node on the graph.
    Note: The root node is a starting point already available on the hierarchy editor. You can rename the hierarchy by editing the details of the root node. For example, the Products hierarchy.
    The selected hierarchy root node is expanded with its properties. For information about properties, see Properties Displayed on the Node.
  3. When you select a node, a toolbar with icons is displayed on the right of the selected node. Each icon represents some actions to be performed on a node. For icons and their description, see Hierarchy Editor.
  4. Add nodes to the hierarchy.


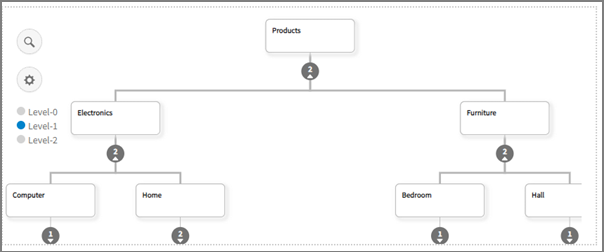
    After adding nodes, the updated hierarchy is:
    Products/Electronics/Computer
    Products/Electronics/Home
    
    Products/Furniture/Bedroom
    Products/Furniture/Hall
    Add some more nodes.

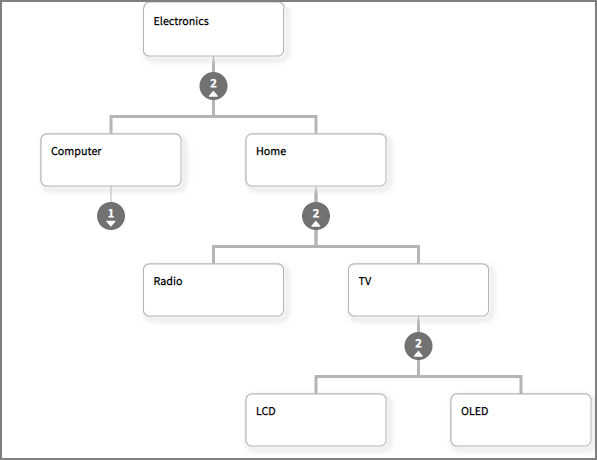
    After adding some more nodes, the new hierarchy is:
    Products/Electronics/Home/Radio
    Products/Electronics/Home/TV/LCD
    Products/Electronics/Home/TV/OLED
    
  5. To save the hierarchy in the Draft state, click Save for later.
    Partially completed changes are saved for later use. To edit the draft hierarchy, see Hierarchy Viewer.
  6. To initiate hierarchy workflow to process all the changes, click Submit.
    When submitting the hierarchy, you can provide an optional comment with the changes done. In the Comments box, type the comment. This comment can act as a reason for the changes done and can be viewed in the hierarchy work item and hierarchy history pages.
    Note: If you have already set the Hierarchy Create Approval business process rule, the hierarchy work item is created. Navigate to Inbox and submit the work item to complete the workflow.