Configuring TIBCO MFT Platform Server for Windows Transfer Templates
TIBCO MFT Platform Server for Windows user must configure the transfer templates to transfer files with TIBCO MFT Internet Server.
Configuring a TIBCO MFT Platform Server for Windows Transfer Template to Upload Files to TIBCO MFT Internet Server.
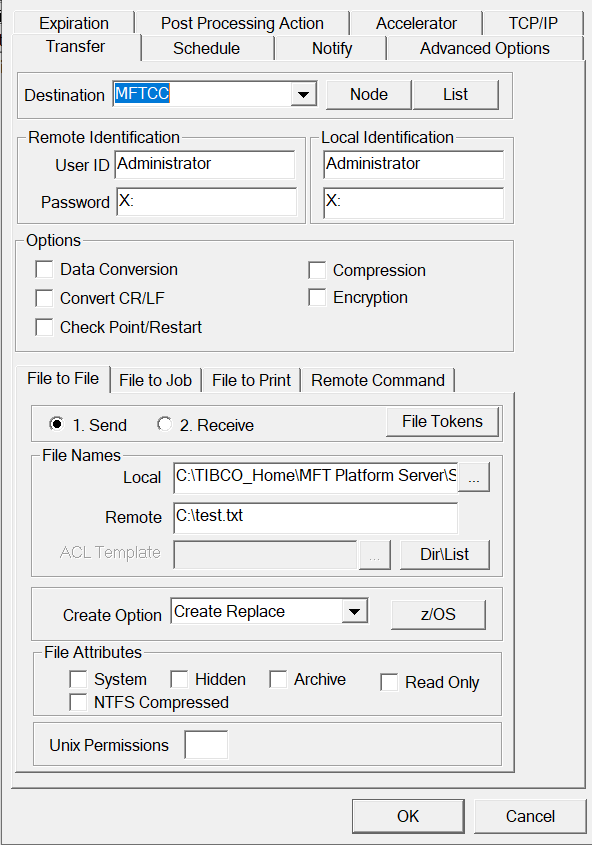
TIBCO MFT Platform Server user must configure a transfer template to upload a file to TIBCO MFT Internet Server. The following figure shows an example of a transfer template from TIBCO MFT Platform Server for Windows that coincides with our TIBCO MFT Internet Server file transfer definition configured in Adding an Upload and a Download File Transfers.
Notice these key parameters: Destination (TIBCO MFT Internet Server), User ID (TIBCO MFT Internet Server user ID), and Remote File Name (TIBCO MFT Internet Server virtual alias in upload file transfer definition).
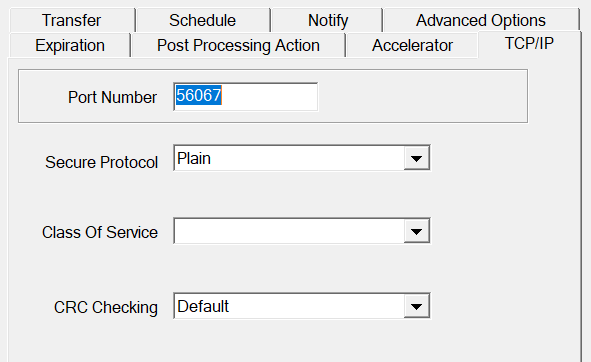
Ensure the port defined is same as the one configure in the TIBCO MFT Internet Server Configure Platform Server page. This would be located on the TCP/IP tab for the transfer template:
When the transfer panel is completed, click OK.
The information entered on the TIBCO MFT Platform Server transfer panel will go to TIBCO MFT Internet Server (based on the destination and port number), and pick up the file transfer definition based on the virtual alias information used. Then, the TIBCO MFT Internet Server will send the transfer to the proper remote system based on the server name defined. In this case, the file is uploaded to *LOCAL which is the TIBCO MFT Internet Server.
Configuring a TIBCO MFT Platform Server for Windows Transfer Template to Download Files from TIBCO MFT Internet Server.
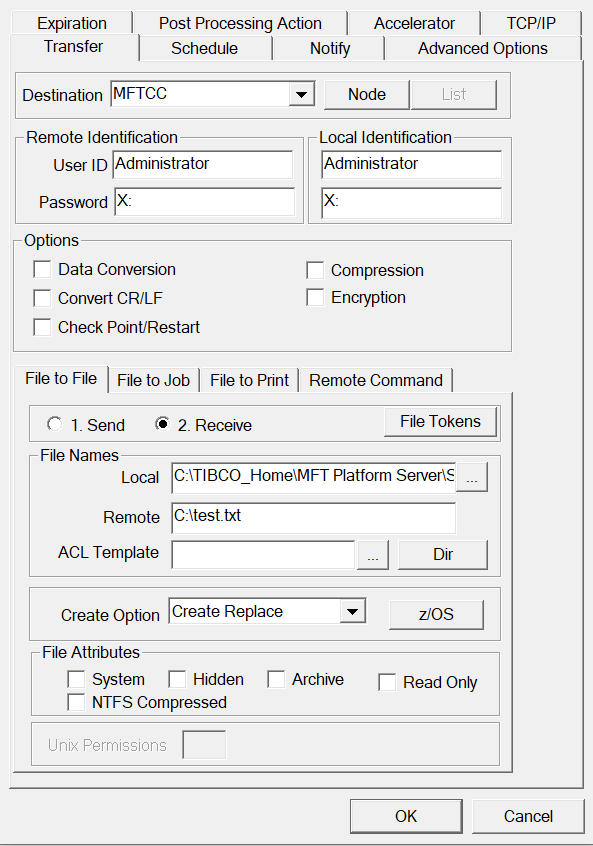
Now TIBCO MFT Platform Server user must configure a transfer template to download files that will be coming from the remote Linux server through TIBCO MFT Internet Server. Below is an example of a transfer template from TIBCO MFT Platform Server for Windows that coincides with the TIBCO MFT Internet Server file definition configured above in Adding an Upload and a Download File Transfers.
Notice these key parameters: Destination (TIBCO MFT Internet Server), User ID (TIBCO MFT Internet Server user ID), Local File Names (using file name tokens), and Remote File Name (TIBCO MFT Internet Server virtual alias in upload file definition).
It is good practice to add the date and time file tokens to the local file name. This will help differentiate the files as they come in.
For the Remote File Name parameter, the asterisk (*) wild card is used after the virtual alias name in the download file definition that was defined in Adding an Upload and a Download File Transfers. This will allow all the files contained in the remote Linux server’s directory to be sent to TIBCO MFT Platform Server on Windows.