The StreamBase LiveView Configuration File Editor is a validating XML editor that is aware of the schema that defines the XML syntax of LiveView configuration files. Take advantage of the following features while editing your lvconf files:
- Typechecking Support
-
The Editor typechecks your configuration file as you compose or edit it, and places a red location marker in the right margin to locate errors. Hover the mouse over the red square marker at the top of the right margin to see a count of the errors in the current file. Hover the mouse over red rectangles in the right margin to see a report of the error at that line.
When you request validation of the current file, the Editor places a red X (
 ) marker
on the left margin next to lines that fail to pass validation. See Validating LiveView Configuration Files.
) marker
on the left margin next to lines that fail to pass validation. See Validating LiveView Configuration Files.
- Namespace Aware
-
The Editor is aware of XML namespaces. When you create a new, blank configuration file, Studio places two namespace declarations placed in the top-level
<liveview-configuration>element. These declarations are what direct the Editor to Studio's internal copy of the lvconf file schema. Do not edit or remove the namespace declarations, or Studio may not be able to provide schema-aware assistance while editing. - Source View
-
By default, Studio opens deployment files in the Source tab of the Editor, which shows the XML text of the file.
- Design View
-
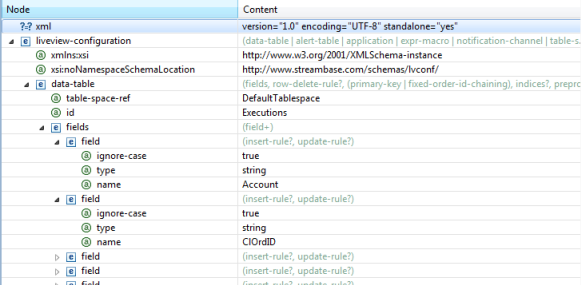
You may prefer to use the Design view of the Editor, which shows the XML in a tree view. Content assistance, typechecking, and the other features of the Editor are still available in Design view. To enter Design view, select the Design tab at the bottom left of the Editor view; select Source to return to the default Source view.
- Syntax Color Coding
-
In Source view, the Editor provides syntax color coding of the XML text.
- Autocompletion
-
When typing a new element or attribute name, press Ctrl+Space after the first few letters. The Editor shows its content assistance window with one or more candidates to complete the element. If there is one candidate, then press Enter to complete the element. Notice that the Editor inserts a closing tag for the element as well.
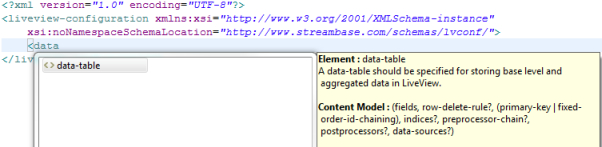
- Syntax Help Text in Content Assistance
-
Notice the yellow pane of the content assistance pop-up in the image above. The Editor provides help text for the currently selected element in the white context assistance pane.
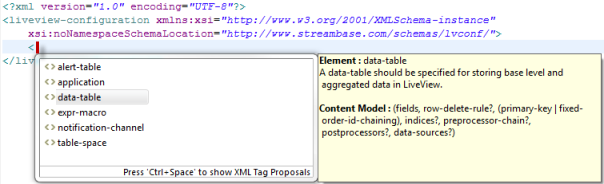
- Tag Proposal of Elements
-
Type an opening angle bracket, then Ctrl+Space. The Editor's content assistance window shows you all elements that can be entered in the current location.
- Required Attributes Included
-
When you add an element, its required attributes are included.
- Tag Proposal of Attributes
-
Place the cursor after an element name but before its closing angle bracket, then press Ctrl+Space. The Editor proposes all optional attributes that are valid for the current element and location.
