Editing settings for added columns
If you have added columns from a different source to a data table, there might be occasions when you need to update the settings used for matching the data from different sources together. For example, a column used for matching linked data can have been renamed or removed in either of the sources, or the selected join type might not provide the expected result.
About this task
Before you begin
Procedure
-
On the
authoring bar, click
Data canvas
 .
.
-
In the
Data canvas, click the settings button on the
Added columns node.
The Settings for added columns dialog shows a preview of the data, using the current settings. You can change the Number of input rows to include more rows (from both input tables) in the sample calculation. This can sometimes increase the accuracy of the shown result. However, using too many rows can decrease the performance of the preview.
Example: Editing the Join settings for added columns
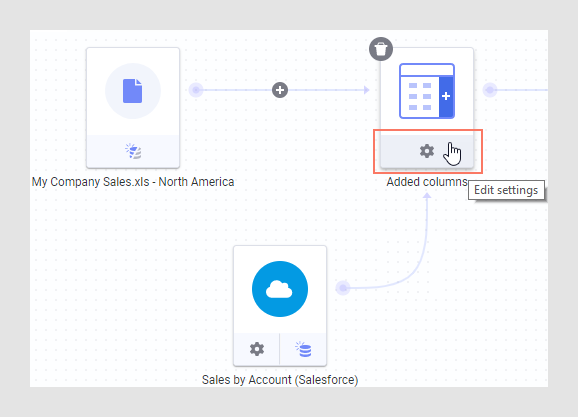
In this example, columns have been added from Salesforce to a data table originally based on a local Excel file. After analyzing the combined data table, it was discovered that not all of the expected rows from the Salesforce data were available. In this case, it is possible to fix the issues by editing the join settings for the added columns.
In the Data canvas, click the settings icon on the Added columns node:
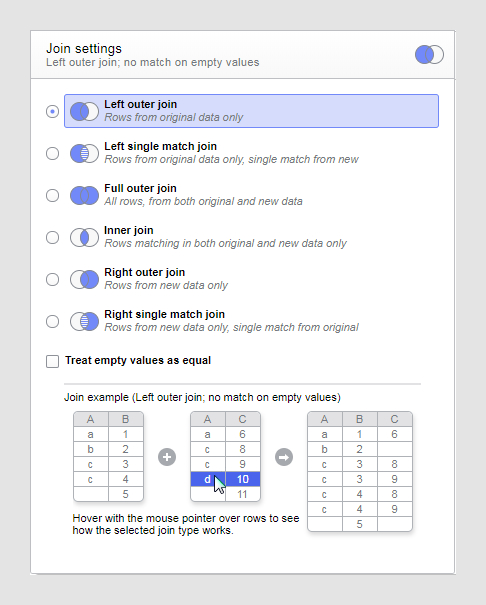
This opens the Settings for added columns dialog. By inspecting the Join settings section and trying out the interactive join example, it was concluded that the currently selected join type, left outer join, was unsuitable for the current use case. With a left outer join, rows that are available in the second data table only will not be included in the resulting data table:
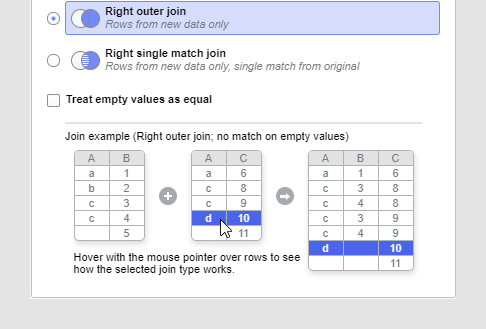
Instead, it was decided that a right outer join would be a better choice for this particular use case: