Guia do Usuário do Cliente Web Spotfire®

Saving an analysis

You can save new or updated analyses to the library.

About this task

Tip: If you are preparing analyses to be used by others you might want to review the section Creating analyses for others before you save your analysis to the library.
Tip: You might also want to specify key columns before saving the analysis. This is important if you want to reapply any specified tags when reopening the analysis file, or if you want to reapply markings in unaggregated visualizations (including markings in bookmarks).
If you want to save updates to the last saved version of the analysis, select File > Save on the menu bar.

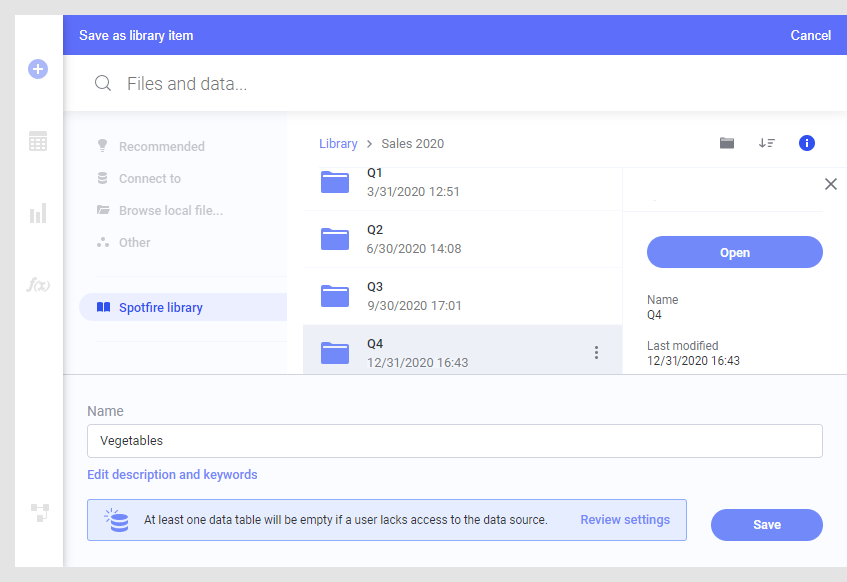
To save an analysis for the first time to the library, or with a different name, or at a new location, follow the procedure below.

Procedure

  1. On the menu bar, select File > Save as > Library item.
    The Files and data flyout is opened.
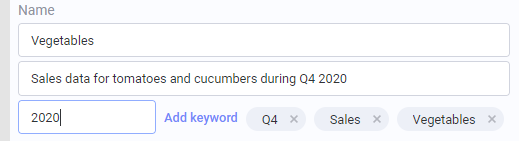
  2. Navigate to the folder where you want to save the analysis file.
  3. Specify a Name for the analysis file.
    The name can be 256 characters at most, and the following characters are not supported: \ / : * ? " < > |
  4. Optionally, click Edit description and keywords to show two additional input fields, where you can enter a description or add keywords specific to the contents of the analysis. Keywords are used to enhance organization and search capabilities. The image below shows a description and some keywords added to the analysis that will be saved.

  5. Read the information in the blue section at the bottom of the flyout.
    It is a summary of what the implications will be to other users of the analysis if you save the analysis with the current data loading settings.
  6. If you want to see a detailed view of the current data loading settings or edit them, click Review settings.
  7. In the Data loading settings dialog, review the settings for all data tables in your analysis, and make changes if needed.
    Depending on whether you want data to be updated from a linked source each time you open the analysis, or, whether you want to store a fixed version of the data in the analysis, you might want to change the data loading settings for a data table or a part of a data table. See Load methods for more information.
    Tip: By properly configuring the data loading settings for all data sources in the data canvas in advance, the saving procedure becomes faster.
    You can click the plus or minus sign for a data table to expand or collapse the data table and show or hide details about the various sources that were used to build the data table. Click on the drop-down list to change the data loading setting for a particular source.
    Tip: If you want as much data as possible to be stored in the analysis, use the Change all applicable data sources to drop-down list and select Stored data.
  8. Click OK.
  9. Click Save.

Results

The analysis file is saved to the library.
Tip: It is possible to save your analysis locally by selecting File > Download as DXP file.
Note: An administrator can change the default data loading settings for file data sources, using preference settings. The preference settings are reached from the installed client, in the Administration Manager, Preferences tab, under Application > DataImportPreferences. The administrator can also change the preference default for embedded data or force embedding of data when saving to library, under LibraryPreferences. If the final data table is embedded, then you will not be able to change any data loading settings for specific sources.