to the right of the parameter
to see the available options.
to the right of the parameter
to see the available options.Which options you have when configuring an action parameter depends on the type of action and how the parameter has been defined by the developer of the action. All input types and options described below will therefore not be available for each action or parameter.
The image below shows a few parameters which might be available
during configuration of an action in an action mod. Click to the right of the parameter
to see the available options.
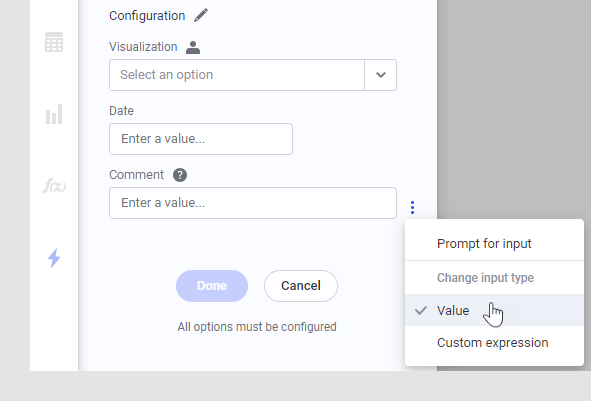
The icon showing a person ![]() to the right
of the "Visualization" parameter means that Prompt
for input has been selected for that parameter. The question mark
to the right
of the "Visualization" parameter means that Prompt
for input has been selected for that parameter. The question mark
![]() to the right of the "Comment" parameter
means that a description is available for the parameter. Hover over the
icon to see the description.
to the right of the "Comment" parameter
means that a description is available for the parameter. Hover over the
icon to see the description.
Value – type or select an input value. How to provide input depends on the data type of the parameter.
Custom expression – specify your own expression for the parameter. The Limit by option is available for custom expressions in external actions, and can be used if you want to limit the data using filterings and/or markings.
Document property (available for external actions only) - select a document property to use as input. Use the search field to help locate your property.
Prompt for input when running action or Prompt for input (depending on type of action) – select this option if you want the person running the action to provide the input. For external actions, you can change the label and add a description to each parameter. For example, it can sometimes be useful to add a description to explain what input is expected for a specific parameter. For actions in action mods, a description must be added by the mod developer. How the parameter is defined, for example, which data type is expected, will decide what kind of control will be shown in the prompt when the action is triggered:
Boolean (true/false) –
check box.
Note: For external actions, where you
specify the labels that will be shown in the prompt during configuration,
make sure that you phrase the check box label to clearly state
that a selected check box means true, while a cleared check box
means false.
Predefined values (enum) – drop-down list.
Integer – spin box where only integers are allowed.
Real – text field where numeric values (integer or real) can be entered.
String – text field.
Data table – drop-down list.
Visualization/Page – drop-down list.
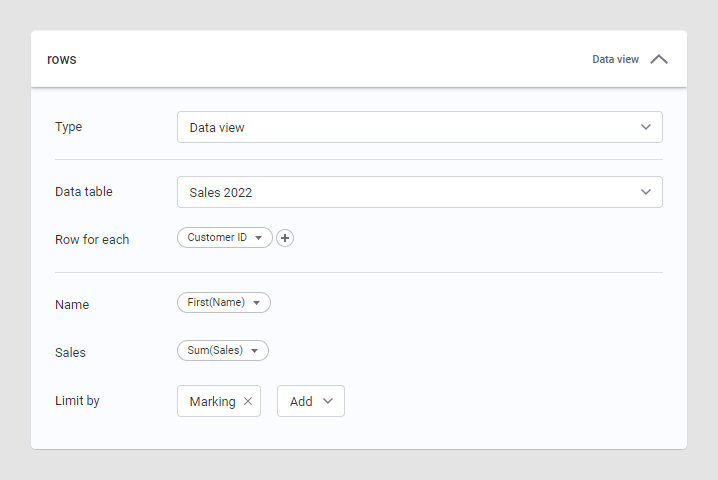
Data
view (available for external actions only) – if a parameter
has been defined with Data view as input
type, a number of records in a tabular format will be sent when the
action is run. Select which data table the parameter should retrieve
data from, and in Row for each, select
a column to split the data into categories. Then define what data
to send for each of the categories by mapping each item in the parameter
to a column. The Limit by option is also
available for data view parameters, and can be used if you want to
limit the data using filterings and/or markings. The image below shows
an example of a parameter with data view input.
None – this option is available if a parameter has been defined as optional for an external action. Select None if you do not want to provide any input for the parameter.
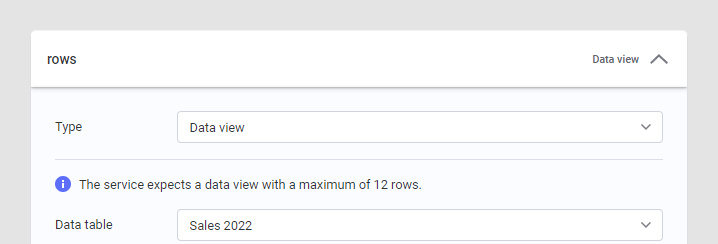
Row limits for data view parameters
The person creating the service can specify row limits for data view parameters. This means that to run the action, the number of rows sent from that parameter must be within the limits. When row limits exist for a data view parameter, information about the limits will be shown in the Configure action flyout. The image below shows a data view parameter where only a maximum row limit has been specified, but you might also encounter services where the parameter expects a minimum number of rows, has both a minimum and a maximum number of rows defined, or expects an exact number of rows.
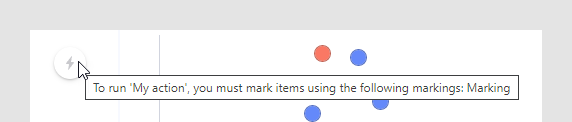
If you configure a data view parameter that requires a minimum or exact number of rows so that it also is limited by one or more markings, then any triggers that exist for the action will become grayed out until some items in the visualizations are marked.
A tooltip will let the person who wants to run the action know which markings must be used before it is possible to run the action, as you can see in the image below.