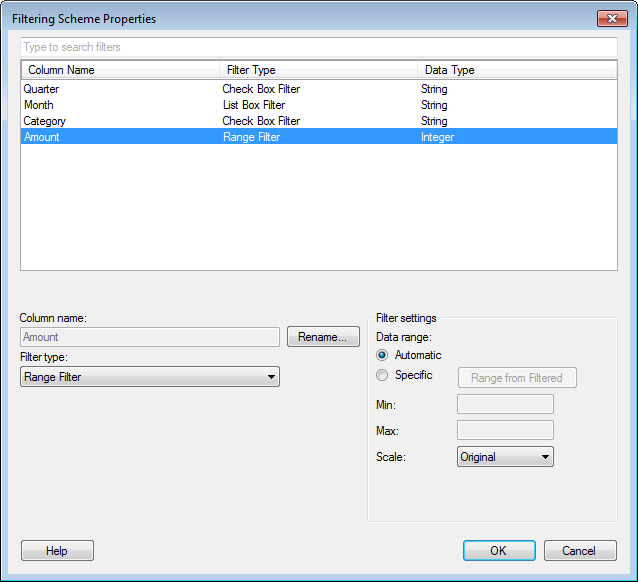
In the Filtering Scheme Properties dialog you can view and change the settings for the filters in a filtering scheme. The different filter types have slightly different settings as described below. The properties specified for a filter in this dialog affect all pages and visualizations where the current filtering scheme is used.
Note: The visibility and order of filters within a data table group are instead handled per page, using the Organize Filters dialog.
To reach the Filtering Scheme Properties dialog:
Right-click the Filters panel on a page where the filtering scheme of interest is used.
From the pop-up menu, select Filtering Scheme Properties.
|
Option |
Description |
|
Data table |
Specifies which data table to work with. |
|
[Type to search filters] |
If the list of filters is long, you can enter a search expression here to limit the list to show only filters that match your search. |
|
[Filter list] |
Lists all the filters in the selected data table. Click on a column header to sort the list according to the values in that column. |
|
Column name |
Displays the name of the currently selected column in the list. This is also the name of the filter. |
|
Rename... |
Opens the Rename Column dialog where you can change the name of the selected column. Note: This will change the name of the filter, as well as all the instances of the column throughout the analysis. |
|
Filter type |
Specifies the type of the selected filter. |
|
Filter settings |
When selecting a range filter, you can modify the Data range and Scale. Select either Automatic data range (default) or Specific data range. If you selected Specific, you can either click the Range from Filtered button to set the data range to what the range slider is currently set to, or, you can manually enter a Min and Max value in the fields. You can also select whether the scale should be Original or Log10 from the drop-down menu. |
|
Filter settings |
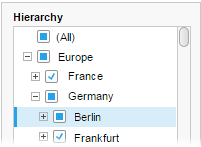
When selecting a hierarchy filter for a fixed hierarchy that is not from an external source, you can modify the hierarchy by clicking on the Edit button that is shown inside the Filter settings area. You can always specify whether to use a Fixed height and the Number of rows in the filter. You can also specify whether to Include a check box for '(All)' values and whether to Indicate partially selected categories in the hierarchy. If the latter check box is selected, then you will see category values where only a few of the subcategories are selected shown as blue squares instead of with check marks:
|
|
Filter settings |
When selecting a List Box Filter, you can modify the appearance of the filter. The check box "Show search field" allows you to set if the search field is displayed in the filter or not. If you select "Show check boxes", the values in the filter are represented as check boxes in the list. For more information, see List Box Filter. You can set the number of rows shown in the filter by typing a number or setting the number with the arrows. |
Note: Most of the settings in this dialog, such as renaming a filter, changing the filter type or range filter scale, will not be affected when you select Reset Filter or Reset All Filters from the right-click menu in the Filters panel. Resetting a filter only affects modifications related to filtering of the data; for example, clearing any check boxes in a check box filter, or narrowing down the range of values in a range filter.
See also: