Initializing PySpark for Spark Cluster
If you have configured a Spark compute cluster in the Chorus Data section, you can use PySpark to read and write table data. This notebook can be exposed as a Python Execute operator which can be used by the downstream operators in a workflow.
This method is far more efficient than other methods for medium or large data sets and is the only viable option for reading data sets having a size of more than a few GB.
Only one data set is initialized for one data source.
You can initialize and use PySpark in your Jupyter Notebooks for Team Studio.
- Procedure
- Create a new notebook.
- Click
.

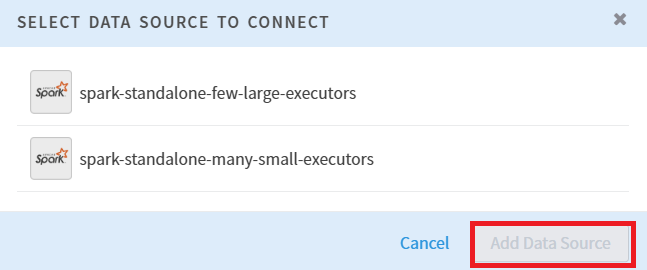
- A SELECT DATA SOURCE TO CONNECT dialog appears. Select an existing Spark Cluster data source, and then click Add Data Source.

- A bit of code is inserted into your notebook. This facilitates the communication between the data source and your notebook. If you want to read more data source, repeat step 1 to step 3 (maximum limit is 3 for inputs to a python execute operator). To run this code, press
shift+enteror click Run.Now, you can run other commands by referring to the comments in the inserted code.
The commands use the object
ccwhich is an instantiated object of classChorusCommanderwith the required parameters for the methods to work correctly. The generated code sets thesqlContextargument to the initialized Spark Session in thecc.read_input_tablemethod call. You can setspark_optionsdictionary argument to pass additional options havingdriverproperty set to the auto-detected JDBC Driver class. -
To read the data sets, uncomment the lines in the generated code for that data set along with the
_propsvariable having the correspondingspark_options. -
To use the notebook as a python execute operator, change the
use_input_substitutionparameter fromFalsetoTrueand add theexecution_labelparameter for data sets to be read. Theexecution_labelvalue should start from string'1', followed by'2', and'3'for subsequent data sets. For more information, seehelp(cc.read_input_table). -
The generated
cc.read_input_tablemethod call returns a Spark Data Frame. You can modify, copy, or perform any other operations on the Data Frame as required. -
Once the required output Spark Data Frame has been created, write it to a target table using the
cc.write_output_table.-
To enable the use of output in downstream operators, set
use_output_substitution=True. -
To drop any existing table having the same name as the target, set the
drop_if_existsparameter toTrue. -
Use the
spark_optionsargument as in theread_input_tablefor the driver. You can also write to a different target data source by updatingcc.datasource_name = '...'to the required value and the driver inspark_optionsaccordingly.
For more information, see
help(cc.write_output_table). -
-
Run the notebook manually for the metadata to be determined so that the notebook can be used as a Python Executor operator in legacy workflows.