Example 4: Designing and Analyzing a 2332 Experiment
Connor and Young (in McLean and Anderson, 1984) report an experiment (taken from Youden and Zimmerman, 1936) on various methods of producing tomato plant seedlings prior to transplanting in the field. The experiment is a 2332 factorial design (3 factors at 2 levels, 2 factors at 3 levels). We will first design the experiment, and then analyze the yield (in pounds) as a function of the different factor settings.
The factors in the design are:
| Factor | Levels | Value |
| Soil condition | Field soil | 0 |
| +fertilizer | 1 | |
| Size of pot | Three-inch | 0 |
| Four-inch | 1 | |
| Variety of tomato | Bony Best | 0 |
| Marglobe | 1 | |
| Method of production | Flat | 0 |
| Fibre | 1 | |
| Fibre+NO3 | 2 | |
| Location on field | 0,1,2 |
- Designing the experiment
- Start the Experimental Design (DOE) analysis:
Ribbon bar. Select the Statistics tab, and in the Industrial Statistics group, click DOE to display the Design & Analysis of Experiments Startup Panel.
Classic menus. On the Statistics - Industrial Statistics & Six Sigma submenu, select Experimental Design (DOE) to display the Design & Analysis of Experiments Startup Panel.
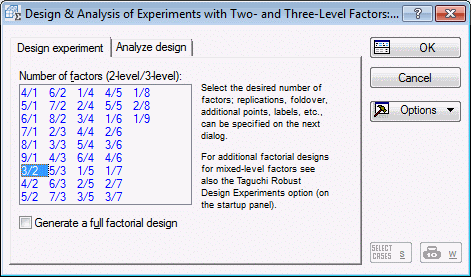
Select Mixed 2 and 3 level designs and click OK to display the Design & Analysis of Experiments with Two- and Three-Level Factors dialog box.
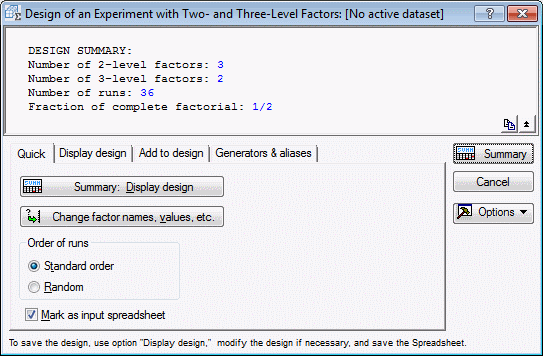
The design reported in Connor and Young consists of 3 two-level factors, and 2 three-level factors. Thus, select the 3/2 design on the Design Experiment tab.
Click the OK button to display the Design of Experiments with Two- and Three-Level Factors dialog box.
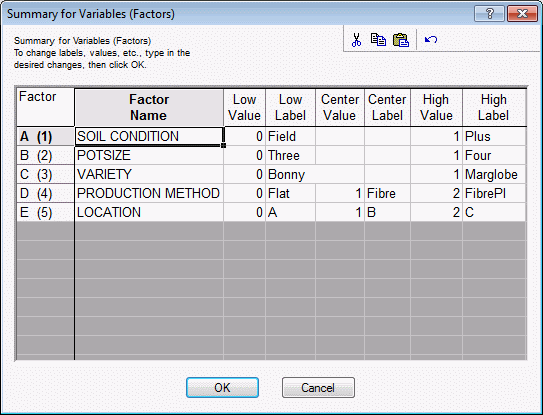
Click the Change factor names, values, etc. button. Enter the values into the Summary for Variables (Factors) dialog box as shown below.
Click the OK button.
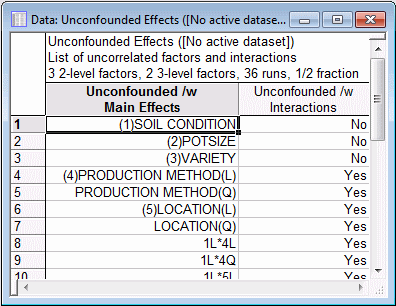
- Reviewing unconfounded effects
- Before saving the design, let's look at the unconfounded factor effects for this design.
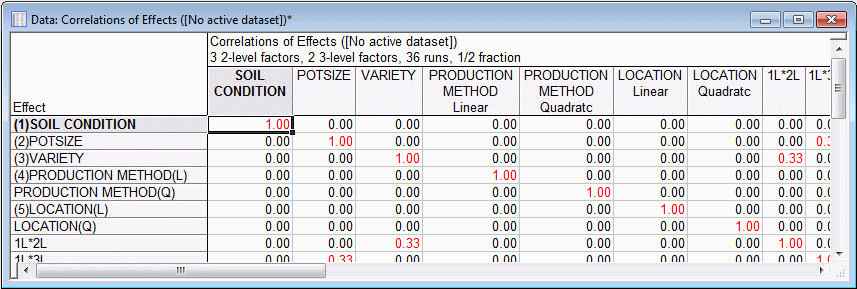
On the Generator & aliases tab, select the Include interactions by quadratic components check box. Then, click the Correlation matrix (main effects and interactions) button; two spreadsheets will be produced. The first one contains the correlation matrix for the coded main effects and interactions.
The second one lists the main effects and two-way interactions that are unconfounded with other main effects and interactions.
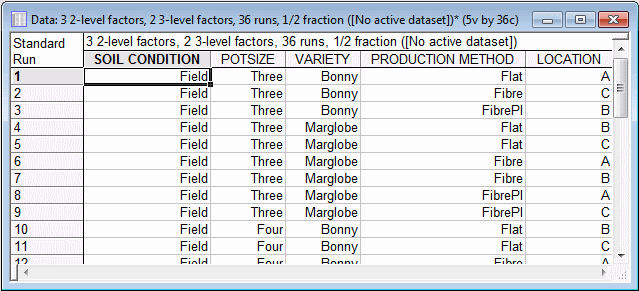
- Displaying and saving the design
- To display and save the design, select the Display design tab.
Select the By Names option button in the Denote factors group box, and select the Text labels option button in the Show (in spreadsheet) group box.
Click the Summary: Display design button. Shown below is a portion of the design.
Even though this spreadsheet shows the text values that we entered to denote the factor levels, "underneath" these are stored the numeric factor highs and lows. Thus, when you save this design, both the numeric values and text values will be saved to the data file.
- Analyzing the design
- The design along with the values for the dependent variable (Pounds) are stored in the data file Tomatoes.sta. Open that data file.
Start the Experimental Design module, and select Mixed 2 and 3 level designs in the Startup Panel.
In the Design & Analysis of Experiments with Two- and Three-Level Factors dialog box, select the Analyze design tab. Click the Variables button, and select the variable Pounds as the Dependent variable and variables Soil Condition through Location as the Indep. (Factors). Click the OK button.
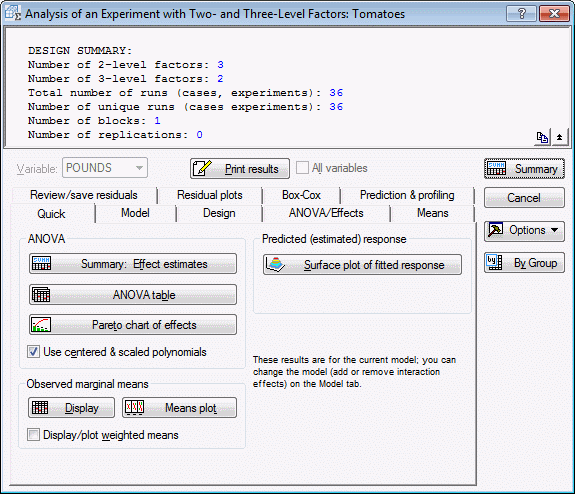
In the Design & Analysis of Experiments with Two- and Three-Level Factors dialog box, click OK to display the Analysis of an Experiment with Two- and Three-Level Factors dialog box.
- Analysis of variance
- Click on the
Model tab, and select the 2-way interactions (linear, quadr.) option button in the Include in model group box.
Select the Quick tab, and click the ANOVA table button.
The first spreadsheet shows the ANOVA for each single-degree of freedom test, that is, it shows separate tests for the linear and quadratic components of the 3-level factors. Since the factors in this experiment are qualitative in nature, we will ignore the values in that spreadsheet and focus on the results reported in the second spreadsheet, which reports the results for the combined effects (i.e., multiple degree-of-freedom tests).
None of the interaction effects are statistically significant. The soil condition by production method (1*4) interaction is marginally significant.
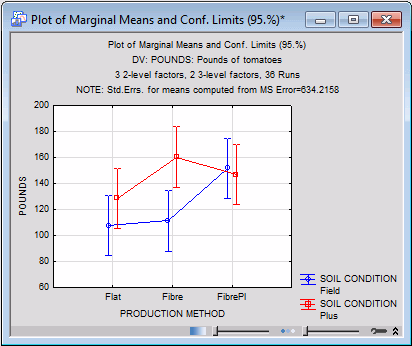
In the Observed marginal means group box, click the Means plot button. In the Compute marginal means for dialog box, select Soil Condition and Production Method as the Factors, and click OK.
In the Arrangement of Factors dialog box, select Production Method as the x-axis, upper and Soil Condition as the Line pattern, and click OK to produce the graph of the interaction, as shown below.
It appears that for the field-plus-fertilizer (Plus) condition, the fiber pots with added NO3 did not further improve the yield. However, this effect was not statistically significant.
- Plot of means
- You can also use the Means plot button to plot the of means for the significant main effects (Soil Condition, Variety, Production Method, and Location). If you produce these four graphs, the patterns of means will clearly show how the four factors are related to the resulting tomato yield. [Shown here is a compound graph produced from the four means plots, one for each main effect. This graph can be created using Multi-Graph Layouts in the Tools group on the Graphs tab (ribbon bar) or Multiple Graphs Layouts on the Graphs menu (classic menus).]
The patterns of means clearly shows how the four factors are related to the resulting tomato yield.
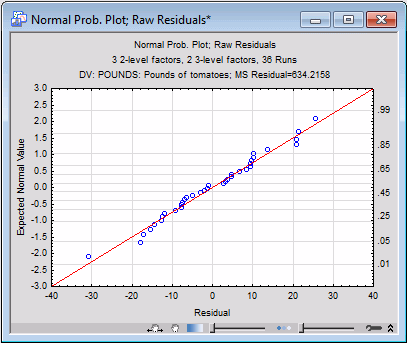
- Probability plot of residuals
- Finally, we will examine the normal probability plot of residuals for any indication that the residual values are not normally distributed.
In the Analysis of an Experiment with Two- and Three-Level Factors dialog box, select the Residual plots tab.
In the Probability plots of residuals group box, click the Normal plot button to produce the graph shown below.
It appears that the residuals closely follow the line, indicating the normal distribution. Thus, we can conclude that the normality assumption is probably not violated in the data.
See also, Experimental Design Index.