Example 7: Setting Up Server Tasks
Server TaskSets require the STATISTICA Monitoring and Alerting Server (MAS). MAS is an application that is available as an add-on to STATISTICA Enterprise. It enables you to monitor groups of Analysis Configurations for alarms and other specified conditions, and to designate what actions will be taken when those alarms or specified conditions are detected. This approach allows for the efficient and automated, server-based analytic monitoring of specific data streams using SVB or IQC (Interactive Quality Control) Analysis Configurations. The underlying Analysis Conditions can specify any analysis to run in STATISTICA. For purposes of this example, the focus will be on Quality Control analyses, where the definition of alarms is defined in the Alarm Options of the IQC Analysis Configuration. For SVB Analysis Configurations, the approach is the same, except that the STATISTICA Visual Basic (SVB) script will need to have specific return codes designating the specific outcomes for MAS to monitor.
The 2 main components of MAS are Tasksets and Dashboards:
- A Taskset is a collection of one or more related Analysis Configurations. Rules for handling alarms are specified in a Taskset.
- A Dashboard is a visual representation of one or more Analysis Configurations that have been placed into Tasksets. Dashboards allow you to see whether a given analysis has generated an alarm.
You can use the Data Configurations created in Example 4: Setting Up a Data Configuration to create a taskset. The Data Configurations must contain Auto-Update fields such as in the DATE options displayed in the following image.

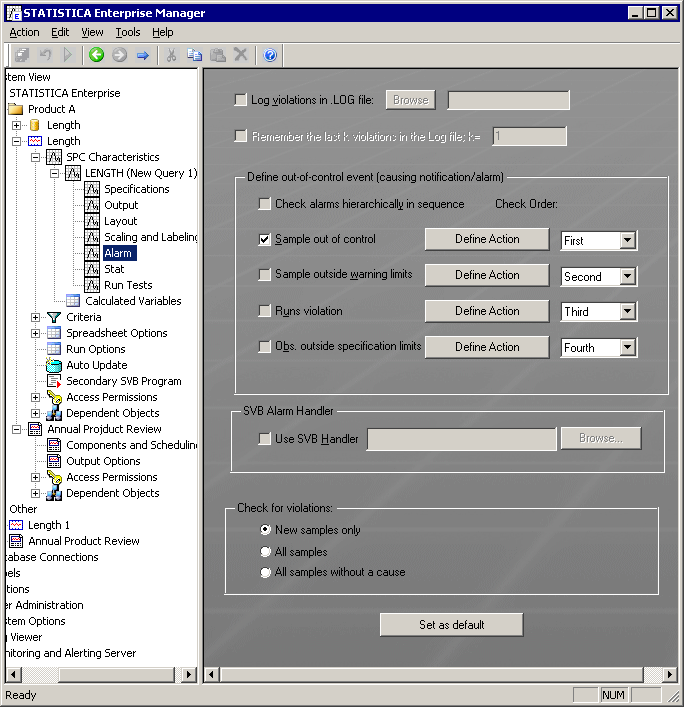
Also, the Analysis Configuration created in Example 5: Setting Up a QC Analysis Configuration must have the Sample out of control check box selected in the Alarm node.
You will use these Data and Analysis Configurations in creating a Taskset and a Dashboard. Creating a Taskset
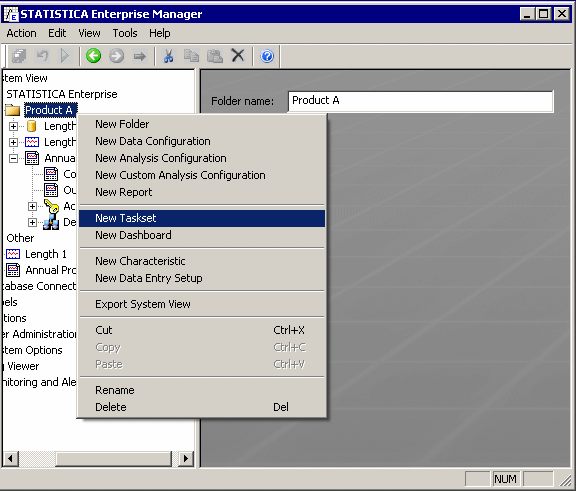
Right-click on a node in the System View tree and select New Taskset.
A new Taskset node will be created in the tree view, and the details of that Taskset's components will be displayed in the properties page.

Type Measurements in the Name field, and type Product Dimension Measurements in the Description field. Make sure that the In use check box is selected.
Click Add Task to add an analysis configuration to the Taskset. Note that in the Taskset properties page, analysis configurations are referred to as tasks. A dialog will be displayed where you can select from among the existing analysis configurations.
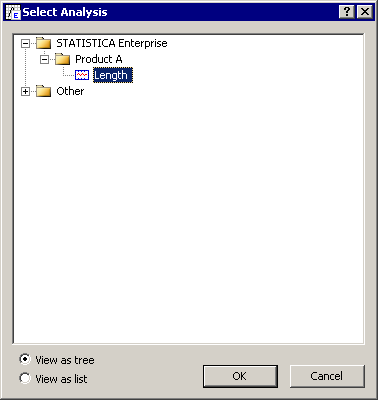
Select one of the Analysis Configurations and click OK. You will be prompted if you want the Taskset to have the same user permissions as the Analysis Configuration. Click OK to do so.
A child node of the Taskset is created for the selected Analysis Configuration. The tree view automatically navigates to that child node.

You will see a list of the variable characteristic(s) and/or attribute characteristic(s) that are charted by the selected Analysis Configuration. Select the check box next to the characteristic that should be checked for alarms. Then click the Next Step button.
A child node of the Taskset is created that allows you to specify the rules that govern if and when alarms will be generated. The tree view automatically navigates to that node.
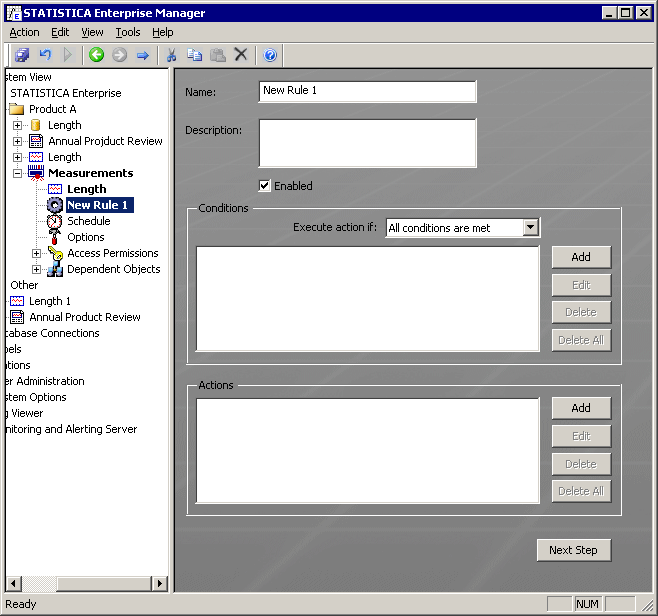
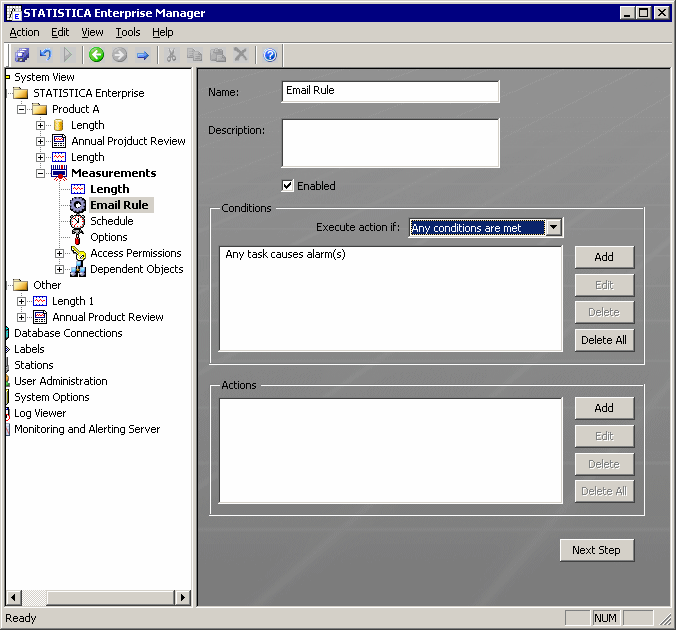
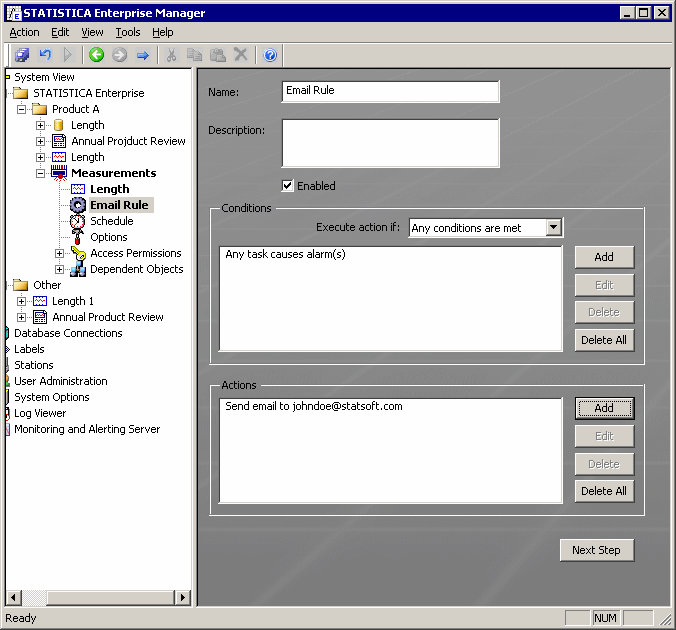
Type Email Rule in the Name field. Make sure that the Enabled check box is selected.
In the Conditions group box, click Add. A dialog will be displayed where you can select a task (e.g., analysis configuration) for which alarm actions will be taken. You can also select Any, in which case action will be taken for alarms generated by any Analysis Configuration in the Taskset.
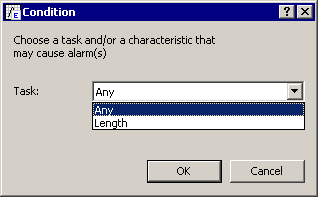
Select Any and click OK. A condition will be added to the list box.
We could add several tasks to this Taskset, and specify several conditions in the Email Rule. Then the Conditions list box would have several entries. In that case, the Execute action if drop-down list box would be relevant. Click on that list box, and you will see 2 options:
All conditions are met
Any conditions are met
When All conditions are met is selected, action is only taken if all the conditions in the list box are met, i.e., if all the specified characteristics from the specified tasks generate alarms.
When Any conditions are met is selected, action is taken if any of the conditions in the list box are met.
For this example, we only have 1 task, and that task has 1 characteristic. So either option will work. Select Any conditions are met.
In the Actions group box, click Add. The Choose an action dialog will be displayed.

The options on this dialog enable you to specify what kind of action should be taken when the conditions specified in the Conditions group box have been met. You can choose to either send an email or run a program.
Select the Send an email option button and click the OK button to display the Send Email dialog, where you can type in the email address to which the alarm notification will be sent.
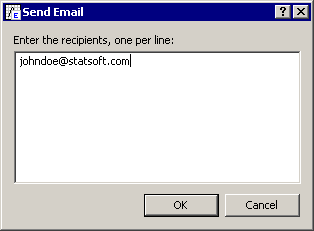
Type in an email address and click OK. Now you have specified the conditions in which alarm action will be taken, and what that action will be.
Click Next Step. The tree view automatically navigates to the Schedule node and displays the options for scheduling the tasks. Click on the arrow in the Schedule by drop-down list box. You can see the following options:
Daily
Weekly
Monthly
On Demand
Select Daily.
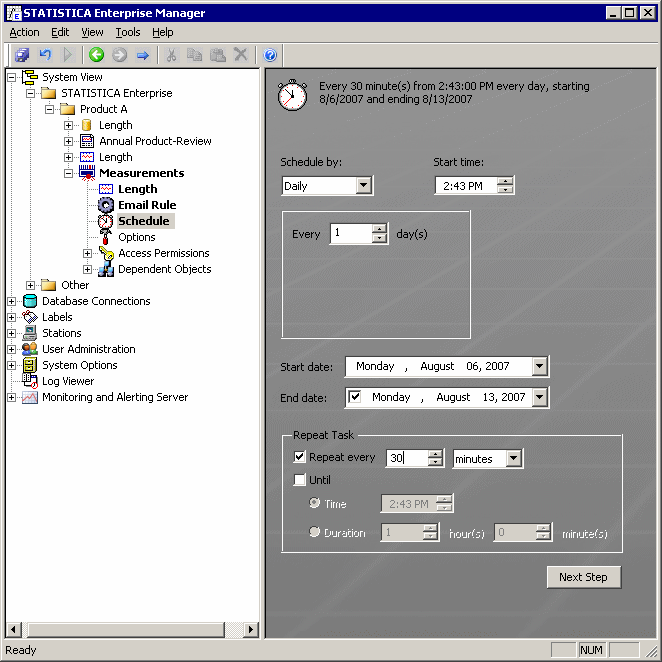
Now you can see the various options for scheduling the tasks in this task set. Note that the options will vary depending on what you choose in the Schedule by drop-down list box.
Select today as the start date. Select 1 week later as the end date.
Click the Repeat every check box, and set the controls to repeat every 30 minutes.
Now all the tasks in this task set will run every 30 minutes for the next week. If those tasks generate alarms, then action will be taken based on the Conditions and Actions specified previously in the Email Rule node.
Click Next Step. In the tree view automatically navigates to the Options node, and displays the other Taskset options.

In the Alarms and rules group box, there are controls to exclude old alarms.
The Admin email address box must be filled in. This specifies the email address that is notified in the event of any system problems. Note that this is different from the destination of alarm notification emails.
You can also specify a maximum time that a task is given to run.
In the Error handling group box, you can specify whether to reschedule a task that has failed to execute.
Click the Next Step button. The tree view automatically navigates to the Access Permissions node, and displays the current user permissions.

You can grant permissions to individual users or to groups by highlighting the user or group in the Available Users and Groups list box in the properties page, and then clicking on the right-pointing arrow. The highlighted user or group is moved to the Access Permissions list box.
Every user or group in the Access Permissions list box has read permissions for this Taskset. You can also select the Edit check box to give a user or group edit permissions for this Taskset.
We have now finished creating the Measurements Taskset. Select Commit Changes, or press CTRL+S on your keyboard, or click the Commit Changes button on the toolbar to save this Taskset.