
Model Management Server Installation on RedHat Openshift
Table of Contents
Overview of the installation steps
These are the installation steps that must be performed. These steps must be executed in this order.
- Run MMS Installer, Unpack Necessary Items
- Login Into Openshift Cluster
- Create Namespace
- Additional Values Required
- Install Secrets
- Install Helm Chart
- Openshift On Azure
- Openshift On Aws
- Copy Maven Artifacts (Using
Kubectl) - Monitor Installation Process (With
Tkn) - Capture MMS Url
- Cleaning Up Completed Taskruns And Jobs
Introduction
This guide’s intention is to help a user deploy TIBCO Streaming Model Management Server on RedHat OpenShift Platform, regardless of which platform OpenShift is installed on.
Prerequisites
- Create a RedHat account
- Ensure OpenShift is installed
- Optional, In case of windows node is required, install opensift with hybrid network
- Download and install Tools Kubectl and OC (OpenShift CLI)
- Download and Install HELM Cli
- Download and Install Tekton CLI (Optional)
- Download and Install Lens (Optional)
- For Openshift installed on GCP, create a filestore instance.
- For Openshift installed on AWS, create a EFS instance.
- For Openshift installed on Azure, create a NFS fileshare instance.
Supported OpenShift Environments
MMS is supported on OpenShift running in these environments:
- vSphere (Datacenter)
MMS supports both installer-provisioned infrastructure (IPI) as well as user-provisioned infrastructure (UPI). Installer-provisioned infrastructure is recommended for a MMS installation.
To install an OpenShift cluster please use the official RedHat installation documents:
INSTALLATION STEPS
RUN MMS INSTALLER, UNPACK NECESSARY ITEMS
Run the installer for your platform. The installer names are:
| Platform | Name of the installer |
|---|---|
| Linux | TIB_MMS_11.2.0_linux_x86_64.archive-bin |
| macOS | TIB_mms_11.2.0_macosx_x86_64.archive-bin |
| Windows | TIB_MMS_11.2.0_win_x86_64.msi |
Agree to the EULA.
Set location for installation (or accept default)
On Windows you may be asked to allow the app from an unknown publisher to make changes to your device. Select “Yes”.
The MMS installer will place a Helm chart and Maven repository in the install directory. You will need both these artifacts when you deploy the product onto your cloud infrastructure. After the installation these items can be located in the following locations by default:
| Platform | Helm Chart |
|---|---|
| Linux | /opt/tibco/str/n.m/mms/kubernetes-installer-1.4.0.tgz |
| macOS | ./TIBCO Streaming/n.m/mms/kubernetes-installer-1.4.0.tgz |
| Windows | C:\TIBCO\str*n.m*\mms\kubernetes-installer-1.4.0.tgz |
NOTE: Here, MMS n.m represents the release version, where n represents major release and m represents minor release.
| Platform | Maven Repository |
|---|---|
| Linux | /opt/tibco/str/n.m/distrib/tibco/mms/repo/product-repository-mavenrepo.zip |
| macOS | ./TIBCO Streaming/n.m/distrib/tibco/mms/repo/product-repository-mavenrepo.zip |
| Windows | C:\TIBCO\str*n.m*\distrib\tibco\mms\repo\product-repository-mavenrepo.zip |
NOTE: The expected output from this step is mms_home. It is the directory where MMS is installed on your machine. For instance, on Windows, it is C:\TIBCO\str\n.m. Users can assign to mms_home either the default install or whatever value they provide.
Login into Opeshift Cluster
- Log in into OpenShift cluster, using any of the two ways below:
Using the kubeconfig file:
export KUBECONFIG = $path/kubeconfig
Using OC for login:
            oc login \
                https://api.$CLUSTER_NAME.$DOMAIN:6443 \
                -u $CLUSTER_USERNAME \
                -p $CLUSTER_PASSWORD
CREATE MMS NAMESPACE
kubectl create namespace mms
You should see a message: “namespace/mms created”
INSTALL THE SECRETS
ADDITIONAL VALUES REQUIRED FOR THIS STEP
- ELASTIC_PW
- GIT_SERVER_PW
- NEXUS_SERVER_PW
- PROMETHEUS_PW
- SCORING_ADMIN_PW
- ARTIFACT_MANAGEMENT_PW
- Oauth2 server details
- External DNS details
In order to avoid clear text passwords, Kubernetes provides a Secrets facility. So prior to installation, Kubernetes Secrets have to be created to contain the passwords required by MMS.
Assign each of the names above to some value, then issue the following commands to set up the secrets.
NOTE: Without secrets installed, the [helm installation] (#install-helm-chart) step will be in a wait mode and eventually time out.
Clear out any old secrets that may exist with this series of delete secret commands:
    kubectl delete secret git-server --namespace mms
    kubectl delete secret nexus-server --namespace mms
    kubectl delete secret prometheus-server --namespace mms
    kubectl delete secret scoring-admin --namespace mms
    kubectl delete secret oauth2 --namespace mms
    kubectl delete secret externaldns-config --namespace mms
    kubectl delete secret artifact-management --namespace mms
    kubectl delete secret artifact-management-env --namespace mms
Create new secrets:
    kubectl create secret generic elasticsearch-es-elastic-user \
        --from-literal=elastic=$ELASTIC_PW \
        --namespace mms --dry-run=client --output=yaml 2>/dev/null > secret.yaml
    kubectl apply --filename secret.yaml
    kubectl create secret generic git-server \
        --from-literal=mms=$GIT_SERVER_PW \
        --namespace mms
    kubectl create secret generic nexus-server \
        --from-literal=admin=$NEXUS_SERVER_PW \
        --namespace mms
    kubectl create secret generic prometheus-server \
        --from-literal=admin=$PROMETHEUS_PW \
        --namespace mms
    kubectl create secret generic scoring-admin \
        --from-literal=admin=$SCORING_ADMIN_PW \
        --namespace mms
    kubectl create secret generic artifact-management \
        --from-literal=admin=$ARTIFACT_MANAGEMENT_PW \
        --namespace mms
    kubectl create secret generic artifact-management-env --namespace mms
NOTE: The Elasticsearch password is limited to alphanumeric, “.”, “_”, “~”, and “-” characters, i.e. it must conform to this regular expression (‘^[a-zA-Z0-9._~-]+$’)).
NOTE: The prometheus-server secret is only used if you are not using OAuth2 authentication; if using OAuth2, this secret need not be created.
It should consist of name value pairs where each name is a user name, and each value is the corresponding password. These are used to secure
the Prometheus ingress with basic authentication.
Auto update of public DNS is possible by enabling the (external DNS)[https://github.com/kubernetes-sigs/external-dns] component - without this the DNS will need to be updated manually. External DNS on azure requires a secret containing azure credentials that has permissions to update DNS (tenant id, subscription id, dns resource group and client secret.
kubectl create secret generic externaldns-config --from-literal=azure.json="{ \"tenantId\": \"$TENANT_ID\", \"subscriptionId\": \"$SUBSCRIPTION_ID\", \"resourceGroup\": \"$DNS_RESOURCE_GROUP\", \"aadClientId\": \"$SERVICE_PRINCIPAL_ID\", \"aadClientSecret\": \"$CLIENT_SECRET_KEY\" }" --namespace mms
INSTALL THE HELM CHART
Openshift on Azure
Create a secret for accessing the fileshare in azure
        kubectl create secret generic mms-storage --from-literal=azurestorageaccountname=$STORAGE_ACCOUNT \
            --from-literal=azurestorageaccountkey=$STORAGE_ACCOUNT_KEY \
            --namespace mms
        helm upgrade \
            --install mms ${home}/mms/kubernetes-installer-1.4.0.tgz \
            --set cloud=openshift \
            --set openshift.oauth2=$OUTH2_SERVER_TYPE \
            --set openshift.externalDNS=azure \
            --set externalDNS.azure.clientID=$CLIENT_ID \
            --set externalDNS.azure.subscriptionID=$SUBSCRIPTION_ID \
            --set externalDNS.azure.tenantID=$TENANT_ID \
            --set externalDNS.azure.hostedZoneName=$DNS_ZONE_NAME  \
            --set externalDNS.azure.resourceGroupName=$DNS_RESOURCE_GROUP \
            --set openshift.networkExposure=ingress \
            --set size=large \
            --set openshift.ingressDomain=$(kubectl get ingresses.config/cluster -o jsonpath={.spec.domain}) \
            --set openshift.containerRegistry=$IMAGE_STREAM \
            --namespace mms \
            --set artifactManagement.storageClass=azurefile-csi \
            --set cloudProvider=azure \
            --set artifactManagement.azure.fileshare.fileshareName=$FILESHARE_NAME
            --set artifactManagement.azure.fileshare.resourceGroup=$FILESHARE_RESOURCE_GROUP
OpenShift on AWS
For EFS filesystem follow the steps mentioned in the (documentation)[https://cloud.redhat.com/experts/rosa/aws-efs/] Create a secret to access the EFS, and pass the $ROLE created to access the EFS as per the above documentation.
        cat << EOF | oc apply -f -
            apiVersion: v1
            kind: Secret
            metadata:
                name: aws-efs-cloud-credentials
                namespace: openshift-cluster-csi-drivers
            stringData:
            credentials: |-
                [default]
                role_arn = $ROLE
                web_identity_token_file = /var/run/secrets/openshift/serviceaccount/token
        EOF
        helm upgrade \
            --install mms ${home}/mms/kubernetes-installer-1.4.0.tgz \
            --set pullpolicy=Always \
            --set openshift.oauth2=$OUTH2_SERVER_TYPE \
            --set cloud=openshift \
            --set openshift.ingressDomain=$DOMAIN \
            --set openshift.containerRegistry=$IMAGE_STREAM \
            --set openshift.networkExposure=ingress \
            --namespace mms \
            --set openshift.externalDNS=aws \
            --set externalDNS.aws.eksRoleArn=$ROLE_CERT_MANAGER \
            --set externalDNS.aws.region=$REGION \
            --set externalDNS.aws.hostedZoneID=$HOSTED_ZONE_ID \
            --set openshift.containerRegistryPrefix=mms \
	        --set cloudProvider=aws \
            --set artifactManagement.aws.efs.efsId=$EFS_ID \
            --set artifactManagement.storageClass=efs-sc
OpenShift on GCP
Create a secret to update DNS
kubectl create secret generic clouddns-dns01-solver-svc-acct --from-file=key.json=${keyJsonfile} -n mms
        helm upgrade \
            --install mms ${home}/ep-kubernetes-installer-1.4.0.tgz \
            --set pullpolicy=Always \
            --set cloud=openshift \
            --set openshift.ingressDomain=$DOMAIN \
            --set openshift.containerRegistry=$IMAGE_STREAM \
            --set openshift.networkExposure=ingress \
            --namespace mms \
            --set openshift.externalDNS=gcp \
            --set openshift.containerRegistryPrefix=$PREFIX \
            --set artifactManagement.storageClass=filestore-sc \
            --set openshift.clusterType=internal \
            --set artifactManagement.gcp.filestore.instance=$FILESTORE_IP \
            --set artifactManagement.gcp.filestore.zone=$FILESTORE_ZONE \
            --set artifactManagement.gcp.filestore.fileshare=$FILESTORE_NAME \
            --set artifactManagement.gcp.filestore.mountPath=$MOUNT_PATH \
            --set cloudProvider=gcp \
            --set gcp.projectID=$GCP_PROJECT
COPY MAVEN ARTIFACTS (using kubectl)
On Windows, you must change directory to the maven artifacts subdirectory of your MMS installation to run this command.
cd c:\TIBCO\str\n.m\distrib\tibco\mms\repo
On Linux you can give a fully qualified path name to the mavenrepo.zip file.
If on Windows, change directory then issue the following command:
kubectl cp \
        product-repository-mavenrepo.zip \
        mavenrepo-0:/tmp/ \
        --namespace mms
This command takes some time to run, and gives no output.
MONITOR INSTALLATION PROCESS (with tkn)
tkn pipelinerun logs bootstrap --follow --namespace mms
This pipelinerun command takes SOME time to complete and gives copious amounts of output. When this command completes, you can then ask to see the task list:
tkn taskrun list --namespace mms
The task list should show as below:

Capturing MMS UI url
Log into OpenShift console
To get the console URL
$ oc whoami --show-console
Navigate to the URL and pass $CLUSTER_USERNAME and $CLUSTER_PASSWORD
Select developer mode
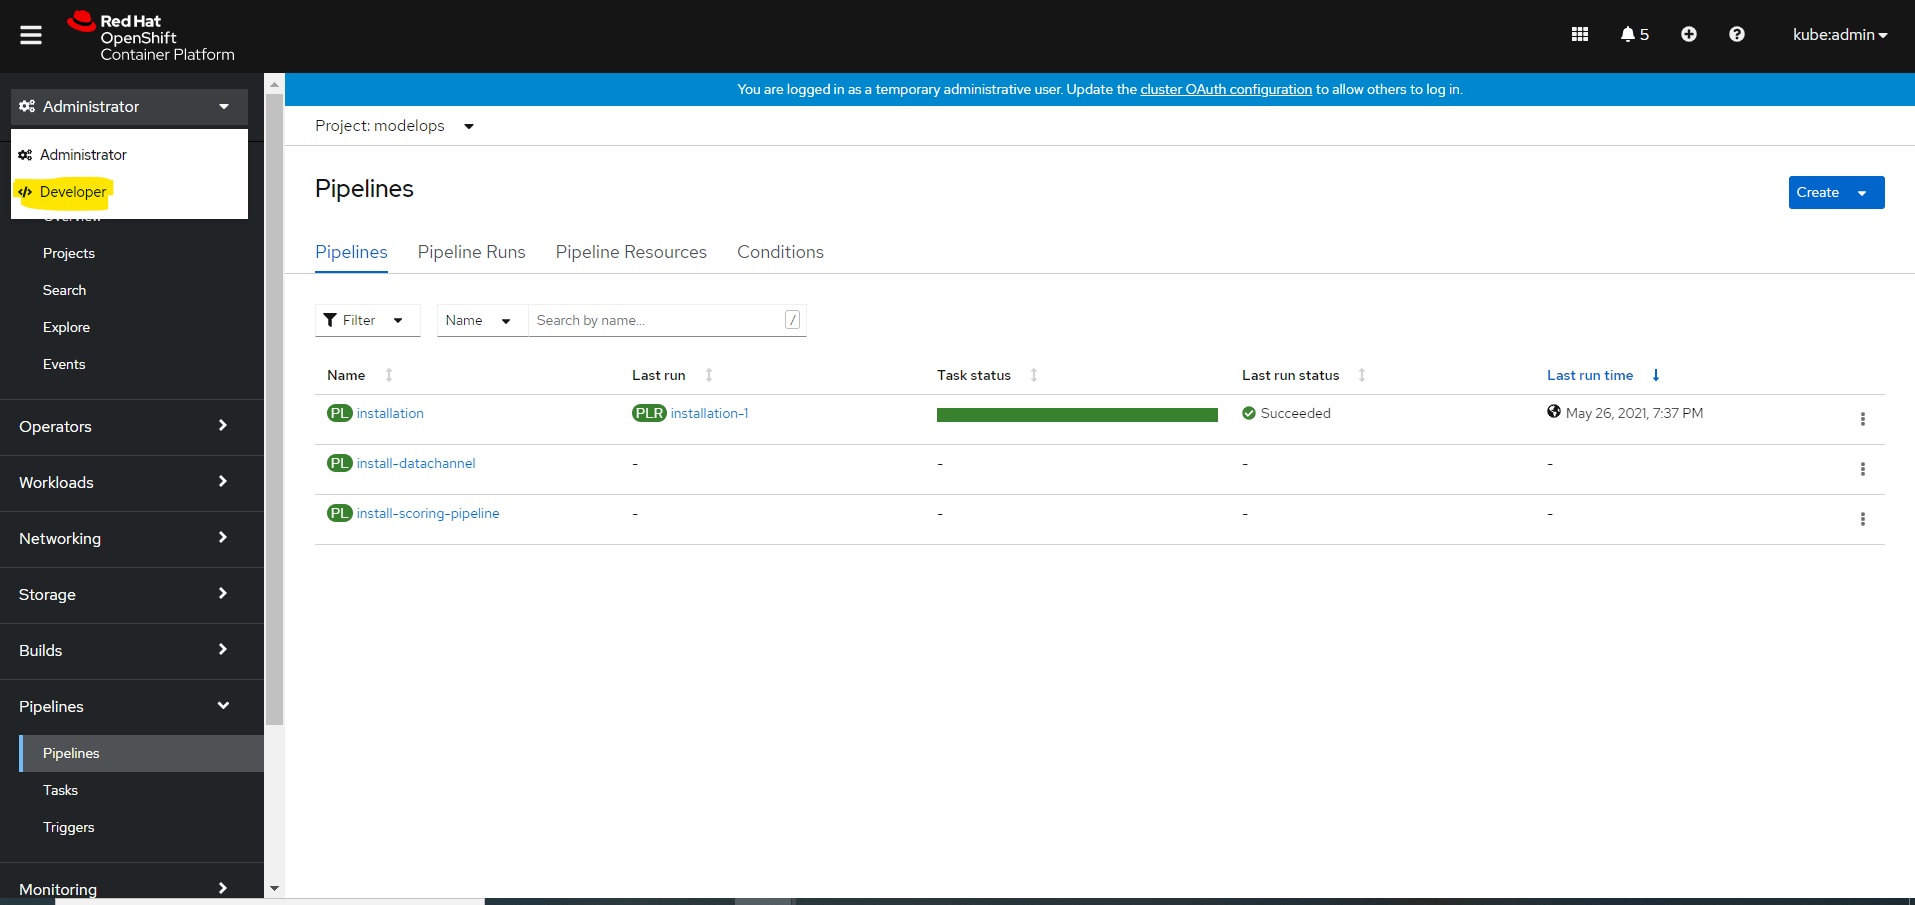
Navigate to Topology and Click on MMS server
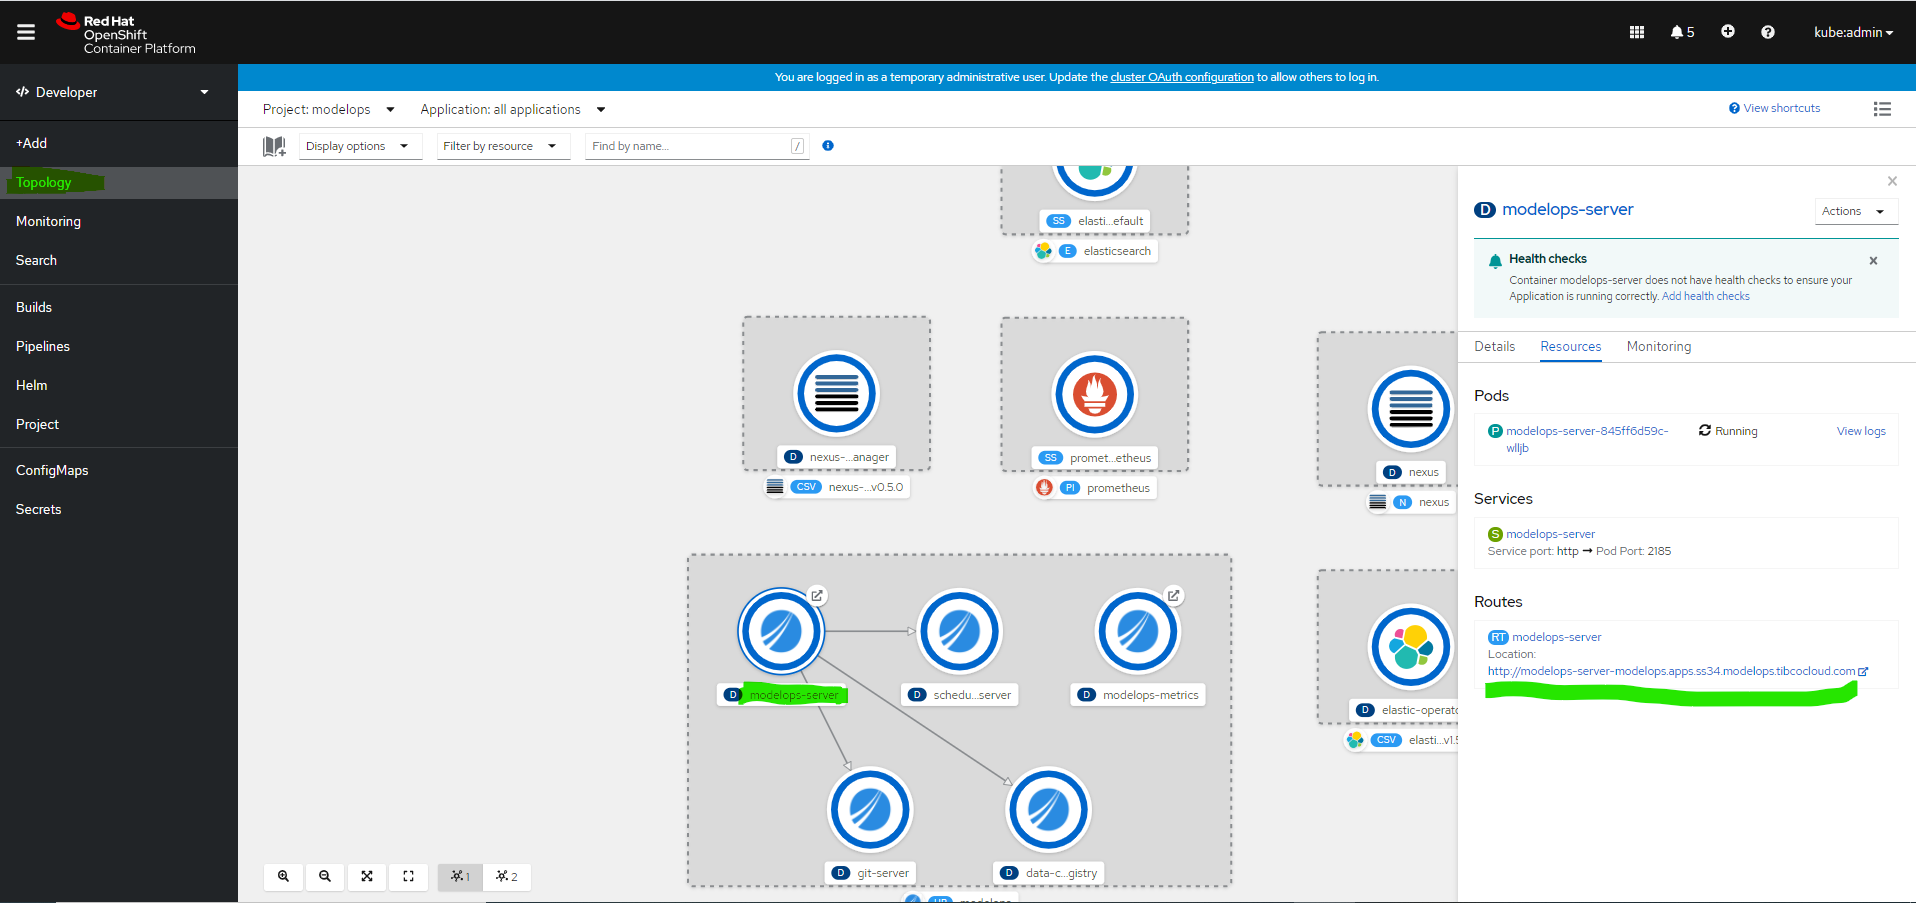
Cleaning Up Completed TaskRuns and Jobs
After running the pipeline, you may want to clean up completed TaskRuns and jobs to free up resources and keep your namespace tidy. Here are some commands to help you do that:
Delete all completed TaskRuns in the namespace
tkn tr list --namespace mms -o name | sed 's#taskrun.tekton.dev/##' | xargs -I {} tkn tr delete {} --namespace mms -f
Delete all completed jobs in the namespace
kubectl delete jobs --all --namespace mms
If you want to keep some tasks or jobs for debugging purposes, you can use the following command to keep specific TaskRuns & jobs:
List all TaskRuns in the specified namespace, filter out the one to keep, and delete the rest
tkn tr list --namespace mms -o name | sed 's#taskrun.tekton.dev/##' | grep -v -E "$taskrun1_to_keep|taskrun2_to_keep" | xargs -I {} tkn tr delete {} --namespace mms -f
Replace ‘job1-to-keep’ and ‘job2-to-keep’ with the names of the jobs you want to keep
kubectl get jobs --namespace mms -o jsonpath='{.items[*].metadata.name}' | tr ' ' '\n' | grep -v -E '^(job1-to-keep|job2-to-keep)$' | xargs -I {} kubectl delete job --namespace mms {}
VARIABLE REFERENCE
| Variable | Source of Value | Description |
|---|---|---|
| CLUSTER_NAME | At time of creation of an Openshift Cluster | The user gives the cluster name while creating Openshift cluster. |
| CLUSTER_USERNAME | Cluster Admin can provide these values. | Users can be created by Admin of the openshift cluster. |
| CLUSTER_PASSWORD | Cluster Admin can provide these values. | Users can be created by Admin of the openshift cluster. |
| DOMAIN | Domain is the public DNS exposed to access MMS service. | The DNS registered in DNS zone for the respective AKS. Eg: devmms.streamingaz.tibcocloud.com |
| TENANT_ID | It is the ID of the AAD directory in which the user created the application. | Open the Azure Portal>>Azure Active Directory>>Properties>>Directory ID. |
| SUBSCRIPTION_ID | subscription_id is a unique alphanumeric string that identifies your Azure subscription. It is listed in the portal and is a hash-type value. | eg: 79fd09g4-3345-4975-3057-d048c402ba89 |
| DNS_RESOURCE_GROUP | dns_group is the name of the resource_group which was used to create a DNS zone. The resource group name must be unique within the Azure subscription. | eg: tmoazclouddnszone |
| SERVICE_PRINCIPAL_ID | It is an identity created for use with applications, hosted services, and automated tools to access Azure resources. | This value comes after registering an app as mentioned above. |
| CLIENT_SECRET_KEY | It is an authentication key string used to login to azure. | This value is generated by an user after an app registration. |
| ROLE_CERT_MANAGER | Create a Role as stated in this link | This role helps the cluster to update the records in route53 |
| REGION | AWS region in which Openshift cluster is created. | This value is been passed while Openshift cluster creation, please save this value for later use. |
| HOSTED_ZONE_ID | This can be captured from AWS portal under Route53. | It is a ID assigned to Domain created in route53 |
| IMAGE_STREAM | This value is for the image registry in which container images are stored | If default image registry is used value is “image-registry.openshift-image-registry.svc:5000” |
| STORAGE_ACCOUNT | This value is obtained from the storage account where the fileshare is created. | This value is generated by the user after creating the fileshare. |
| STORAGE_ACCOUNT_KEY | This value is obtained from the storage account. | This is used for connecting to the file share. |
| FILESHARE_NAME | This value is obtained from Azure, where the user creates a file share inside a storage account. | |
| FILESHARE_RESOURCE_GROUP | This is obtained from Azure. | This is the resource group where the storage account is created. |
| FILESTORE_IP | This value is obtained from GCP. | This value is the IP for the filestore created. |
| FILESTORE_NAME | This value is obtained from GCP. | This value is given by the user while creating a filestore. |
| FILESTORE_ZONE | This value is obtained from GCP. | This is the zone where the filestore is created. |
| MOUNT_PATH | This value is obtained from GCP, which states the path where volumes will be mounted. | This value is provided by the user while creating the filestore. |
| GCP_PROJECT | This is the GCP project id where all the resource are deployed | |
| EFS_ID | This value is obtained from AWS. | This value is generated while creating the AWS EFS |
HELM CHART REFERENCE
Below command give detailed helm chart parameters. In case if any default parameter needs to be over written pass it in helm install command i.e –set openshift.oauth2=google
$ helm show values kubernetes-installer-1.4.0.tgz
Maintenance Tasks
Maintenance tasks are essential activities that need to be performed periodically to ensure the smooth operation and security of your deployed application. In this section, we focus on changing passwords for critical services.
Change-secret-passwords
One of the common maintenance tasks is changing the passwords for critical services like git-server and nexus-server. Follow the steps below to change the passwords for these services after the initial deployment:
Change git-server Password After Deployment
If you need to change the password for the git-server after the deployment of the application, follow these steps:
- Execute the following command to access the
git-servercontainer:
kubectl exec -it --namespace mms git-server-pod-name -c git-server -- sh -c "clear; (bash || ash || sh)"
- List the users to find the username for which you want to change the password:
gitea admin user list
This command will display a list of users similar to the following:
ID   Username      Email                   IsActive IsAdmin 2FA
1    streaming-web streaming-web@tibco.com true     true    false
- Change the password for the desired user:
gitea admin user change-password --username username --password new-password
After changing the password, exit the shell by typing exit
- Delete the existing
git-serversecret:
kubectl delete secret git-server --namespace mms
- Create a new
git-serversecret with the updated password:
kubectl create secret generic git-server --from-literal=streaming-web=NewP@ssw0rd --namespace mms
This will update the password for the git-server user and create a new secret with the updated password.
Finally, restart the git-server deployment to apply the changes:
kubectl rollout restart deployment git-server --namespace mms
Additionally, restart the artifact-management deployment to ensure the changes work correctly for the MMS application:
kubectl rollout restart deployment artifact-management --namespace mms
Change Nexus-Server Password After Deployment
If you need to change the password for the nexus-server after the deployment of the application, follow these steps:
- Port-forward to the
artifact-repository:
kubectl port-forward --namespace mms svc/artifact-repository 8081:80
-
Open your browser and go to
http://localhost:8081. Log in with your current credentials. -
Go to
Server Administration and Configuration settings. -
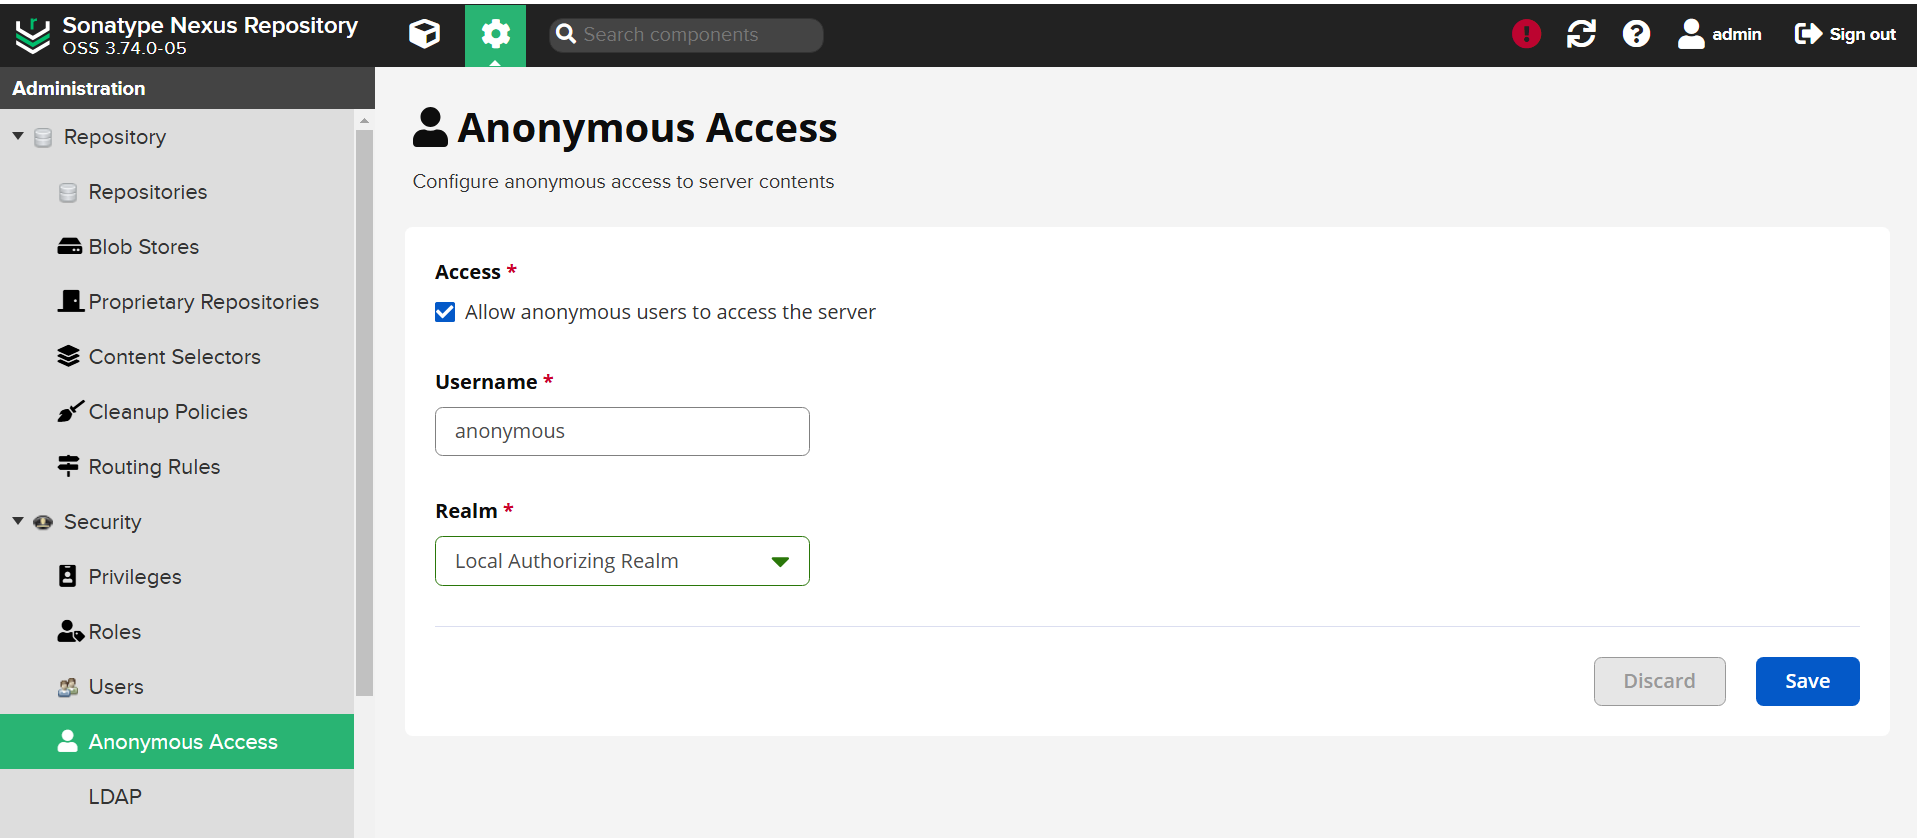
Under the
Securitydropdown, selectAnonymous Accessand uncheckAllow anonymous users to access the serverand save the settings:
-
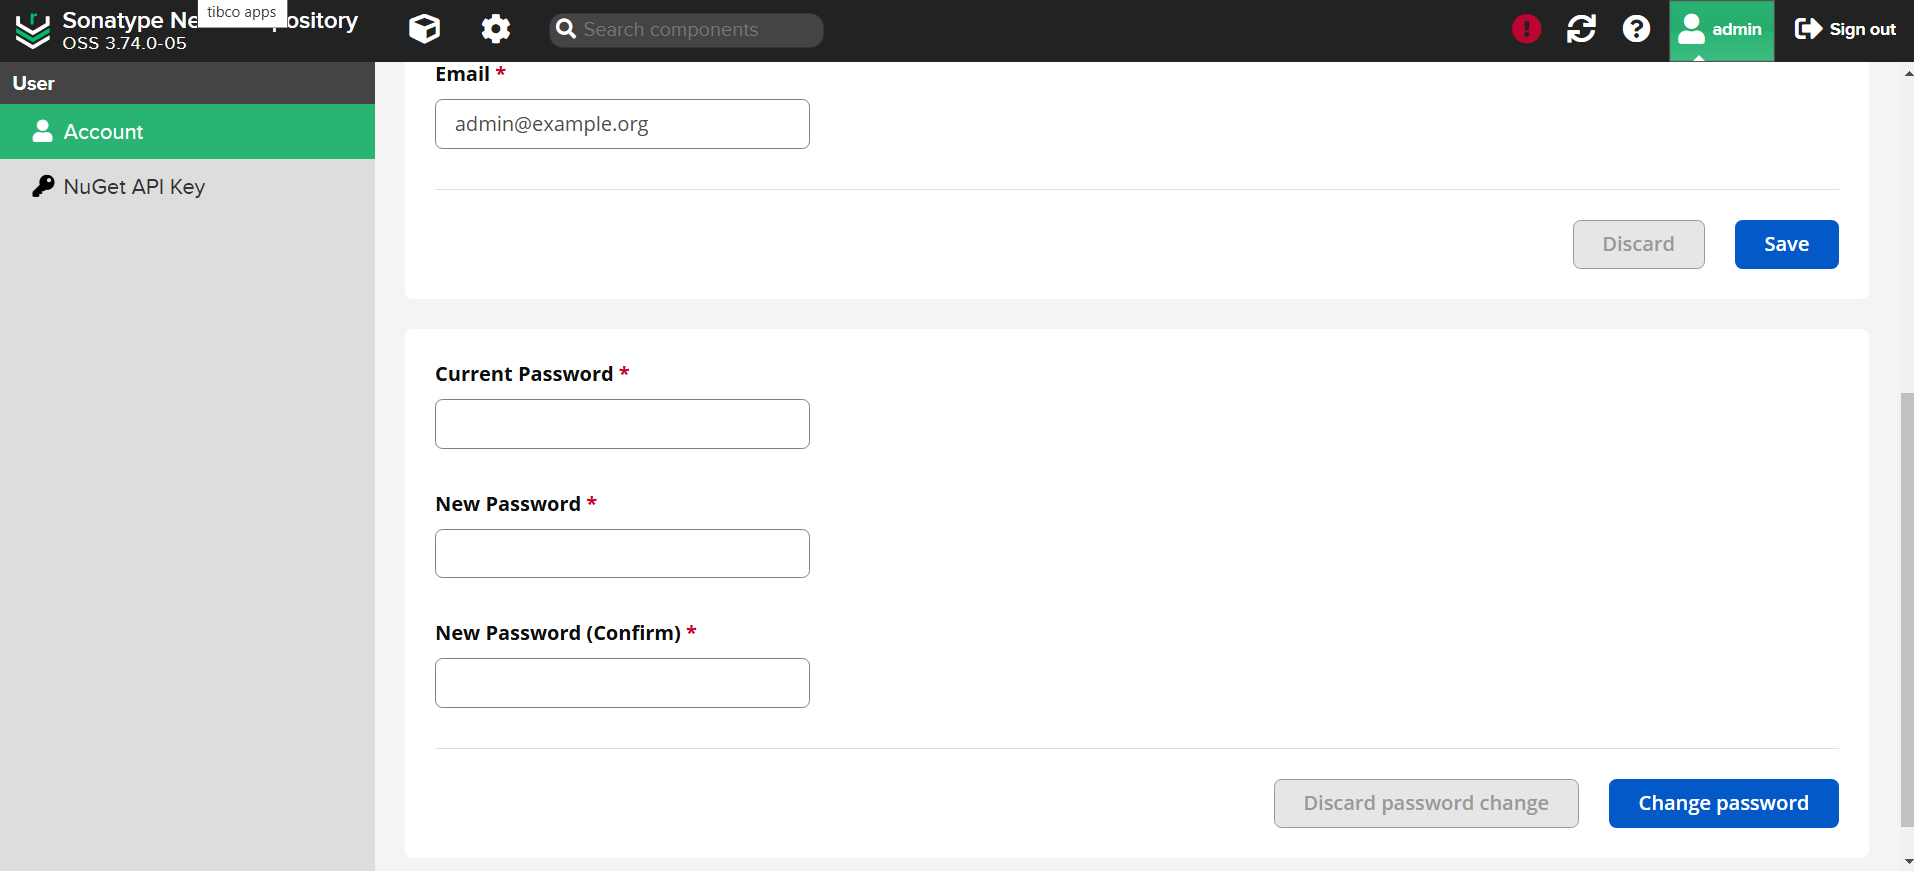
Change the password for the admin user:
- Select the
Admintab on the top right corner. - Go to
Accountand change the password.
- Select the
-
Re-enable
Anonymous Access(check and save). -
Stop the port-forwarding by pressing
Ctrl+Cin the terminal where the port-forward command is running. -
Update the
nexus-serversecret with the new password:
kubectl delete secret nexus-server --namespace mms
kubectl create secret generic nexus-server --from-literal=streaming-web=NewP@ssw0rd --namespace mms
Finally, restart the artifact-repository deployment to apply the changes:
kubectl rollout restart deployment artifact-repository --namespace mms
Additionally, restart the artifact-management deployment to ensure the changes work correctly for the MMS application:
kubectl rollout restart deployment artifact-management --namespace mms