Contents
This tutorial page describes how to use docker commands to run the containerized image generated on the previous page. Go through that page first if you have not already.
In this tutorial page, you will:
-
Run the containerized Docker image created on the previous page in your local Docker Desktop environment.
-
Confirm that you can communicate with the containerized application.
The steps in this section take you through running your Docker image in its container and communicating with the LiveView module therein.
-
Confirm the images that are available to run with the
docker imagescommand:REPOSITORY TAG IMAGE ID CREATED SIZE docker_hellolv 1.0.0 08277a6d9592 23 minutes ago 848MB sbrt-base 10.6.0 c39719f31fba 2 hours ago 828MB
Look for the image you just built on the previous page:
docker_hellolv. -
Run a command like the following to name the Docker container and start it.
docker run -d --name hellolv -p 11000:10000 -e STREAMING_NODENAME=B.lvcluster docker_hellolv:1.0.0
Remember that on the previous page, you configured the Hello LiveView fragment with a configuration file that specifies listening on client API port 11000. You must now remap the local machine's port 11000 as a passthrough for the Docker container's port 11000. Syntax of the
-poption islocalport:containerport. Thus, we are using-p 11000:11000in this docker run command.You must set the STREAMING_NODENAME environment variable for the Docker image with the
-eor--envoption, as shown. You can specify the node and cluster names you prefer, as long as you specify the same cluster name for Docker-hosted images that will run the same fragment together as a cluster. (Do not use the same cluster name for any currently running StreamBase Application project that contains a different fragment).Look for output similar to this:
d26c729222632a69b587a910f4386e5b4e71b6bf74947b0db771f139f1a8b340
Note
The --name argument assigns the Docker container the name
hellolv. Think of this as a shortcut name or an alias. You can instead use any name you prefer.As an alternative, it may help you manage a cluster with many containerized modules to use the same name argument as the nodename you assign with the STREAMING_NODENAME environment variable. Thus:
docker run -d --name B.lvcluster -e STREAMING_NODENAME=B.lvcluster ...
Tip
If a message tells you your container name is in use, you can remove a leftover container with
docker stopfollowed bycontainerNamedocker rm— or just use a different name in your docker run command.containerName -
Confirm that your Docker container is loaded by using the
docker pscommand, which returns a row like the following:CONTAINER ID IMAGE COMMAND CREATED STATUS 460ab35a4036 docker_hellolv:1.0.0 "/bin/sh -c ${STREAM…" 4 minutes ago Up 4 minutes PORTS NAMES 0.0.0.0:11000->11000/tcp hellolv -
Confirm that the Docker container is up and running the Hello LiveView sample by using the following command:
docker logs hellolv
Look for results like the following:
Installing application archive /var/opt/tibco/streambase/application/docker_hellolv-1.0.0.zip

[B.lvcluster]  Installing node
[B.lvcluster]      PRODUCTION executables
[B.lvcluster]      Memory shared memory
[B.lvcluster]      4 concurrent allocation segments
[B.lvcluster]      Host name 340c7a30923f
[B.lvcluster]      Starting node services
[B.lvcluster]      Loading node configuration
[B.lvcluster]      Auditing node security
[B.lvcluster]      Deploying application
[B.lvcluster]          Engine default-engine-for-com.tibco.ldm.sample.lv_sample_helloliveview
[B.lvcluster]      Application deployed
[B.lvcluster]      Administration port is 59523
[B.lvcluster]      Service name is B.lvcluster
[B.lvcluster]  Node installed
[B.lvcluster]  Starting node
[B.lvcluster]      Engine application::default-engine-for-com.tibco.ldm.sample.lv_sample_helloliveview
[B.lvcluster]      Loading node configuration
[B.lvcluster]      Auditing node security
[B.lvcluster]      Host name 340c7a30923f
[B.lvcluster]      Administration port is 59523
[B.lvcluster]      Service name is B.lvcluster
[B.lvcluster]  Node started
COMMAND FINISHED
-
Confirm that you can connect to the TIBCO Streaming node running in the Docker container with commands like the following:
docker exec hellolv epadmin display services
docker exec hellolv epadmin display services servicetype=node
The last command returns the name of the node in the containerized app:
Service Name = B.lvcluster
Service Type = node
Network Address = dtm-adm://96b621f6a71d:2000
Use this node name as the service name in two more commands:
docker exec hellolv epadmin servicename=B.lvcluster display node
docker exec hellolv epadmin servicename=B.lvcluster display engine
Notice that the locations of resources returned by these commands are Linux paths not available on your Windows or Mac host:
[B.lvcluster] Node Directory = /var/opt/tibco/streambase/node/B.lvcluster
[B.lvcluster] Deployment Directories = /var/opt/tibco/streambase/node/B.lvcluster/deploy
To stop the containerized application, run either:
docker stop hellolv
docker container stop hellolv
The docker ps command does not show stopped containers. To include those, use docker ps –all.
Give the stop command a moment to complete. Next, remove the container with either:
docker rm hellolv
docker container rm hellolv
As an alternative to the docker commands shown on this page, you can use the Dashboard option from the Docker Desktop menu to open the Dashboard app. The top level of the Dashboard shows the containers currently running locally on your machine.
 |
Select a container to see more detail, which opens to the Logs panel. Use the buttons on the top row to run basic start, stop, restart, or delete commands for the running container, and to open a shell prompt inside the container. For LiveView fragments, there is an extra button on the left that lets you open your default web browser on the LiveView Web instance running as part of your LiveView fragment.
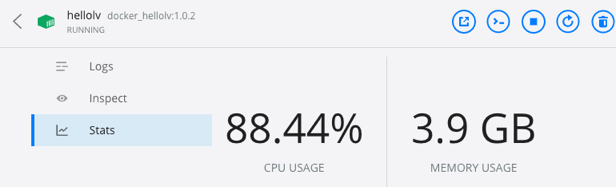
Use the menus on the left to inspect the container's basic settings and view its statistics since startup.
 |
At this point, you know how to use StreamBase Studio and Docker Desktop to containerize and run a StreamBase Application with a LiveView fragment.
Next, try connecting to your containerized LiveView Web instance as described in the next page.
Note
You can configure your Docker container to redirect logging from your Docker-hosted StreamBase application to the Docker host by configuring a Logback console appender in your StreamBase application. See Docker container logging for instructions on this option.