Using the Mapper
The mapper opens when you click an input field in the Input tab.
You can only map one element at a time, be it an individual field or an array of primitive data types or non-primitive data types. When mapping array of primitive types, you map the array root and its containing elements will automatically get mapped. When mapping an array of non-primitive data types, you must first map the root array, then map each element of the non-primitive data type individually. For example, to map an array named Employee Records containing Employee objects that is made up of employee name, employee ID, and department, you have to first map Employee Records, then map each element of the Employee object individually.
Here is an example of what the mapper looks like.
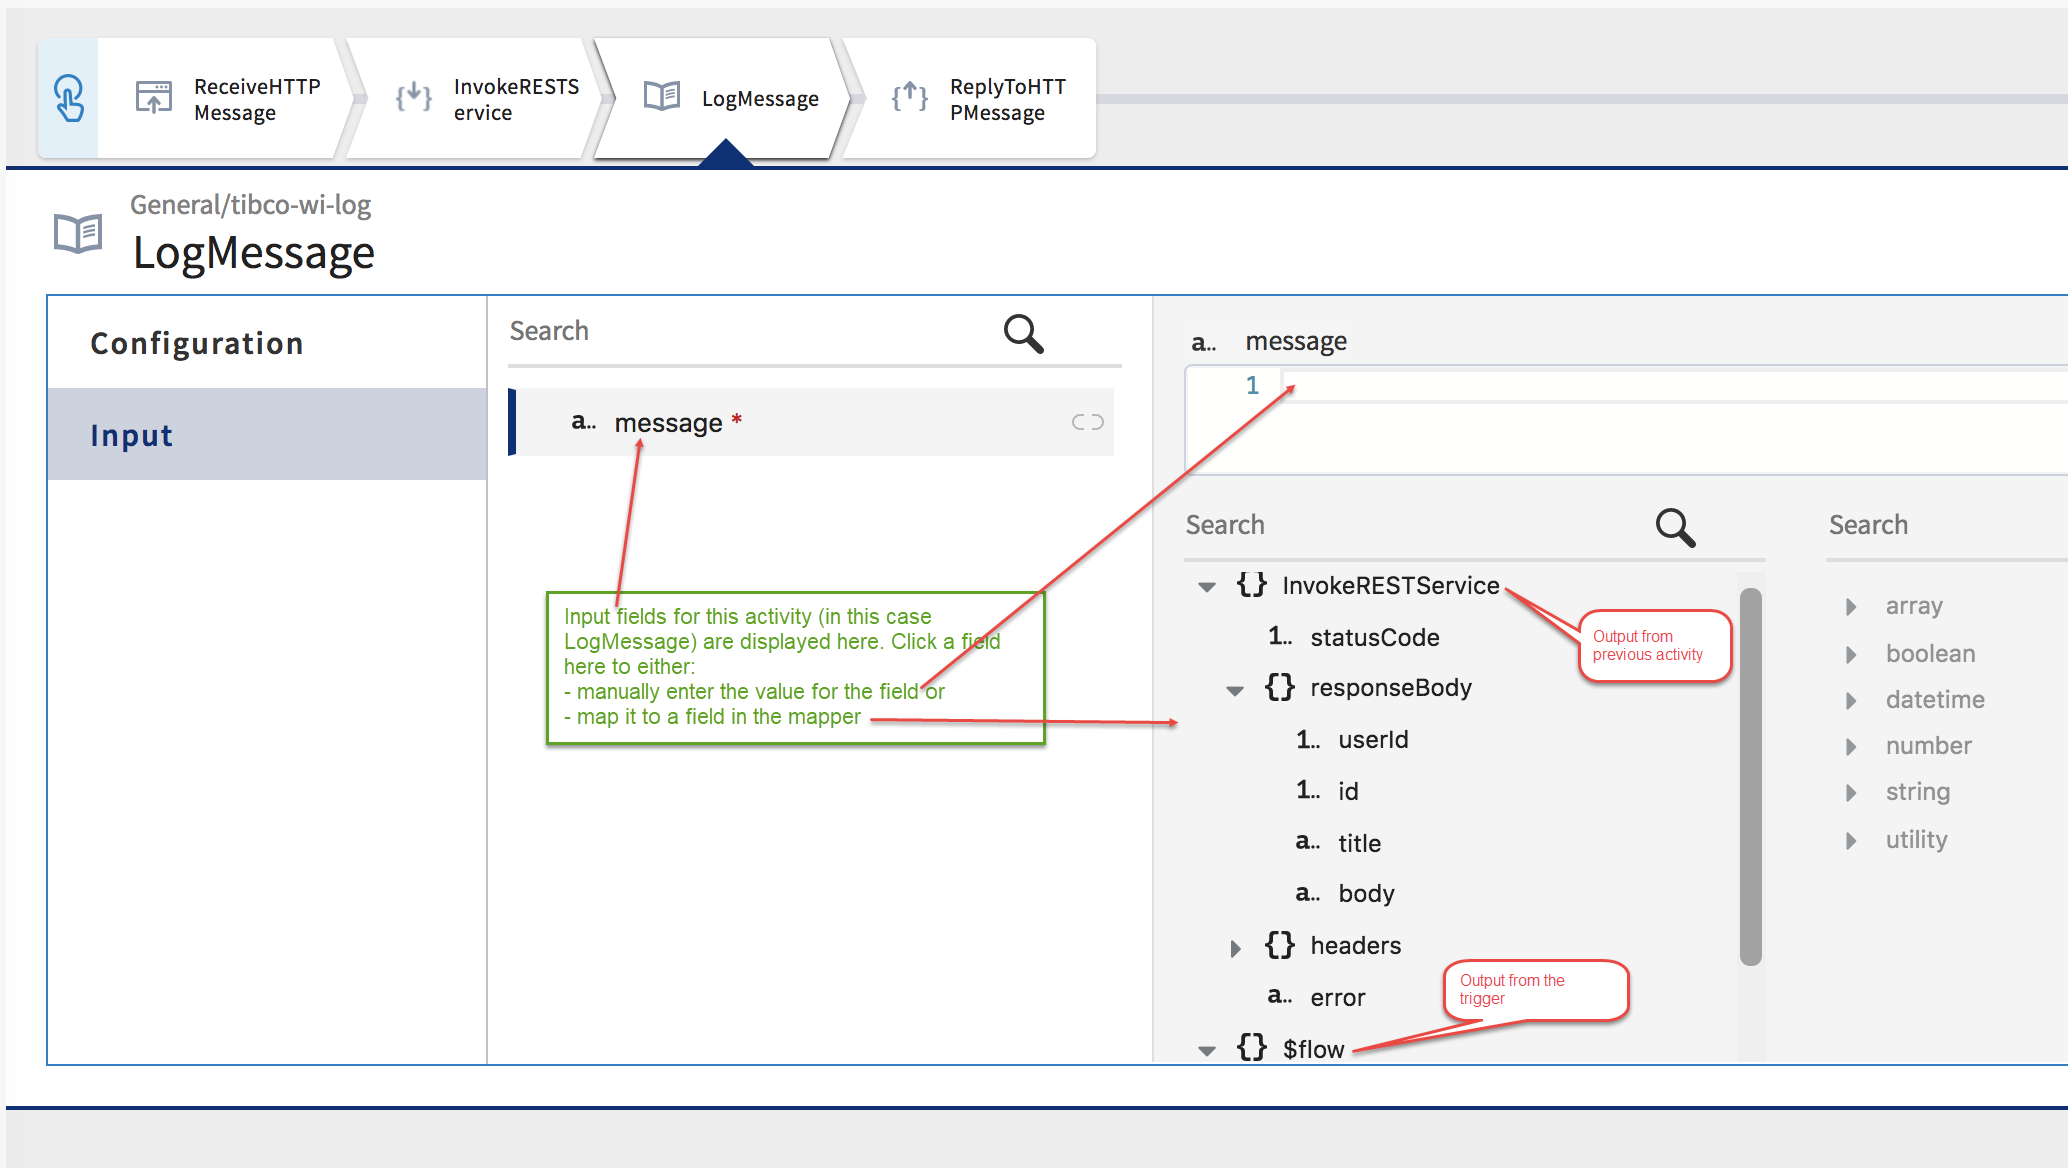
In the example above, to map the message field in the LogMessage activity Input tab, you would need to do the following:
Procedure
- Reserved Keywords to be Avoided in Schemas
TIBCO Cloud Integration- Flogo (PAYG) uses some words as keywords or reserved names. Do not use such words your schema. When you import an app, If the schema entered in the Input or Output tab of an activity or trigger in the app contains reserved names, after the app is imported, such attributes get treated as special characters which results in runtime errors. - Mapping a Single Element
You can map a single element in the input schema to a single element of the same type in the output schema of a trigger or preceding activity. - Using Functions
You can use a function from the list of functions in the right column of the mapper and provide the necessary input to the function by using the elements from the output fields in the left column of the mapper. - Using Expressions
You can use two categories of expressions in TIBCO Cloud Integration- Flogo (PAYG). - Supported Operators
TIBCO Cloud Integration- Flogo (PAYG) supports the operators that are listed below. - Mapping Array of Primitive Types
To map an array of primitive data type in the input to an array of primitive data types in the output schema, you only need to map the array. - Mapping an Array of Objects
Mapping an array of objects in the input to an array of identical objects in the output schema is a two step process. Map the array root first and then map each individual element within the object separately. Only the mapped elements will be included in the input. - Mapping an Array to a Non-Array Structure
To map an array to a non-array structure, you must use selectors in the expression.