Deploying Language Resource Files
After resource files have been created (that is, translations completed, key attribute values set, etc.), those files must be deployed to the node before they can be used in the application.
The way in which you deploy the resource files depends the type and current deployment status of the application. For more information see Deploying Language Resource Files.
The following describes the procedure for deploying resource files when an extension point had been previously defined:
Procedure
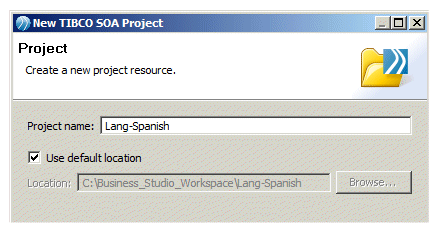
- On the Project dialog, enter a project name (this example uses the name “Lang-Spanish”), then click Next.
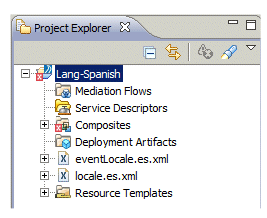
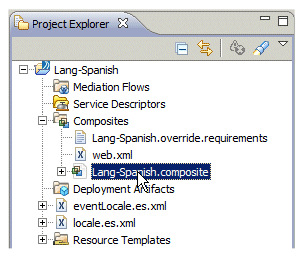
- Copy the resource files to the root folder of the SOA project, as follows:
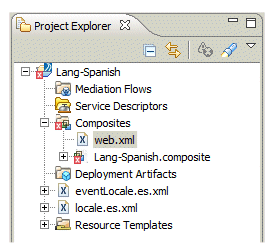
- Add a web.xml deployment descriptor to the Composites folder in the project, as follows:
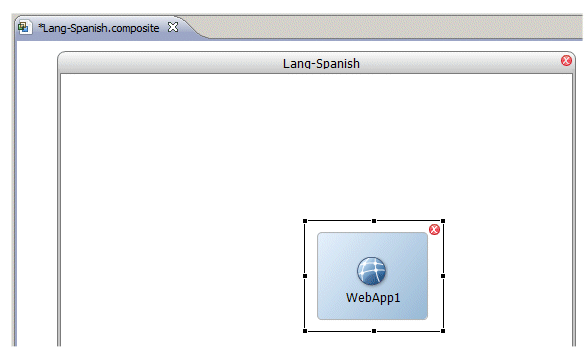
- Add a WebApp component to the composite by selecting WebApp from the Component Types palette, then clicking in the composite.
-
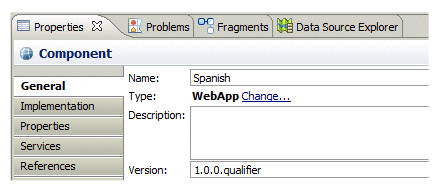
Display the
Properties view for the component, select the
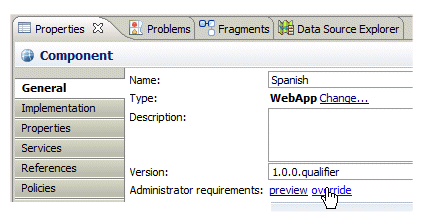
General tab, then enter a name for the component in the
Name field—this example will name the component “Spanish”:
Also notice the version number for the component on the General tab. Later versions of the component take precedence. Therefore, if you deploy resource files to the same extension point with different component versions (for example, 1.0.0 and 1.2.0), the one with the higher version takes precedence.
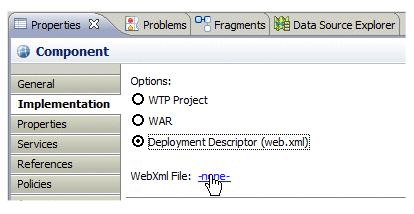
- On the Implementation tab, select the Deployment Descriptor (web.xml) option, then click the -none- link to the right of “WebXml File”:
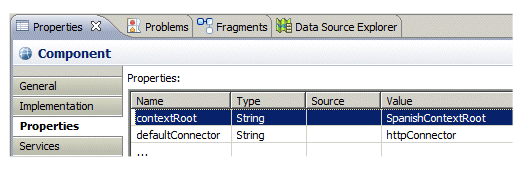
- On the Properties tab of the Properties view, enter a value for the contextRoot and defaultConnector.
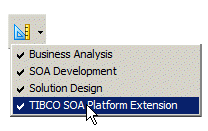
- Ensure that “TIBCO SOA Platform Extension Capability” is enabled:
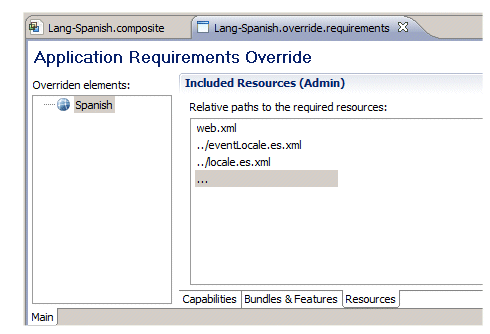
- On the General tab, click the override link:
- Use the Browse button to add the resource files:
- In the Project Explorer, right click the composite, then select from the context menu:
-
Insert an extension point reference into the composite file, inside of the <sca:Componentelement>. This specifies that resource files are being added to an application that was deployed with an extension point. The extension point reference names the extension point that is being referenced, as well as the location of the resource files in the SOA project, and the location to which they need to be mapped in the deployed application:

Use the following text for the extension point reference:
<scaext:extension xmi:id="_FYNUQEntEeC1W-tBHP1Z0A" name="LanguagePackInstallWebApp" requiredVersion="1.0.0" extensionPoint="com.tibco.n2.workspace.language-pack.extension-point"> <webapp:web-app-update xmi:id="_FYNUQUntEeC1W-tBHP1Z0A"> <static-resource xmi:id="_FYNUQ0ntEeC1W-tBHP1Z0A" location="/projName/eventLocale.ll.xml" path="/JSXAPPS/base/locale/eventLocale.ll.xml"/> <static-resource xmi:id="_FYNUREntEeC1W-tBHP1Z0A" location="/projName/locale.ll.xml" path="/JSXAPPS/base/locale/locale.ll.xml"/> </webapp:web-app-update></scaext:extension>
Change the values in the following attribute, as described:
- extensionPoint - This is the name of the extension point. If you are updating resource files in the Workspace application, this value must be the following (as this is the extension point name that is hard-coded into the Workspace application):
com.tibco.n2.workspace.language-pack.extension-point
If you are updating resource files in a custom WCC application, this must be the name of the extension point that was defined when the application was deployed. For more information, see Deploying an Application After Customizing.
- location - This specifies the location of the resource files in the SOA project. Specify the name of your SOA project in the projName part of the value, and the appropriate country code in the ll part of the value.
- path - This specifies the relative path that the resource files are to be mapped in the deployed application. Specify appropriate country code in the ll part of the value.
- extensionPoint - This is the name of the extension point. If you are updating resource files in the Workspace application, this value must be the following (as this is the extension point name that is hard-coded into the Workspace application):
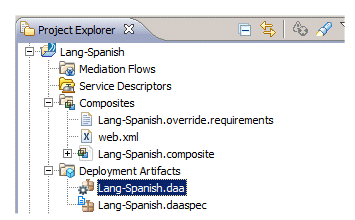
- Create a DAA by doing the following:
-
Using TIBCO Administrator, deploy the DAA file to the appropriate node.
For information about deploying applications using TIBCO Administrator, see the TIBCO Administration guide. (For a tutorial of deploying applications using TIBCO Administrator, see the How to Implement and Deploy the WelcomeUsers Application.)
Note that you may need to clear your browser cache to see the change in the application.
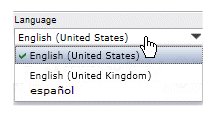
The deployed language should now be available in the application: