Accessing the Resource Editor
Procedure
-
Either click the
 icon on the resource list toolbar, or select Edit Resource(s) from the resource list Tools menu.
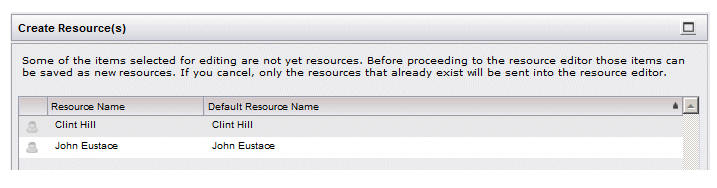
If one or more of the resources you have selected has not yet been “created” (i.e., previously mapped to a group or position, or explicitly created with the Create Resource function — see Creating Resources), the following dialog is displayed:
- Modify the resource name, if desired. The resource name is what the user must enter to log into the system. In the example shown above, “Clint Hill” must be entered as the username to log in (if left unchanged on this dialog). To modify it, select the name in the Resource Name column and change it to the desired resource name.Note: Note that only one case variation of a resource name is allowed, across all LDAP containers. For example, if there is already a resource with the name "Clint Hill", you cannot create a resource with the name of "clint hill".
The resource name can be changed at a later time if desired; see Renaming a Resource.
- Click the Save button - This creates the resource(s) listed on the Create Resource(s) dialog, then displays the Resource Editor. All of the resources that you selected in the resource list are listed in the editor.
- Click the Cancel button - This causes the Resource Editor to be displayed without creating the resources that are listed on the Create Resource(s) dialog. Only the resources that were already created among those you selected in the resource list are listed in the editor. (Note, however, that the Resource Editor does not appear if the Cancel button was clicked if none of the resources dragged were not already resources; it only appears if the Cancel button was clicked when at least one of resources that was dragged was already created.)
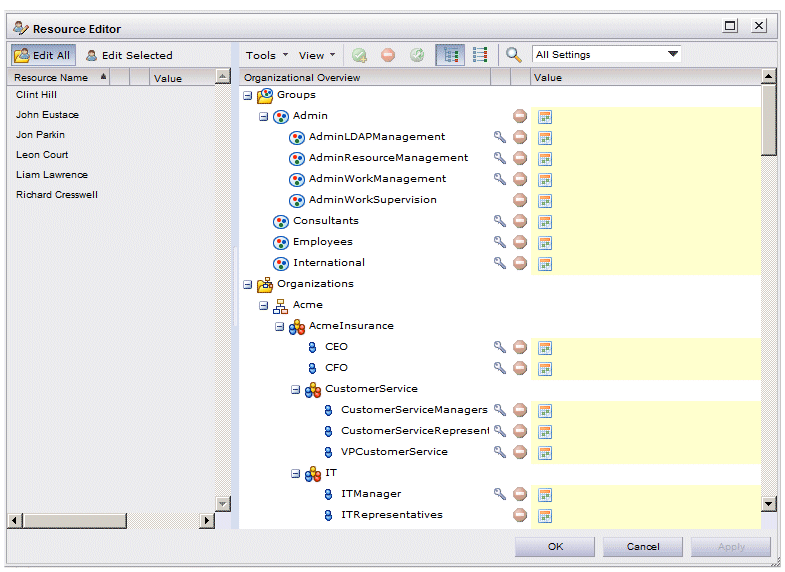
The Resource Editor appears as follows:
- Modify the resource name, if desired. The resource name is what the user must enter to log into the system. In the example shown above, “Clint Hill” must be entered as the username to log in (if left unchanged on this dialog). To modify it, select the name in the Resource Name column and change it to the desired resource name.
Copyright © Cloud Software Group, Inc. All rights reserved.