Browsing Groups
An organization model can consist of multiple groups, including subordinate groups.
Procedure
-
Click either the
Tree View (
 ) button or the
Columns View (
) button or the
Columns View ( ) button to display the organization hierarchy in a tree- or column-view format, respectively (the example below shows the tree-view format).
-
Click the
Settings (
 ) button and select
Toggle Label or Name to toggle between displaying the "label" or "name" for groups; these can be different, depending on how they were defined in TIBCO Business Studio.
) button and select
Toggle Label or Name to toggle between displaying the "label" or "name" for groups; these can be different, depending on how they were defined in TIBCO Business Studio.
-
Ensure that the appropriate version of the organization model is selected in the
Display Version field.
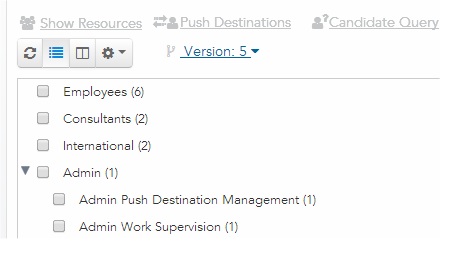
A graphical representation of the groups that have been defined in the organization model is displayed. For example:
The number in parentheses to the right of each group indicates the number of resources that are currently mapped to that group.
Note: If LDAP containers have been created on your system that have an organization relationship set up, you may or may not be able to see all organizations in the organization model when you display the Organization Browser. For more information, see Container Organization Relationships. -
Select one of the desired groups by checking the box to the left of the name, then clicking the appropriate button on the top of the dialog, as follows:
Groups can be selected by clicking anywhere on a line, or you can move up and down in the list using the arrows keys on the keyboard, then use either the spacebar or the Enter key to select/unselect an item.
- Show Resources - Displays the resources currently mapped to the group, and allows you to mapped the listed resources to additional groups. For more information, see
Mapping Resources.
Another option is to double-click on any group that already has resources mapped to it (a number other than 0 is shown in parentheses to the right of the group name). This causes a dialog to display that lists only the resources that have been mapped to that group. This dialog contains a Map Resources button that, when clicked, displays the "Resource" view, that is, the resource list for the group that was double clicked.
- Push Destinations - Displays the push destinations defined for the selected group, and allows you to add additional push destinations. For more information, see Editing Organizational Entity Push Destinations.
- Candidate Query - Displays a candidate query defined for the group, if any, and allows you to specify a candidate query. Also note that if a candidate query is configured for a group, a question mark icon is displayed next to the group name. For example:
For more information, see Candidate Queries.
- View Details - Provides the following details about the selected group.
Property Description Allocation Method Identifies the method by which resources are selected from the collection of resources mapped to the group, as follows: Organizational Entity Push Destinations The destination(s) to which work items sent to the group are to be pushed. For more information, see Editing Organizational Entity Push Destinations. Privileges The privileges assigned to the group, which are inherited by resources mapped to the group. For more information, see Privileges. Required Capabilities The capabilities resources should have to be mapped to the group. For more information, see Capabilities.
- Show Resources - Displays the resources currently mapped to the group, and allows you to mapped the listed resources to additional groups. For more information, see
Mapping Resources.