After a JVM has been created in a node it can be started, stopped, and removed. If a JVM is removed it must be redeployed.
Figure 4.1, “JVM administration” shows the screen that is used to monitor and control a JVM. The information on this screen can also be displayed using this command:
administrator servicename=A display jvm name=sandbox_Timer0
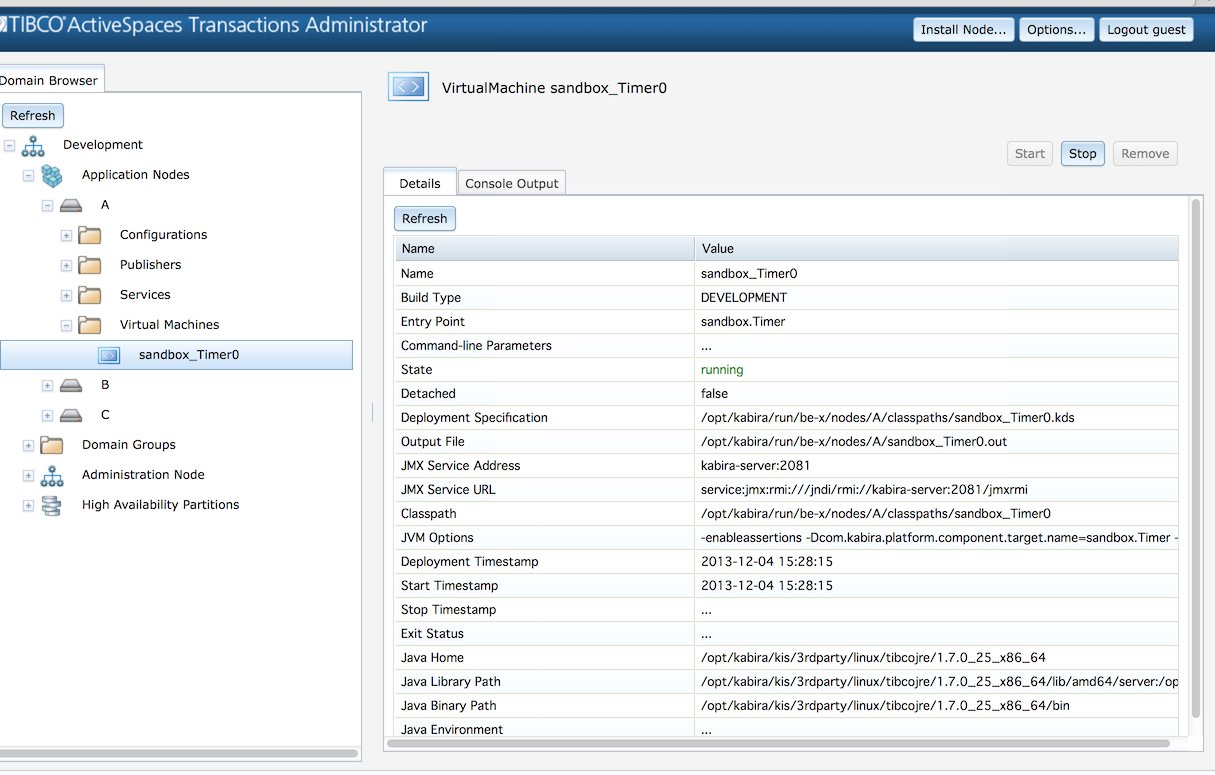
This information is displayed for a deployed JVM:
Name - JVM name.
Build Type -
DEVELOPMENTorPRODUCTIONbuild.Entry Point - Class containing
main.Command-line Parameters - Application parameters specified at deployment.
State - Current state.
Detached - Boolean indicating detached state.
Deployment Specification - Generated internal deployment specification.
Output File - Path to file containing standard output for the JVM.
JMX Service Address - Network address to connect with JMX.
JMX Service URL - Network URL to connect with JMX.
Classpath - Class path used when starting JVM.
JVM Options - Options used when starting JVM.
Deployment Timestamp - Time JVM was deployed.
Start Timestamp - Time JVM was last started.
Stop Timestamp - Time JVM was last stopped.
Exit Status - Exit status last time JVM was stopped.
Java Home - Java JDK/JRE path.
Java Library Path - JDK/JRE native library path.
Java Binary Path - JDK/JRE binary executable path.
Java Environment - Environment variables passed to JVM when it is started.
Once a JVM is deployed it supports being started, stopped, and removed. These are accomplished using the Start, Stop, and Remove buttons shown on Figure 4.1, “JVM administration”. These actions can also be performed from the command line:
//
//  Start a deployed JVM
//
administrator servicename=A start jvm name=sandbox_Timer0

//
//  Stop a running JVM
//
administrator servicename=A stop jvm name=sandbox_Timer0

//
//  Remove the JVM from the node.  It must be redeployed
//
administrator servicename=A remove jvm name=sandbox_Timer0