In this task you configure an HTML channel with one
destination. The AllOperations destination listens for
messages that come from HTTP forms embedded in the project’s
readme.html file.
What are channels and destinations? Messages enter and leave the system through channels. You create destinations within a channel to define the message sources and sinks. Typically, events are created using data in incoming messages; outgoing messages are created using data from events. Later in the tutorial, you will set up the relationship between these destinations and the event types that they listen to by default.
Note that in this tutorial outbound messages are simply sent to the console, so there are no outbound destinations.
How are channels and destinations created? You create channels and destinations at design-time, as explained below. When you are planning TIBCO BusinessEvents® Extreme projects, you would consider the incoming and outgoing messages for your project, and then define the channels, destinations, and the corresponding event types — outbound events are transformed into appropriate messages, and inbound messages are transformed into events of a specified type.
Why Use Shared Resources? Shared resources are generally used in channels to configure communication with some external system such as HTTP clients or a JMS server. You can configure the connection once and use it in multiple places. If some configuration has to be changed, you just have to change it in one place.
![[Tip]](images/tip.png) | |
It’s a good idea to use global variables in shared resources so that projects can be quickly adapted to run in different environments. |
![[Note]](images/note.png) | |
See Channels and Destinations, and JMS Channels chapters in the TIBCO BusinessEvents® Extreme Application Developer’s Guide. |
Select the
SharedResourcesfolder and pressCtrl+N. You see the Select a Wizard dialog. (You could also get here usingFile > New > Other.)Select
TIBCO Shared Resources > HTTP
          Connection
and clickNext.In the New HTTP Connection Wizard, name the connection
HTTPConnectionand clickFinish. (In a real world situation you would probably give the connection a more meaningful name.) You see the HTTP Connection dialog.Resource names and directory names in the path to a resource cannot be any of the keywords or other words listed in the Rule Language Grammar chapter in TIBCO BusinessEvents® Extreme Application Developer’s Guide, and they cannot contain spaces.
In the
Hostfield, enterlocalhost.In the
Portfield, enter8108. This is the default port used in thereadme.htmlfor this project.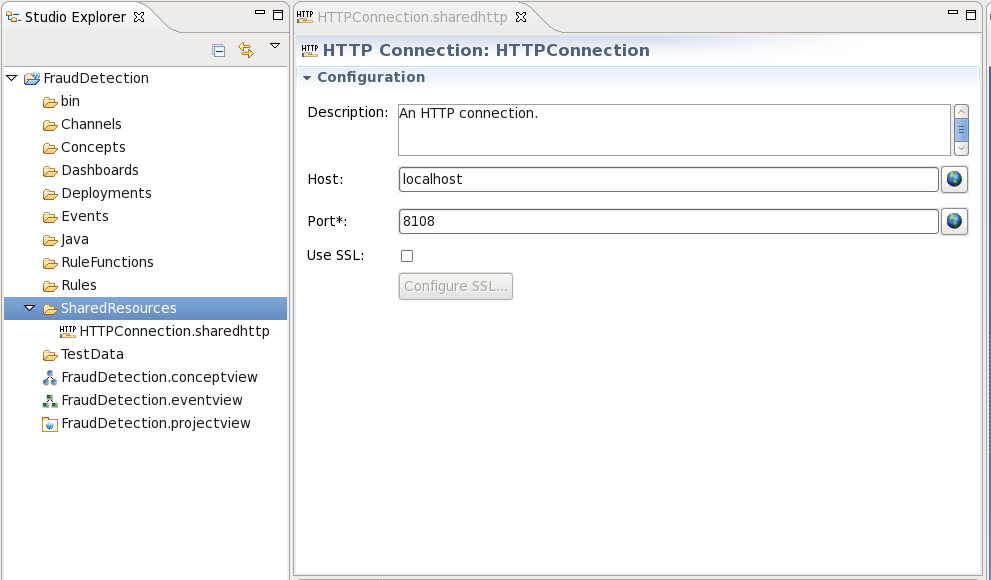
Save the resource (
File -> Save) and close it.
You see the New Channel Wizard.
In the Channel Name field, type
HTTP.![[Warning]](images/warning.png)
This value is case sensitive. Ensure that you use all capital letters.
In the Description field, type
An HTTP channel.In the Driver Type field, select
HTTP.Click
Finish. You see the Channel editorYou cannot change the channel name in the editor after you click
Finishin the new resource wizard. You can change the description, however. You can later rename the resource using a shortcut menu refactoring option.
In the Resource field, browse to and select the HTTP connection resource you created in the section called “Add an HTTP Connection”. Only valid shared resources for the current resource display.
In the Destinations section, click
and name the destinationAllOperations. You need to click on the assigned default name and use the Rename pop-up to change the name. Leave all other fields set to their default values.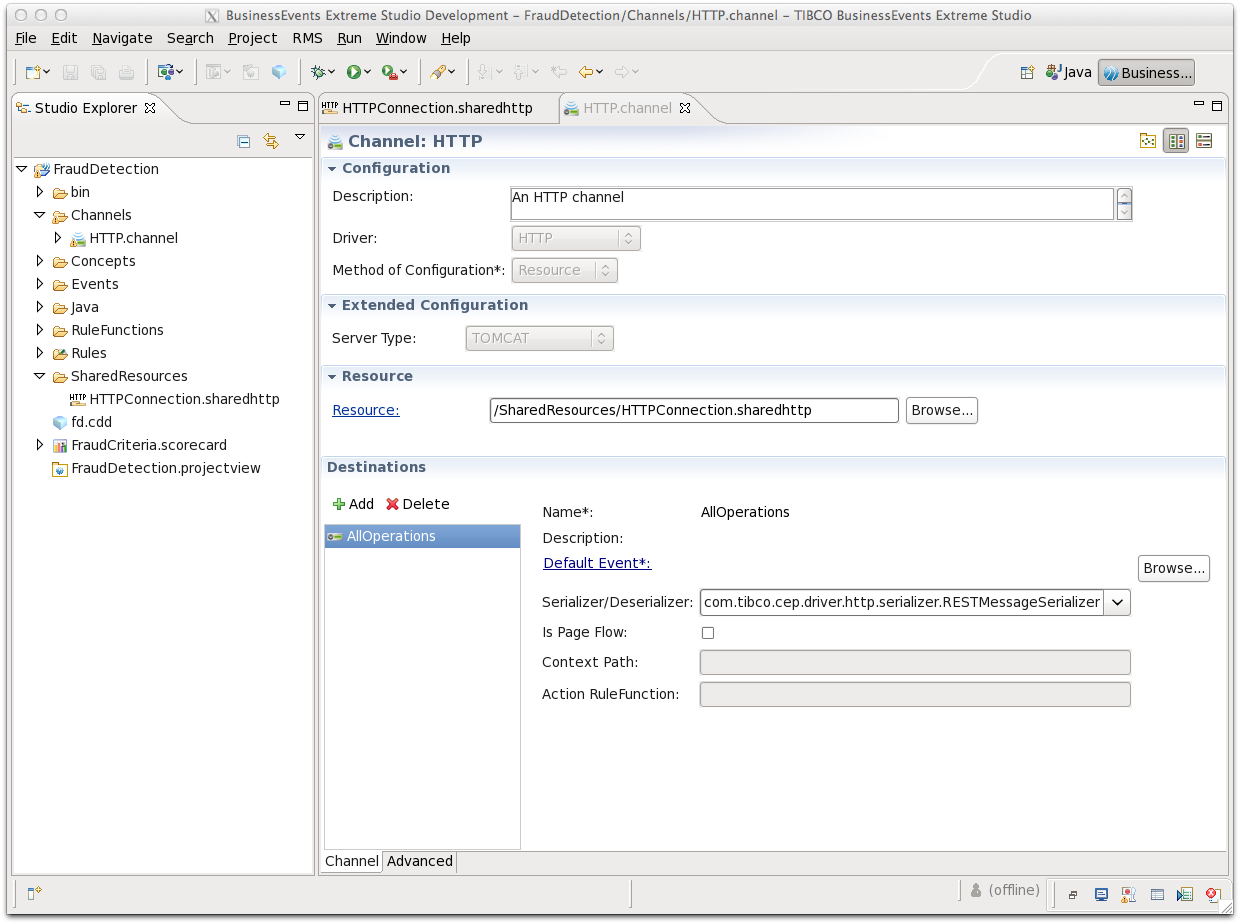
Save and close the resource.
All messages arriving at a destination are transformed to the destination’s default event, unless the message specifies a different event. Adding a default event, however, does stop a warning sign from appearing! — this warning draws your attention to the fact that a destination does not have a default event, but does not indicate an error.
Default events and destinations are explained in the next step.