Signing into the AMS Web Client
This topic explains how to sign into AMS from its web client and navigate the user interface. The available options displayed in the web client vary based on your assigned user role and privileges.
Signing into AMS
AMS supports the following two methods for signing into the web client, depending on how your user account was configured.
- Native Sign-In
-
Sign-in to AMS requires a valid user name and password, as configured by your AMS administrator.
- Single Sign-On with OpenID Connect
-
If Single Sign-On with OpenID Connect is enabled to connect with a valid ID provider, you can sign into the web client using your provider ID account.
-
Launch Google Chrome, which is the supported web browser for AMS.
-
Enter the URL for the web client, as provided by your AMS administrator.
-
Choose a sign-in option as described in the next sections.
Signing in Natively
-
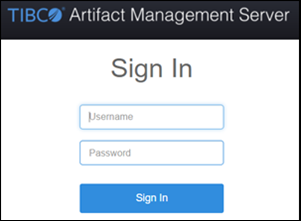
Enter your AMS user name and password in the TIBCO Artifact Management Server welcome screen and click .

Signing in Using Open ID Connect
Open ID Connect (OIDC) sign-in relies on an OIDC identity being associated with — bound to — an AMS user. The first time you sign in through an OIDC provider, no binding exists, and one must therefore be created. The binding is created in one of three ways, depending upon the configuration of AMS server:
-
The binding is created automatically
-
You enter the username and password of an existing AMS account, and the OIDC identity gets bound to that user
-
You enter the username and password of AMS user account to be created, and the OIDC identity gets bound to that newly-created user account (which is typically initially disabled).
-
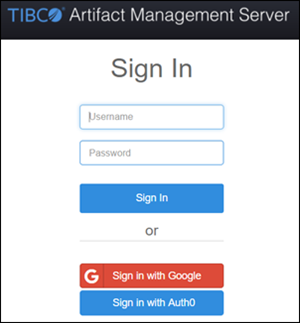
If AMS is configured for Single Sign-On with OpenID Connect, click on your provider to sign in (note that you can still sign on natively regardless of whether Single Sign-On is enabled). The following dialog shows the two default providers AMS uses — Google and Auth0.

-
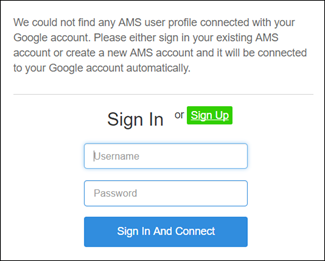
If your OIDC identity is already bound to an AMS user account, the sign-in takes you directly to the AMS web client. Otherwise, depending up the AMS server configuration, you are prompted to sign in to an existing AMS account or enter the username and password of a new AMS user account to create, as shown in the following Sign In or Sign Up dialog.

-
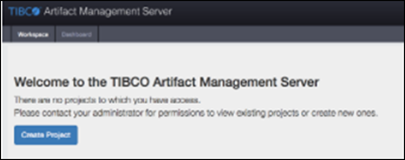
If no projects currently exist that you have access to, AMS prompts you to create one, as shown below.

After Signing into the Web Client
If no projects currently exist under your user name, AMS prompts you to create one. At this point, project creation is optional and is described here: Building Rules for Decision Table Artifacts.
Otherwise, AMS displays projects to which you have access in the web client's Workspace view. The following example shows one project called New_Project, which contains one artifact called New_Artifact. The artifact's contents are displayed in the Artifact Editor, which is located in the right pane and is where you build and edit artifacts.
 |