Contents
- Before You Install
- Maintaining Multiple StreamBase Releases
- Uninstalling a Previous Release of StreamBase
- Installation Procedure
- 64-Bit Windows Considerations
- Windows Start Menu Considerations
- Installing Additional Features
- Using the StreamBase Command Prompt
- Allow Connection If Your Firewall Prompts
- Using Cygwin or Other Alternate Shells
This page describes the installation of the TIBCO StreamBase® base kit on Microsoft Windows platforms. The base kit for Windows includes the StreamBase Studio authoring environment, the StreamBase Deployment Runtime, and support files for the StreamBase Client API.
This page describes the installation of the TIBCO StreamBase® plus TIBCO® Live Datamart base kit on Windows platforms. The base kit for Windows includes the StreamBase Studio authoring environment, the StreamBase Deployment Runtime, support files for the StreamBase and LiveView Client API, and the LiveView extensions for StreamBase Studio.
Before you install TIBCO StreamBase, use the following checklist to make sure each target machine matches the prerequisites.
| Read through the Release Notes for the current release to look for any late-breaking information about installing StreamBase on Windows. | |
| If you have used StreamBase Studio on the target machine, back up your existing Studio workspace and configuration. | |
| Confirm that the target machine is running a supported version of Windows with the latest updates. See Supported Configurations. | |
| Confirm that the target machine's RAM and disk space requirements meet or exceed the minimums listed on Supported Configurations. | |
| Depending on the target machine's configuration, you may need administrator rights to install into the default location. | |
| Certain command-line operations must detect an Oracle JDK at the operating system level, independent of the JDK bundled with StreamBase. The installation requirements of a JDK for command-line use are discussed in Installing a Command Line JDK. |
You can install more than one release of StreamBase on the same Windows computer, with specific limitations outlined below.
-
Maintenance releases are always installed in the parent release's directory. For example, release 10.1.6 would be installed in the StreamBase 10.1 directory. If you also have a 10.0.x release on the same machine, it would not be affected by installing 10.1.6, because 10.0.x would be located in the
C:\TIBCO\sb-cep\10.0directory. -
New maintenance releases replace any previously installed release for the same
major.minorversion on your system, which means you must uninstall the existing release in the same major.minor series. -
Installing new releases of the same major.minor series does not impact existing StreamBase deployments. Your Studio workspaces persist independently of the installed software.
To install a maintenance release, you must first uninstall any existing version of the same major.minor release. If you do not, the StreamBase installer prompts you to uninstall the existing one.
Do not remove the StreamBase installation directory manually. That is, do not drag it to the Recycle Bin or select it and press Delete, or remove it at a command prompt. Instead, to uninstall a previous StreamBase release, use the Uninstall a program page in the Windows Control Panel.
Uninstalling a previous StreamBase release does not affect any StreamBase application files you created in that release. The StreamBase uninstaller only removes files that the installer placed on your disk, and deliberately leaves certain files in place:
-
Your StreamBase Studio workspace and configuration directories are preserved.
-
Any Eclipse plug-ins you downloaded and installed into StreamBase Studio are left behind, including any data, log files, and directories they use.
To install StreamBase on Windows, follow these steps:
-
If you are installing a maintenance release for an existing installation, first uninstall the existing StreamBase release, as described in Uninstalling a Previous Release of StreamBase.
-
Launch the StreamBase installer by running the
.msiinstaller file that you downloaded from the TIBCO distribution site.The StreamBase installer is named with the following pattern:
TIB_sb-cep_m.n.p_win_x86_64.msiwhere
m.n.pindicate the major, minor, and maintenance release numbers. -
Follow the instructions on screen to accept the StreamBase license agreement.
-
Accept the default StreamBase installation location or browse to a different location. However, NEVER try to overwrite an existing previous StreamBase installation.
-
Click to begin the installation process.
-
On the installer's final screen, select the check box to open the post-installation README in your Web browser to see important information. The README describes the entries installed in the Windows Start menu for this release.
-
Click the button.
StreamBase is only supported on 64-bit Windows. This gives rise to the following considerations:
-
Microsoft does not support loading 32-bit shared libraries or DLLs into 64-bit processes. Thus, if you have any StreamBase plug-ins such as custom clients written in C++ with a previous StreamBase release, they must be recompiled for 64-bit operation.
-
The 64-bit StreamBase installation includes 64-bit link libraries for C++ and .NET, which allows you to rebuild any custom client applications for 64-bit operation.
-
Any embedded adapter that calls Windows-native libraries for underlying support must be adjusted to load the 64-bit version of those shared libraries, if available.
This section describes Windows Start menu changes made by the StreamBase and Live Datamart installers.
Links to run the included applications are placed in the Windows menu in the TIBCO folder.
Be aware that all pre-7.5.0 and pre-2.0.0 versions of installed StreamBase software continue to display as individual entries above the TIBCO folder entry.
On Windows 8, the StreamBase installer places an icon to start StreamBase Studio on the desktop, but does not initially appear to provide a way to start the other features installed.
However, you can switch to the Start tiles screen and use its search feature to locate the phrases StreamBase or LiveView. This results in entries clearly labeled, such as StreamBase 10.1 Command Prompt.
The same Start menu structure is actually installed on Windows 8 as for Windows 7 as described in the previous section. However, Window 8 has famously lost its Start menu in favor of the start tiles mechanism.
TIBCO recommends the following procedure to allow you to start and run StreamBase and LiveView programs with ease from the Windows 8 desktop:
-
Open Windows 8 Desktop mode.
-
Double-click This PC to open a Windows Explorer window.
-
Navigate to the following location, or copy and paste this path in the Explorer window's navigation field:
C:\ProgramData\Microsoft\Windows\Start Menu\Programs
The
C:\ProgramDatafolder is hidden by default, so you may need to select the Hidden items check box on the View ribbon of the Explorer window. -
Select the
TIBCOfolder in this location. Right-click and drag it to the desktop, holding down the right-click mouse button all the way. Then release the mouse button, and select Create shortcut here from the pop-up menu. -
Thereafter, double-click the desktop shortcut to the TIBCO Start menu items, where you can navigate the folders and double-click to launch any item.
On Windows 10, Start menu entries for StreamBase and Live Datamart are much like the image shown above for the Windows 7 Start menu.
The difference is that Windows 10 no longer allows subfolders to appear in the Start menu. That is, in Windows 7, the Start
menu was organized with a top-level TIBCO folder that contained TIBCO Live Datamart and n.m TIBCO StreamBase subfolders. However, Windows 10 now allows only the top-level n.m TIBCO folder in the Start menu, which means the contents of the former subfolders are concatenated into one folder.
If you have a single TIBCO product installed, the Windows 10 Start menu organization works well. However, if you have more
than one TIBCO product installed, all Start menu entries from all products appear together in one long TIBCO menu.
Of course, the installers for existing products cannot be retroactively reconfigured to install each TIBCO product into its own top-level Start menu folder. Eventually, newer releases of TIBCO product installers, including installers for StreamBase and Live Datamart, will catch up with the new restrictions imposed by Windows 10.
In the meantime, you can manually reorganize your Start menu to place the menu entries for each TIBCO product into their own top-level, product-specific Start menu folder. Follow these steps:
-
Use one the following Windows 10 key combinations:
-
Enter Windows-key+R and type
shell:common start menu. Use this method if you installed your TIBCO product in a system-controlled folder such asC:\TIBCOorC:\Program Files. (By default, StreamBase and Live Datamart are installed inC:\TIBCO.) -
Enter Windows-key+R and type
shell:start menu. Use this method if you installed your TIBCO product in a personal folder as part of your Windows home directory.
-
-
This opens a new Explorer window to the top of the System or Personal Start menu, respectively. Double-click
Programsto enter the Start menu folder itself. -
Look for a folder named
TIBCO. If not found, use the other key combination and look again. (It is also possible to have aTIBCOfolder in both Start menu locations.) -
Look inside the
TIBCOfolder. If it contains subfolders for the product of interest, move each entire subfolder, one at a time, one level up to become a sibling of theTIBCOfolder. -
Rename each moved subfolder so that it begins with "TIBCO". This keeps all TIBCO products alphabetically together in the Start menu. For example, move
StreamBaseup parallel to its containingn.mTIBCOfolder, and rename itTIBCO StreamBase. Do the same for then.mLive Datamartsubfolder.n.m -
If you have other TIBCO products installed, including other versions of StreamBase, move their subfolders or move their individual menu entries for each product in turn.
-
If your
TIBCOfolder contains individual menu entries instead of, or alongside subfolders, create new top-level folders, parallel toTIBCO, to contain the Start menu entries for each product of interest. -
Move the appropriate menu entries from the
TIBCOfolder to the newly created top-level folder.
-
-
When the
TIBCOfolder is empty — that is, when all of its contents have been moved up to new top-level folders — you can delete theTIBCOfolder.
TIBCO provides separate installer files for the Excel Add-in, certain additional adapters, and add-in products such as the High-Performance FIX Engine.
As downloaded from the TIBCO distribution site, the installers are delivered in a single file named with the following pattern:
TIB_productid_major.minor.servicepack_win_arch.msi
where productid identifies the add-in or adapter, major, minor and servicepack identify the specific release, and arch identifies the targeted CPU architecture, either x86 for 32-bit or x86_64 for 64-bit.
After completing the installation of StreamBase on Windows, you can next install any external adapter or add-in product for which you have a license, using its separate installer.
The installers for most add-in products look for a matching StreamBase base release, and only allow installation of the product into that base release's directory. By contrast, external adapters can be installed on a machine that does not have a StreamBase installation.
On Windows, the StreamBase Runtime and all StreamBase command-line utilities must be run from a StreamBase Command Prompt that you invoke from the Windows Start menu or from a shortcut on the Windows Desktop. Do not use the standard Windows command prompt. The StreamBase Command Prompt has its environment and PATH preconfigured for running StreamBase commands and utilities.
See Environment Settings for a table of the environment variables set by the StreamBase Command Prompt.
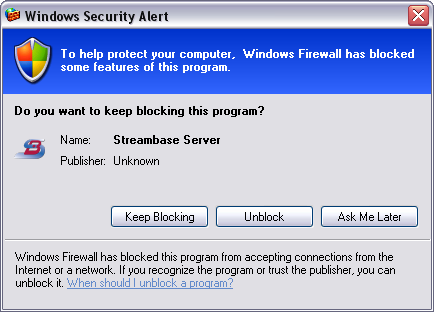
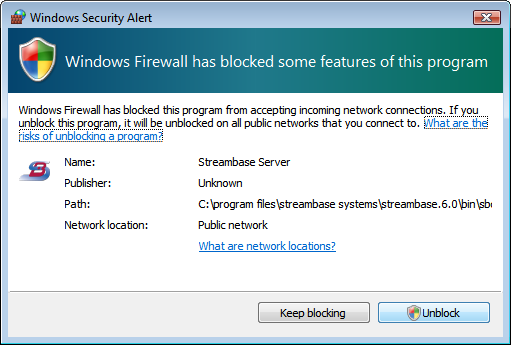
When you run a StreamBase application in StreamBase Studio (for example, by launching one of the demos in the SB Demos perspective), StreamBase Studio makes a local network connection to a StreamBase Server instance. When this connection is first attempted, your firewall or Internet security software may issue a warning message. Always select the Allow or Unblock option that allows StreamBase to make the connection.
In StreamBase Studio, the connection cannot proceed until you allow the firewall or Internet security software to let StreamBase make the connection.
The message may refer to StreamBase Server, or sbstudio.exe (StreamBase Studio), or javaw.exe (Java). You may see separate messages for internal programs epadmin.exe, swcoord.exe, and DTMengine.exe. In all cases, allow StreamBase Studio to make the connection. StreamBase is not performing an outgoing connection of any kind.
You may see similar messages if you select options on the StreamBase Studio Welcome page that access an external website or open a topic in the local StreamBase Help (which uses a Java viewer). For example:
You are welcome to use a third-party command-line environment such as the Linux-like environment provided by Cygwin, as long as you are comfortable configuring that environment. StreamBase formally supports using StreamBase command and the mvn command using the StreamBase Command Prompt.
The primary caution about using the Cygwin, MSys, or the Windows 10 Ubuntu subsystems is to make sure the subsystem has the same sense of home directory as the StreamBase Command Prompt or as Windows command prompts in general.
StreamBase Studio's embedded Maven subsystem writes to a critically important local repository stored by default in your Windows
home directory, in a folder named .m2. If your Linux-like subsystem has a different meaning for your home directory, then it might try to create and use a different
.m2 directory in a different location. You can set environment variables to reconcile the meaning of HOME in the various systems.
As an alternative, you can set up custom settings.xml files for your different Maven installations to make sure they use the same local repository directory. See the online Maven documentation for further details.