So far we have created an application and started it in StreamBase Studio. Our goal is to enqueue some data to it and view its output, and the application is now waiting for tuples to process.
If you performed the Getting Started Cheat Sheet, you enqueued data manually, one tuple at a time. In this tutorial we will learn a more sophisticated method: using a feed simulation that automatically enqueues test data. A feed simulation can enqueue data at faster rates and in different ways than manual data.
The StreamBase Feed Simulator is highly customizable, and you can learn more about its many features in the Test/Debug Guide. Several feed simulations are provided with the firstapp sample application that is installed with StreamBase, as described in First Application Sample. In this topic we will recreate one of them: firstapp-enum.sbfs. It generates tuples choosing values from a list that you provide.
-
Switch to the SB Test/Debug perspective, and open the Feed Simulations view. The view contains a list of existing feed simulations in the project (your list may be empty at this point). Below the list are control buttons to run and stop a selected feed simulation, and a slide control that lets you change the rate at which tuples are submitted.
-
To add a simulation to the list, right-click in the list area and choose from the context menu.
-
In the New StreamBase Feed Simulation wizard:
-
Enter or select the name of your application's parent folder,
MyFirstApp. -
Enter a name for your simulation:
firstapp-enum.sbfs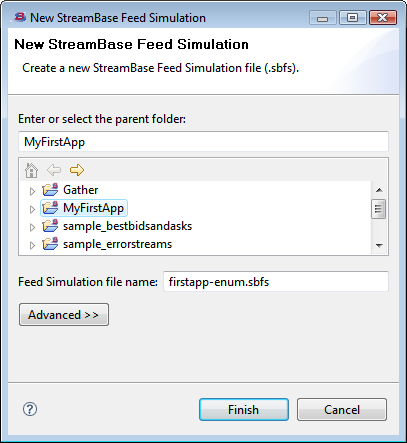
Click to create the new feed simulation and close the wizard.
-
-
Your new file opens in the Feed Simulation Editor.
In the Simulation Streams area, you must define a stream for the feed simulation that can enqueue data to the application's input stream. Click to borrow the stream's schema from the application.
-
In the Stream Selection dialog, open the
MyFirstAppandMyFirstApp.sbappnodes. SelectTradesInand click .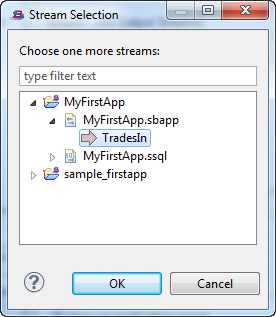
-
This places the TradesIn stream in the Simulation Streams area. Open the arrow symbol on left of the stream's name to see the schema of the imported stream.
-
In the Feed Simulation Editor, we will change the default behavior, which is to generate random values for each field in the input stream. We instead want to model a set of specific values. In the Generation Method section, select the
Customoption and click . -
In the Customize Fields dialog, define each field as follows:
- symbol
-
-
In the Generation Method column, select from the drop-down control.
-
Select the option at the bottom of the dialog named The following values.
-
Click the
 button four times, and enter these values and weights in the new rows:
Value Weight NKE 1.0 CMG 2.0 GMCR 1.0 FSLR 2.5
-
- quantity
-
-
In the Generation Method column, select again.
-
Again select the The following values option.
-
Click the
button six times.
-
Choose the option,
The following values. -
Enter these values and weights:
Value Weight 30000 0.1 10000 0.1 100 0.2 200 0.2 400 0.2 1000 0.2
-
The weights determines the relative frequency of values generated. By default, all weights are one, meaning all values are equally likely to appear. A fractional weight of 0.2 means that the specified value is to appear 20% of the time.
Click to close the dialog.
-
Press Ctrl+S to save your feed simulation.
In this topic, you learned how to create a feed simulation. Click to go to use your feed simulation with your running application.