This topic describes how to create and activate a LiveView Service entry on Windows, and how to activate that service. LiveView can only be started with a compiled project with a minimal configuration, so you will need to have a configured project that you want to have running as the Windows service.
A Windows service is an executable that can be set to run automatically when Windows is booted, and to remain running as a background process. This example creates a service for running the Hello LiveView sample project.
-
Open a StreamBase command prompt as administrator.
-
Navigate to the directory that contains the project directory. This example uses lv-sample-helloliveview in the following directory
:C:\Program Files (x86)\StreamBase Systems\StreamBase.n.m\liveview\sample -
Use the lv-server command with the install-service option. This example uses the sample project lv-sample-helloliveview, service name hellolv and service display name Hello LiveView. This single command is shown on two lines for clarity:
lv-server install-service lv-sample-helloliveview
     --service-name "hellolv,Hello LiveView"
To activate the default installed LiveView service so that it starts at Windows boot time:
-
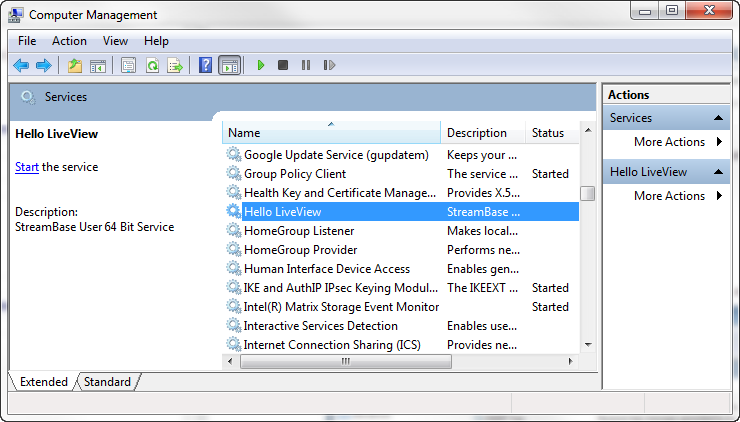
Open the Windows Services control panel, as shown in the example below.
-
Locate the Hello LiveView entry.
-
To start the service one time for testing, click the Start the service link on the left, or right-click and select Start.
|
-
To start the service every time Windows boots, follow these steps:
-
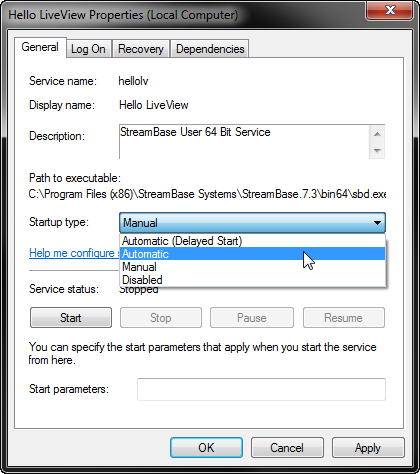
Double-click the entry. This opens the Properties dialog, like the example below.
-
In the Startup type drop-down list, select Automatic.
-
If you need to be able to run the service as a particular user, click the Log on tab and enter your username and password.
-