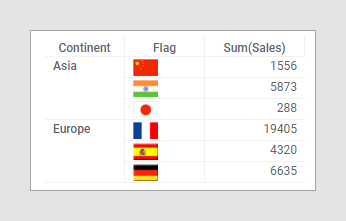
Images in the cross table
Cross tables can be configured to show images in axis labels.
Note: Some of the functionality
described here can only be authored or accessed using the installed Spotfire
client.
You can show images using one of the following options:
- Images are fetched via an URL and built up by the content of the selected expression/column. The actual image is then stored in a file on the network, or on the Internet, and is rendered using the Image from URL option in the Label rendering section.
- Images are stored in BLOB columns in an in-memory data table and rendered directly as images.
- A virtual column producer is available which can transform the value from the chosen expression/column into a desired output. For example, a column containing the IDs of molecules can be used on the axis and the corresponding Molfiles can be fetched from a database and rendered as images showing chemical structures in Spotfire.
Setting up a cross table with images from a binary column or from a URL
- In the visualization
properties for the visualization of interest, locate the
Row axis and
Column axis sections.
Note: The visualization properties look slightly different depending on the client you use and from where you open the properties, but the settings work the same. The Row axis and Column axis are sometimes called Vertical axis and Horizontal axis.
- On the
Row axis or
Column axis section, in the column selector,
choose the column containing binary data to show images based on binary data.
To show images from the web or a local network using a URL, choose the column containing the identifier of the image.
- Click the axis section to expand it and to see the Label rendering settings.
- If you have selected more than one column on the axis, click the column of interest.
- To show images from a
binary column, change
Show as to
Image.
To show images from a URL, change Show as to Image from URL.
- If you chose Image from URL, you must configure the URL. Click Settings or the settings icon next to the drop-down list. Enter the URL where {$} represents each cell value, so that the resulting URL points to your image when the values from the identifier column replaces the {$}. For example, if the images are stored on a network drive which is common for everybody in your company and the identifier column contains the names of the images, then the URL to enter might be Q:\Images\{$}.
- Click OK.