This dialog is used to set up a connection to data in the Amazon Redshift cloud data warehouse, allowing you to choose whether to analyze data in-database or to import it into your analysis. Note that you need to install a driver on your computer to get access to the Amazon Redshift connector. See the system requirements at http://support.spotfire.com/sr_spotfire_dataconnectors.asp to find the correct data source driver. You can also view Getting Started with Connectors to learn more about getting access to connectors in Spotfire.
To add a new Amazon Redshift connection to the library:
Select Tools > Manage Data Connections.
Click Add New > Data Connection and select Amazon Redshift.
To add a new Amazon Redshift connection to an analysis:
Select File > Add Data Tables....
Click Add.
Select Connection To > Amazon Redshift.
Option |
Description |
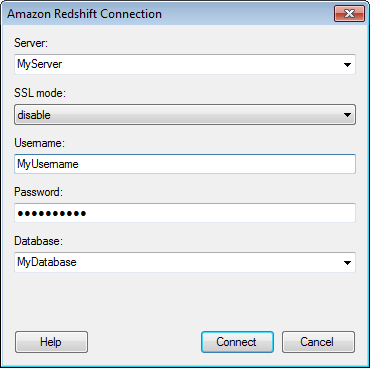
Server |
The name of the server where your data is located. To include a port number, add it directly after the name preceded by colon. Example with port number: |
SSL
mode |
Specifies whether or not SSL should be used when connecting to the Amazon Redshift database. disable allow prefer require verify-ca See the official Amazon Redshift documentation for more information about how to use SSL mode. |
Username |
The account name you wish to use when logging into the Amazon Redshift database. |
Password |
The password for the specified account. |
Database |
The name of the database where your data is located. |
See also: