Monte Carlo Example 1: Adequacy of Sample Size and Heywood Cases in Factor Analysis
One of the questions that tends to arise in many contexts in statistics is "How big a sample do I need?" In standard classical testing situations, this is related frequently to the question of statistical power. If you need to reject the null hypothesis to prove a theoretical point, you certainly want to have adequate power to detect a false null hypothesis. Increasing sample size is the most straightforward way of manipulating power.
In covariance structure analysis, the experimenter is frequently in a somewhat different position, i.e., trying to show that a particular model fits the data well. Here, there can be a different reason for questioning sample size. This reason is not emphasized sufficiently in most textbooks on structural modeling. Specifically, when sample size is insufficient, the iterative procedure may converge to a minimum that is simply impossible, i.e., represents estimates that are way out of line with reality.
For example, in factor analysis, you may encounter the Heywood case, in which one of the residual (or "unique") variances is estimated to be zero (or, in older structural modeling programs, a negative value).
A natural question to ask at the outset of a structural modeling study is, "If my model is a good approximation to reality, the basic statistical assumptions are met, and I gather a sample of size N, am I likely to obtain results from my analysis that agree with my model?" If the answer is "No," you may as well not conduct the study! Yet, people seldom investigate such a question before conducting structural modeling studies, and no published textbook describes the use of Monte Carlo methods to investigate such a question.
Here, we examine how the use of Monte Carlo methods can reveal an insufficient sample size, i.e., an N that leaves a high prior probability of a misleading analysis.
We will use the data file Lawley.sta, and imagine that we are Lawley, about to gather data to test a confirmatory factor model like the one in the file Lawley.cmd. In this example, we will use the Monte Carlo module of SEPATH to examine the long-run performance of the testing procedure in a situation where the confirmatory factor model and underlying statistical assumptions are correct.
Ribbon bar. Select the Home tab. In the File group, click the Open arrow and select Open Examples to display the Open a STATISTICA Data File dialog box. Open the Datasets folder. Open the data file, which is located in the SEPATH folder. Then, select the Statistics tab. In the Advanced/Multivariate group, click Advanced Models and on the menu, select Structural Equation to display the Structural Equation Model Startup Panel.
Classic menus. On the File menu, select Open Examples to display the Open a STATISTICA Data File dialog box. Open the Datasets folder. Open the data file, which is located in the SEPATH folder. Then, from the Statistics - Advanced Linear/Nonlinear Models submenu, select Structural Equation Modeling to display the Structural Equation Model Startup Panel.
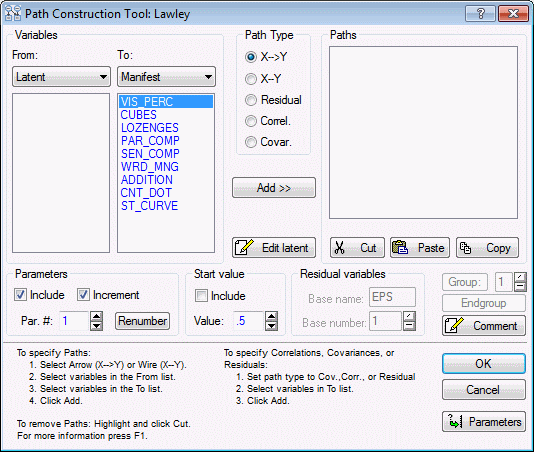
Click the Path tool button to display the Path Construction Tool dialog box.
In the Path Construction Tool dialog box, click the Edit latent button to display the Path Tool - Edit Latent Variable Names dialog box. In the first three boxes, type in the names Visual, Verbal, and Speed.
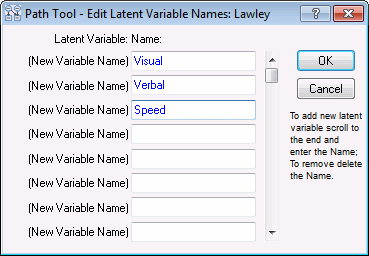
Click the OK button.
We are going to simulate a model in which all factor loadings are .6, all unique variances are .64, and all the factor intercorrelations are zero. We will do this by creating a model with these numbers inserted in braces as initial values. The Monte Carlo procedure will read these numbers, treat them as population parameters, and generate samples from the covariance matrix corresponding to these values.
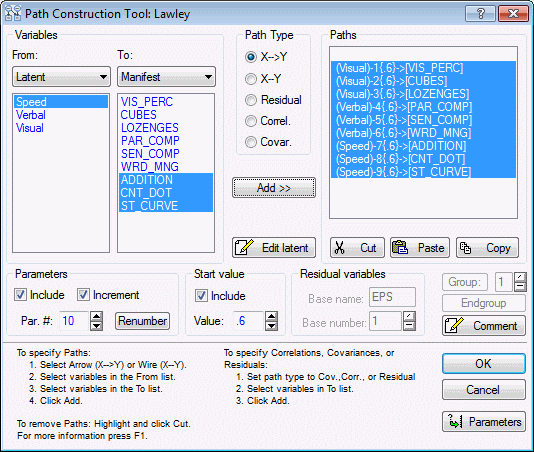
First, create the factor loadings for the Visual factor.
In the Path Construction Tool dialog box, select Visual in the From list.
Select VIS_PERC, CUBES, and LOZENGES in the To list.
In the Path Type group box, select the X-->Y option button.
In the Start value group box, select the Include check box and type in the value .6.
Now click the Add>> button.
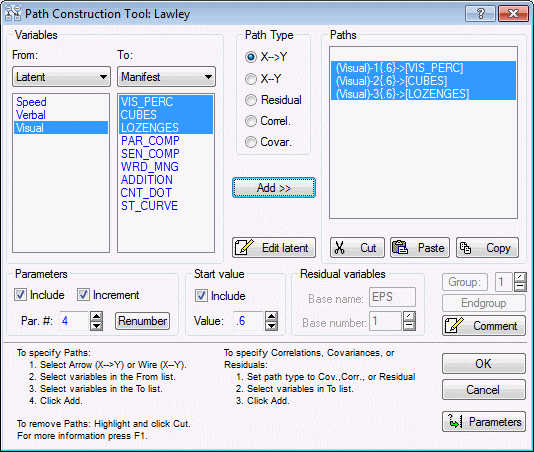
You should see the following three paths displayed in the Paths window.
(Visual)-1{.6}->[VIS_PERC]
(Visual)-2{.6}->[CUBES]
(Visual)-3{.6}->[LOZENGES]
Next, create the factor loadings for the Verbal factor. Select Verbal in the From list, and PAR_COMP, SEN_COMP, and WRD_MNG in the To list. Now click the Add>> button.
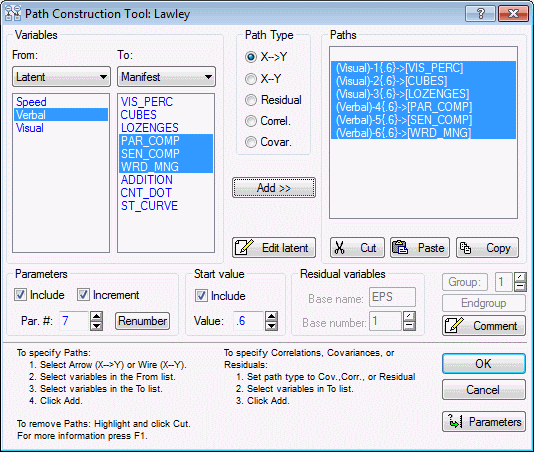
You should see the following three paths added to the previous paths in the Paths window.
(Verbal)-4{.6}->[PAR_COMP]
(Verbal)-5{.6}->[SEN_COMP]
(Verbal)-6{.6}->[WRD_MNG]
Next, in similar fashion, create loadings from the Speed factor to the variables ADDITION, CNT_DOT, and ST_CURVE. When you are finished, the dialog should look like this:
Now, create the residual variable paths.
In the Path Type group box, select the Residual option button.
In the Start value group box, type .64 in the Value box. Select all the manifest variables, and click the Add>> button.

Finally, add the paths for the factor intercorrelations:
In the To variables drop-down list, select Latent.
In the Path Type group box, select the Correl. option button.
In the To list, select the variables Speed, Verbal, and Visual.
In the Start value group box, in the Value box, type 0.0. Then, click Add>>.
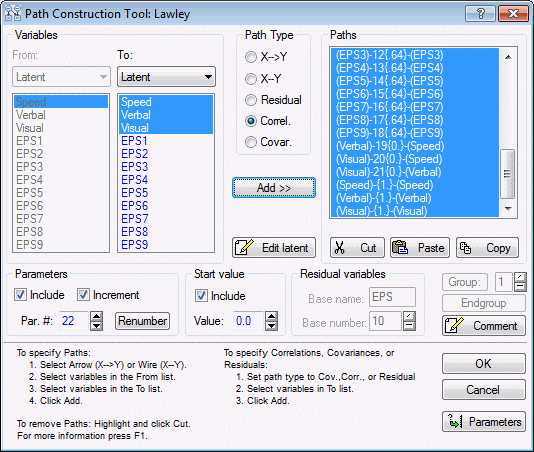
Your model is fully specified. Click the OK button, and the model will be displayed in the Analysis syntax window.
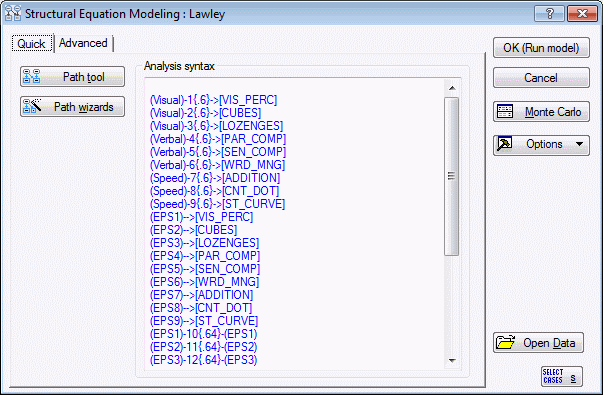
Before continuing, compare your file with the commands in Monte1.cmd to verify that they agree.
You are now ready to perform the Monte Carlo experiment. Before setting up and running the study, choose the appropriate parameters in the Analysis Parameters dialog box.
In the Structural Equation Modeling Startup Panel, select the Advanced tab, and click the Set parameters button to display the Analysis Parameters dialog box. In the Data to analyze group box, select the Correlations option button.
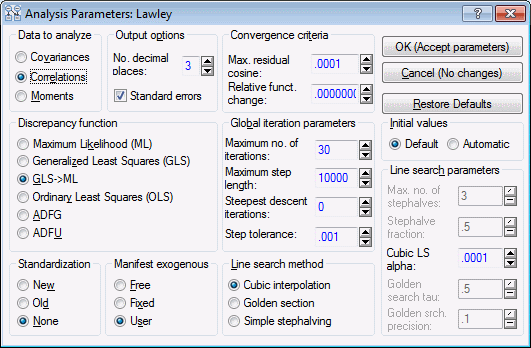
Since most factor analyses are performed on correlation matrices, this mode is preferred over analyzing covariances.
Note that, in the Global iteration parameters group box, the Maximum no. of iterations has a default value of 30. In most Monte Carlo studies, it is a good idea to increase the maximum number of iterations to avoid the somewhat ambiguous results that are generated when iteration is prematurely terminated because more than 30 iterations are required. Increase the maximum number of iterations to 150 by typing this value into the edit field or by using the microscrolls.

Now, click the OK (Accept parameters) button.
In the Startup Panel, click the Monte Carlo button to display the Monte Carlo Analysis dialog box. Select the Advanced tab.
In this case, we want to save extra information about Parameter Estimates, Standard Errors, and Fit Indices, so select these three check boxes in the Store extra information group box.
Because this is an illustrative example, we will run only 50 replications and use the default seed value of 1234567.

We want to examine the long-run behavior of the estimation procedure when the sample size is 75, i.e., roughly equivalent to that actually used in the study discussed by Lawley. To set the sample size for the Monte Carlo simulation, click the Sample Sizes button to display the Set Monte Carlo Sample Sizes dialog box.

Type 75 in the Group 1 edit field, and then click OK (Accept parameters) to return to the Monte Carlo Analysis dialog box.
You are now ready to begin the Monte Carlo study. Click the OK button and the study will proceed. SEPATH will automatically generate 50 simulated samples taken from a population corresponding to the model you created. Each simulated sample will be analyzed according to the parameters you selected.
Progress of your Monte Carlo study will be described in the status bar message area at the bottom of the Iteration Results window.

After a few Monte Carlo replications, you can gauge the approximate amount of time it will require to complete the Monte Carlo analysis. If you are running the analysis in multitasking mode, you will be able to run other applications while the Monte Carlo study is proceeding. Moreover, you can interrupt the analysis at any time with a Cancel command (press the ESC key on your keyboard or click the Cancel button on the Iteration window).
When the Monte Carlo results are complete, the Monte Carlo Results dialog box is displayed.
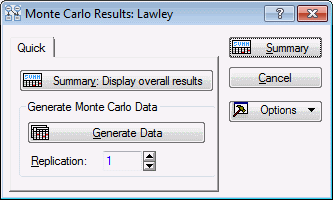
Click the Summary: Display overall results button to produce the results spreadsheet.

Your first step after completing a Monte Carlo experiment should be to save the overall results so they will not be lost if there is some problem that causes your computer to malfunction.
Ribbon bar. Select the File tab. Select Save As to display the Save As dialog box, and browse to the desired location to save the file with the name Monte1.sta.
Classic menus. On the File menu, select Save As to display the Save As dialog box, and browse to the desired location to save the file with the name Monte1.sta.
Now that you have saved your data, you can proceed to analyze the Monte Carlo results. Slide the scrollbar on the bottom of the spreadsheet until variable number 11 (BOUNDARY) is in view. This variable is the number of "boundary cases," or active inequality constraints at the conclusion of iteration, found on each replication. Click on the variable name BOUNDARY to highlight the entire column.

Then right-click on the highlighted column to display the shortcut menu. Select Graphs of Block Data - Histogram: Entire Columns.

The graph will be created, as illustrated below. You can customize the appearance of graphs in countless ways to suit your own preferences. For example, the fitted normal curve, which is displayed by default, is superfluous in this case, and can be eliminated.
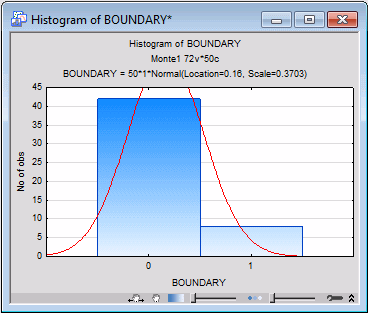
Double-click on the area outside the graph to display the Graph Options dialog box. Select the Plot: Fitting tab, ensure that the number 1 is selected in the Fit box, and click the Delete button to remove the normal curve. A message will be displayed to confirm that you want to delete the fit. Click Yes and then click OK in the Graph Options dialog box.
This histogram shows that 42 of the 50 replications resulted in no boundary cases, and 8 replications yielded one boundary case.
Overall, then, 16% (8 of 50) of the replications resulted in at least one boundary value. For example, the sixth Monte Carlo replication produced a boundary value. If you scroll across the parameter values in the data file, you will discover that the variable PAR_14, the unique variance for the manifest variable CUBES, had a value of 0.000 at convergence. Chances are, this value would have iterated to a negative value except that SEPATH constrains all variance estimates to be non-negative during iteration. This boundary case, known as a "Heywood case" to factor analysts, often will result in distorted values for some of the other parameters.
Clearly, it is an undesirable state of affairs to have a prior probability of approximately .30 of obtaining a Heywood case, when in fact none of the unique variances in the population is less than .64, and the factor model fits perfectly in the population.
The question is, would a larger sample size have avoided this problem? Why not find out? When time permits, feel free to experiment with the Monte Carlo analysis. Below is a scatterplot graph (with exponential fit) representing the results of a brief study. This study examined percentage of boundary cases at sample sizes of 75, 150, and 225.
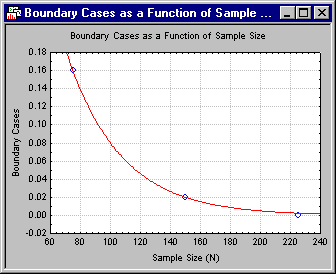
Information such as that obtained in the study just described could be extremely valuable to someone planning a confirmatory factor analytic study, because it allows you to examine, before gathering data, how the estimation procedure will behave "if everything goes according to plan." Needless to say, if the estimation procedure has problems under such ideal conditions, you need to try to eliminate the source of the problem.
The kind of "prior" Monte Carlo analysis we just conducted can furnish additional valuable information. One of the most useful areas of information is an estimate of precision of estimation you are likely to achieve with a given level of sample size.
Suppose, for example, you gather a sample of size 75. What kind of precision of estimation will you achieve in your confirmatory factor analysis if everything goes well?
The Monte Carlo study has given you a considerable amount of relevant information. Simply examine the parameter estimates generated for each parameter across the 50 replications.
For example, click on the variable heading PAR_1 to select that column. Then right-click in the highlighted column to display the shortcut menu. Select Graphs of Block Data - Histogram: Entire Columns.

This action will generate a histogram of the values generated for parameter number 1. This histogram furnishes you with a bootstrapped approximation to the sampling distribution of parameter number 1. The standard deviation of this bootstrapped distribution provides an estimate of the standard error of the parameter estimate.
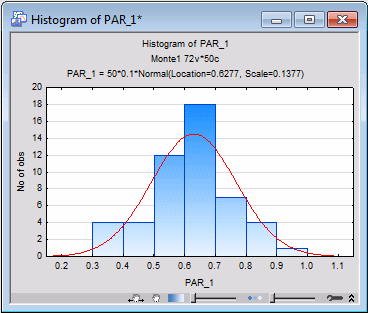
To obtain the standard deviation, right-click in the PAR_1 variable column again, and from the shortcut menu select Statistics of Block Data - Block Columns - All. This will generate basic statistics for the 50 Monte Carlo replications.

A new spreadsheet will be created with the results.

The standard deviation is .138. Since a 95% confidence interval is roughly plus or minus two standard errors, the estimated confidence intervals for each parameter are typically going to be the parameter estimate ±.37. Many experimenters might conclude that this sort of range falls somewhat short of the precision desirable in such an estimate.
In this case, our bootstrapped estimate of the standard error may be biased because we included, in our calculations, the trials on which Heywood cases occurred. By using the Graphs of Block Data facilities or Statistics of Block Data options, you can examine this notion yourself.
In a similar fashion, you could examine, a priori, the kind of precision you will obtain in confidence interval estimates of the non-centrality based fit indices.
In this example, we showed how you can execute a Monte Carlo study, save the results, and analyze them immediately without ever leaving the SEPATH module. You have many other analytic options, of course. You can open the Monte Carlo data file you have saved, and use Graphs of Block Data or Statistics of Block Data (both available from the shortcut menu) to explore the trends further. Alternatively, you can launch another STATISTICA module (such as Basic Statistics and Tables) and pursue the analysis even further. The point is, the Monte Carlo analysis facility is closely integrated with other analytic facilities and tools of the STATISTICA system. You can design, execute, analyze, and graph your Monte Carlo results, all without leaving the STATISTICA environment. This is in keeping with our philosophy that such analysis, performed prior to actual gathering of data, can be crucial to the proper design and execution of research involving structural models.